How To Set Up A Crypto Trading Bot
A crypto trading bot is automated software that connects to your exchange and places trades for you based on predefined rules, indicators, or signals, helping you execute your strategy around the clock.
This guide walks through the process of creating and launching a trading bot on AstraBit. You’ll learn how to connect your exchange, configure strategy settings, and activate automated trading.
For exchange-specific API connection instructions, visit the Help Center or reference the resources listed at the bottom of this page. This content is provided for informational purposes only.
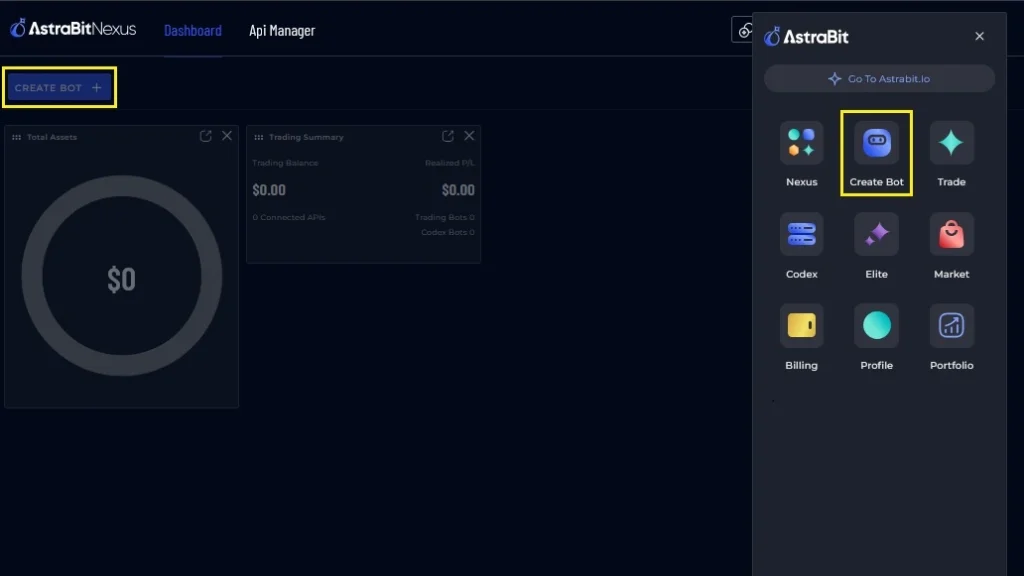
Step 1: Start Bot Creation Wizard
- Log in to your AstraBit account.
- Navigate to the Nexus dashboard.
- Open the Menu and select “Create Bot.”
- Or select “Create Bot” button on the left-hand side
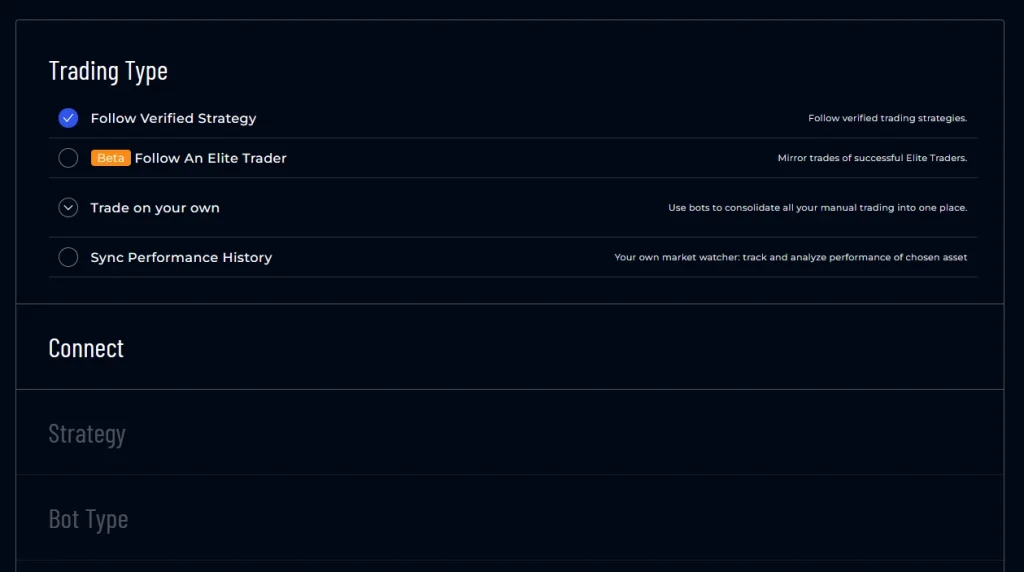
Step 2: Choose Your Trading Type
- Follow a Verified Strategy
- These strategies come from vetted 3rd-party strategists and are plug-and-play. Strategies range from DCA to Swing to Scalping. You’ll be able to review strategies in full in future steps.
- Follow an Elite Trader (BETA)
- AstraBit’s version of copy-trading. Applications are open for Elite Traders.
- Trade Your Own Strategy
- Bring your own strategy, coded in any language, web-hook from TradingView, or manually trade via AstraBit’s dashboard.
- Sync Performance History via our Codex Bot
- If you trade on exchanges and want to check our analytics, you can connect APIs to our Codex bots to sync history and use them in AstraBit Portfolio.
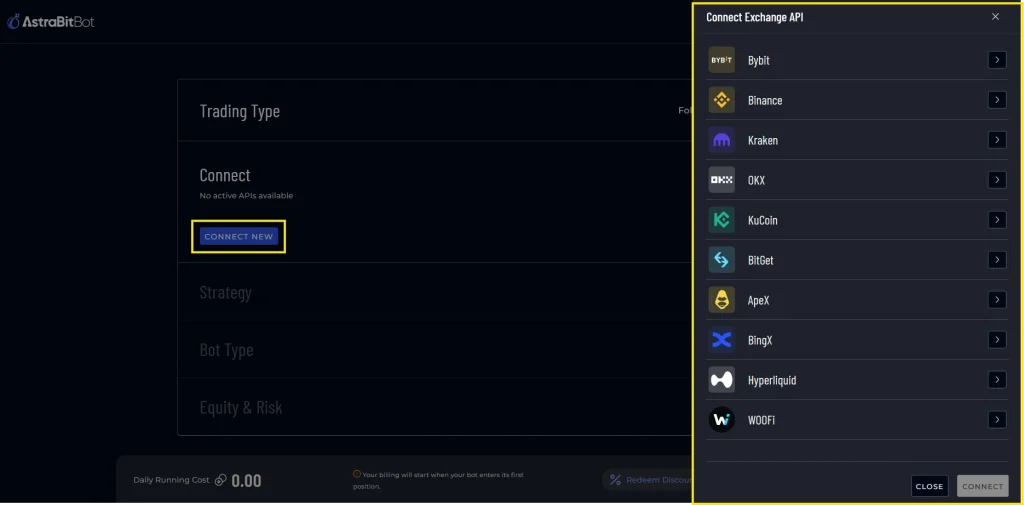
Step 3: Connect an Exchange
- Select “Connect New” exchange
- From the pop-up, select the exchange you want to connect
- Enter the exchange API information in the specific fields
- Select “Connect” once finished, you will see the new API added
- For exchange specific instructions, visit the Help Center.
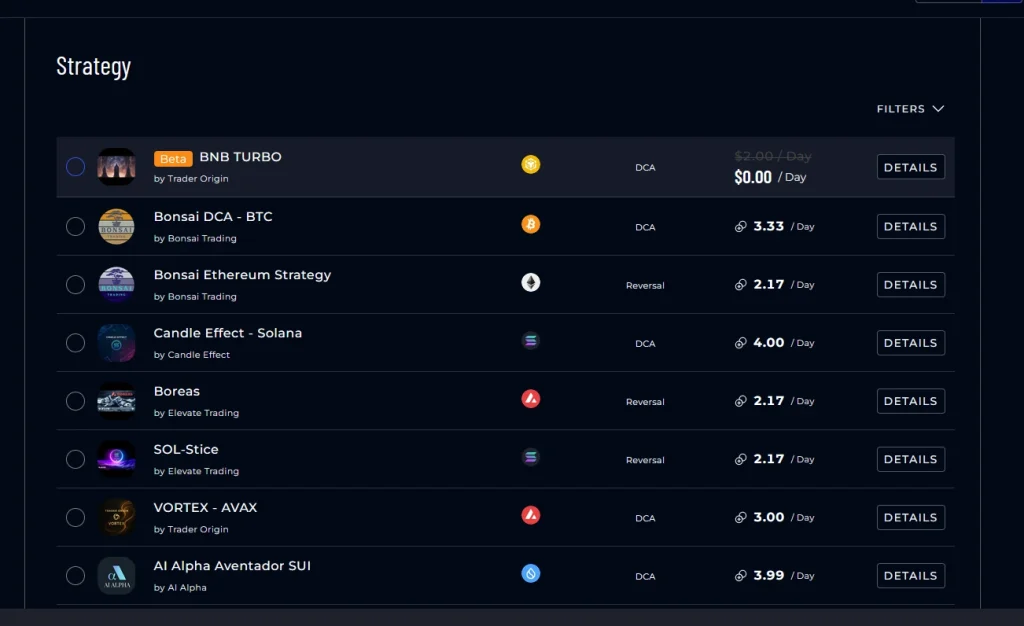
Step 4: Select Your Trading Strategy
- Select the strategy of your choice
- You can filter by Strategist, Asset, Type, and Cost
- Click on “Details” for additional information
- PnL Calculator for each strategy is also under “Details”
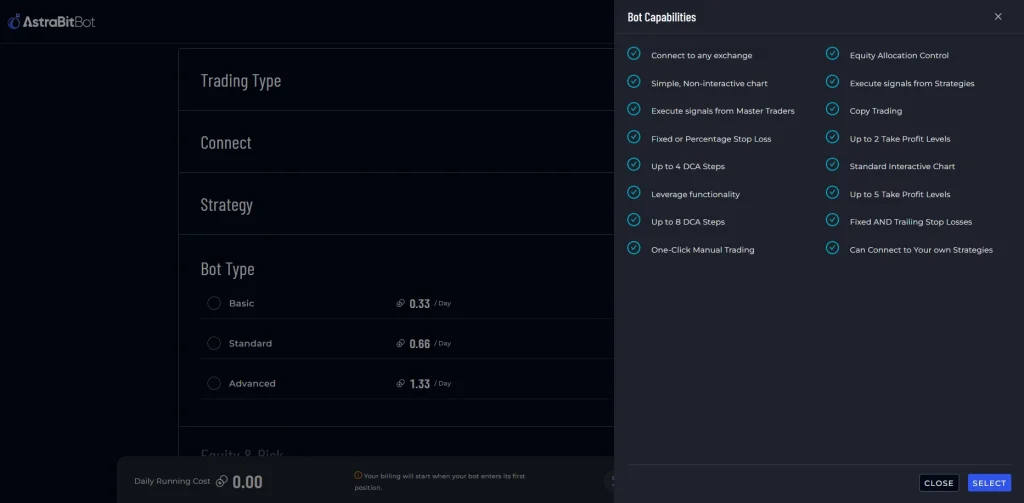
Step 5: Select Your Trading Bot Type
- Select your Trading Bot type
- Basic, Standard, or Advanced
- Click on “Details” for a list of capabilities for each trading bot
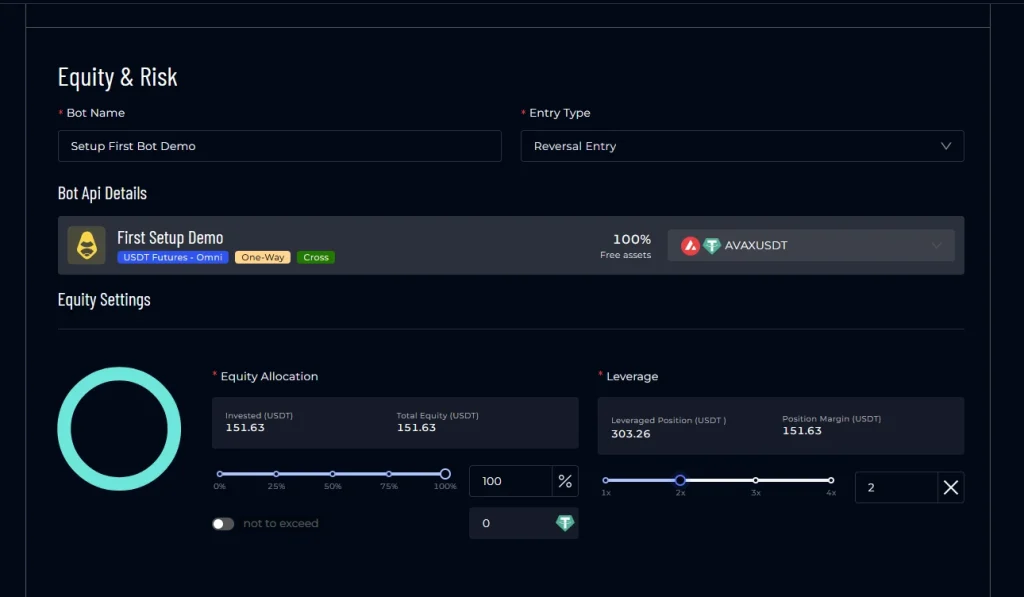
Step 6a: Set Up Bot Configurations
- Name your bot whatever you want
- Entry Type – based on strategy type
- Adjust Equity Allocation – % of funds in account to use for each entry
- Set Leverage amount – optional
Step 6b: Bot Configurations Cont.
- Add Risk Management if wanted
- Set a Stop Loss (optional)
- Add a Take Profit level (optional)
- The number of Take Profit levels you can set is based on trading bot tier
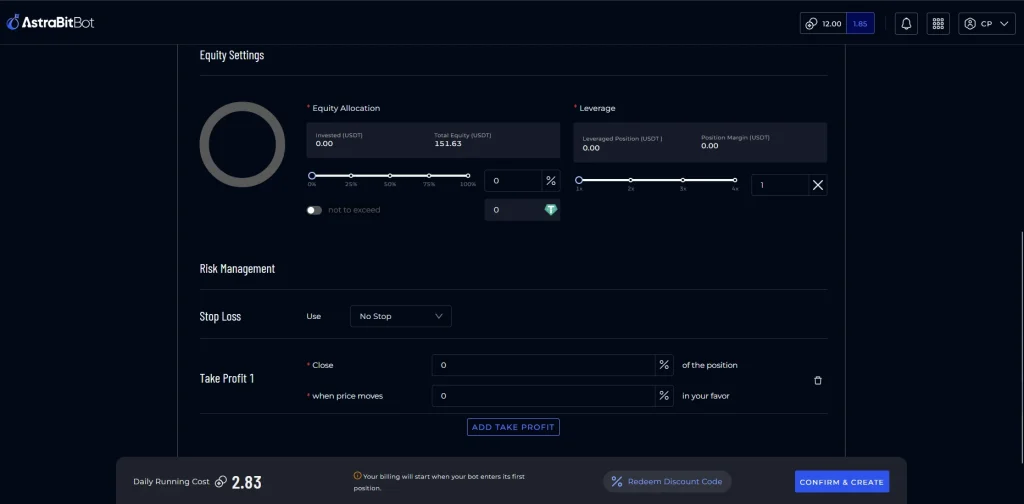
Step 7: Finalize & Launch
- Review your bot configuration settings
- Once ready to proceed, click on “Confirm & Create”
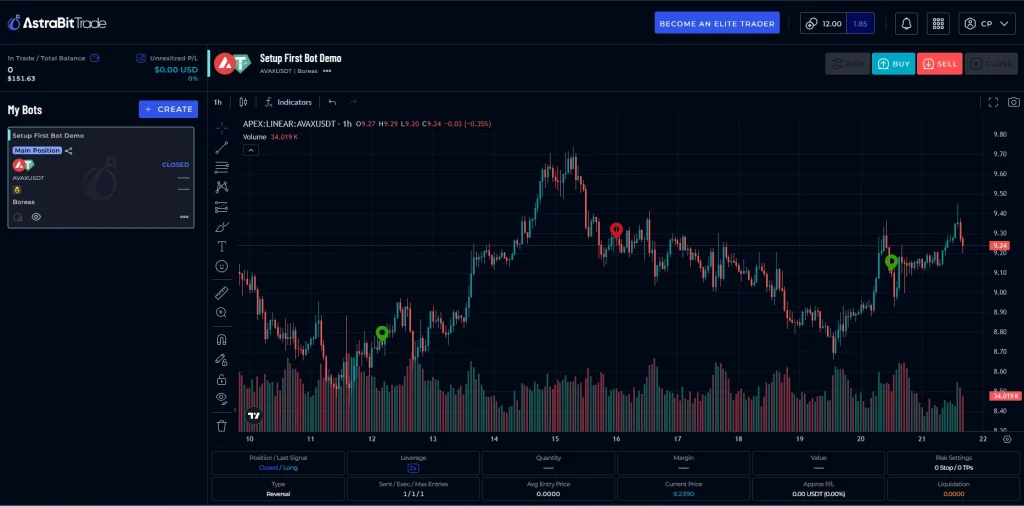
- Your bot will send a test transaction
- Once complete, you will be taken to the AstraBitTrade screen
- This is where you will view your trading bot activity
- Your bot is successfully created and no further action is required
AstraBit Tips
- Make sure you have enough AstraBit Credits in your account to launch your bot.
- A notification will appear if you do not.
- After your trading bot is created, multiple widgets will appear in the Nexus Dashboard.
- You can configure the Nexus Dashboard as you see fit.
- Monitor bot activity and performance in real-time under AstraBit Trade.
Exchange API Creation Guides
Frequently Asked Questions (FAQs)
What is a crypto trading bot on AstraBit? ▼
A crypto trading bot on AstraBit is automated software that connects to your exchange via API and executes trades based on a strategy and settings you define, reducing the need for manual trading.
What do I need before setting up a crypto trading bot with AstraBit? ▼
Before setting up a crypto trading bot with AstraBit, you need an AstraBit account, a supported exchange account, and API keys from that exchange with trading permissions enabled and withdrawals disabled for security.
How do I choose the right AstraBit trading bot type (Basic, Standard, or Advanced)? ▼
To choose the right AstraBit trading bot type, start the bot creation wizard and review the details for Basic, Standard, and Advanced bots. Then select the option that best matches your experience level, risk tolerance, and desired features such as leverage or multiple take-profit levels.
How can I safely test my AstraBit crypto trading bot before committing more capital? ▼
To test your AstraBit crypto trading bot, begin with a small equity allocation, confirm the test transaction during setup, and monitor performance in the AstraBit Trade screen and Nexus dashboard before increasing allocation.
How do I know my AstraBit trading bot is running correctly after launch? ▼
After launch, your AstraBit trading bot will appear in the AstraBit Trade screen with live activity and performance metrics. Related widgets in the Nexus dashboard will also populate, indicating the bot is active unless you pause, stop, or modify its settings.
When will I start being charged for my trading bot? ▼
Charges begin only after the bot executes its first trade. You can configure your bot and view estimated daily costs in advance, but billing does not start until trading activity begins. After the first trade, charges are applied on a daily basis until the bot is stopped or deleted.
Does AstraBit have custody of my funds? ▼
No. AstraBit does not take custody of your funds. Your assets remain on your connected exchange, and bots operate through API access with permissions you control.
Can AstraBit trading bots be used on both centralized and decentralized exchanges? ▼
Yes. AstraBit supports automated trading across both centralized exchanges (CEX) and select decentralized exchanges (DEX), allowing users to manage strategies across different environments from one platform.