
Exchange Connections · Help Center
Connect Binance to AstraBit
Link your Binance account to AstraBit with API keys so the two platforms can communicate securely — funding your futures wallet, creating and configuring keys, and where to enter that information in AstraBit. Three parts, nine steps.
New to Binance? Register through this link to become Freemium-eligible — earn credits from trading volume that reduce or cover AstraBit costs. Technical setup guide only; not trading advice.
Before You Begin
What to Check First
A little prep on the Binance side makes the connection smooth.
Futures, Most Commonly USDT-M
You’ll be trading USDT Perpetuals from a Binance Futures/Derivatives account. Decide what you’re connecting: Spot, USDT-M Futures (most common), or COIN-M Futures (less common).
Fund Before You Connect
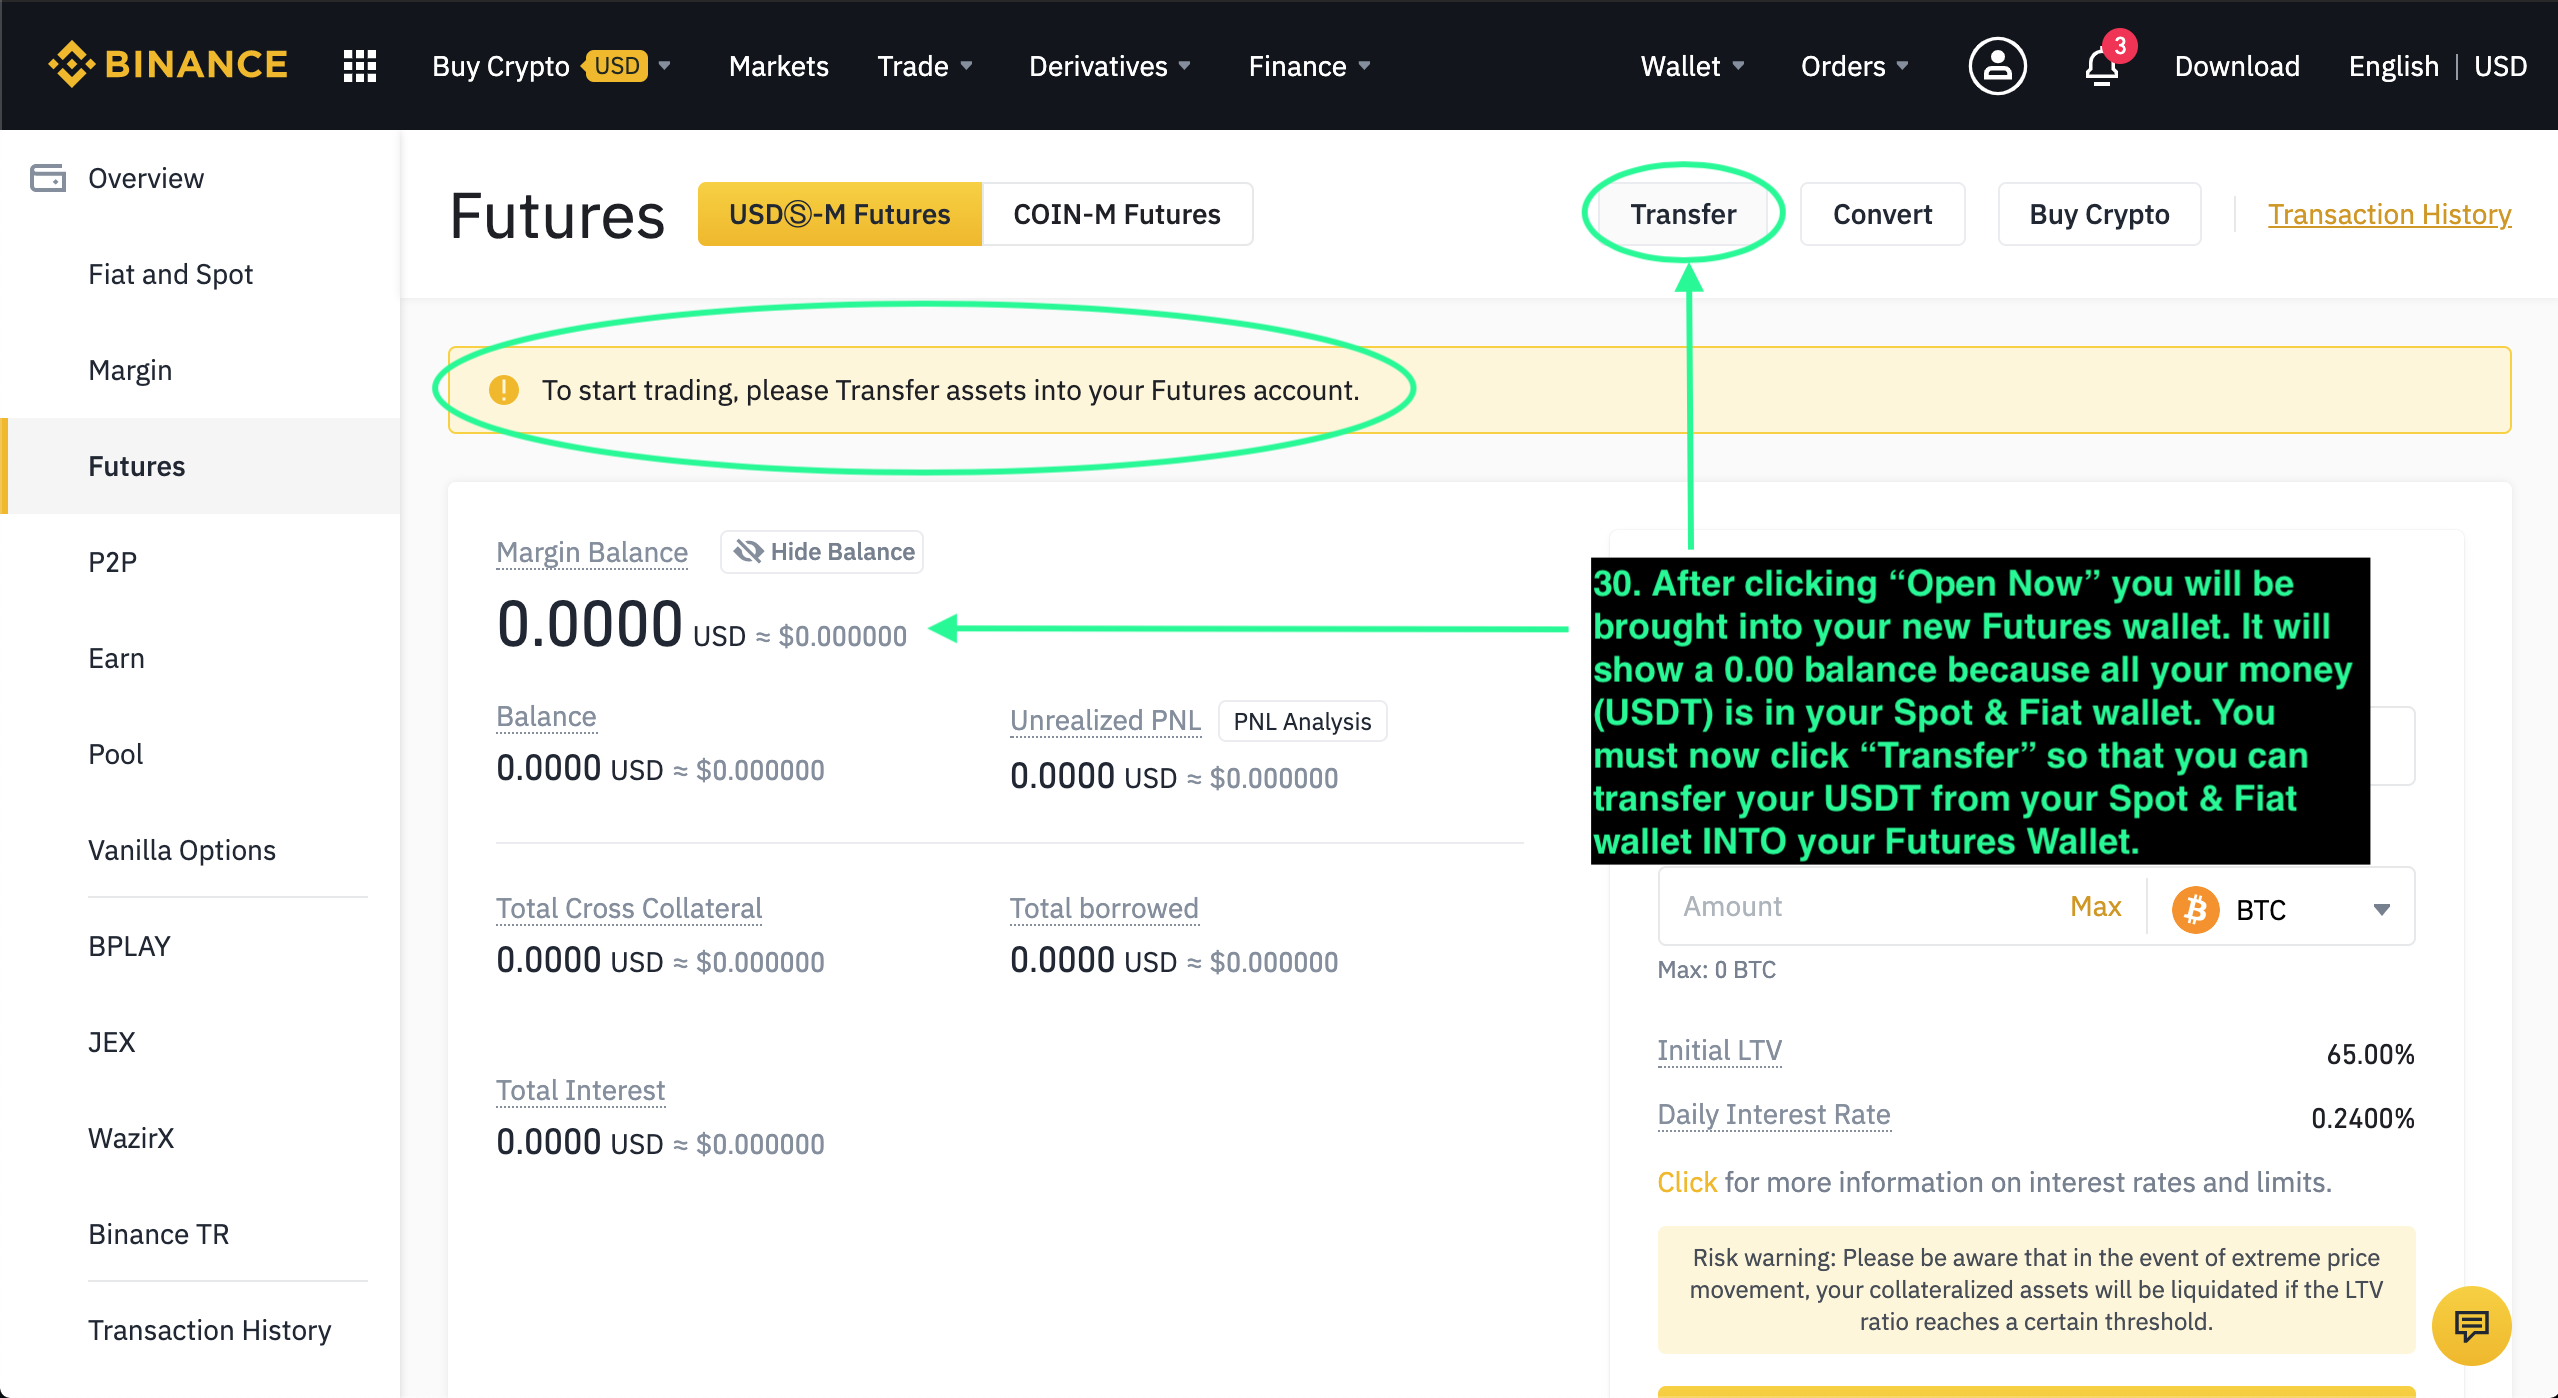
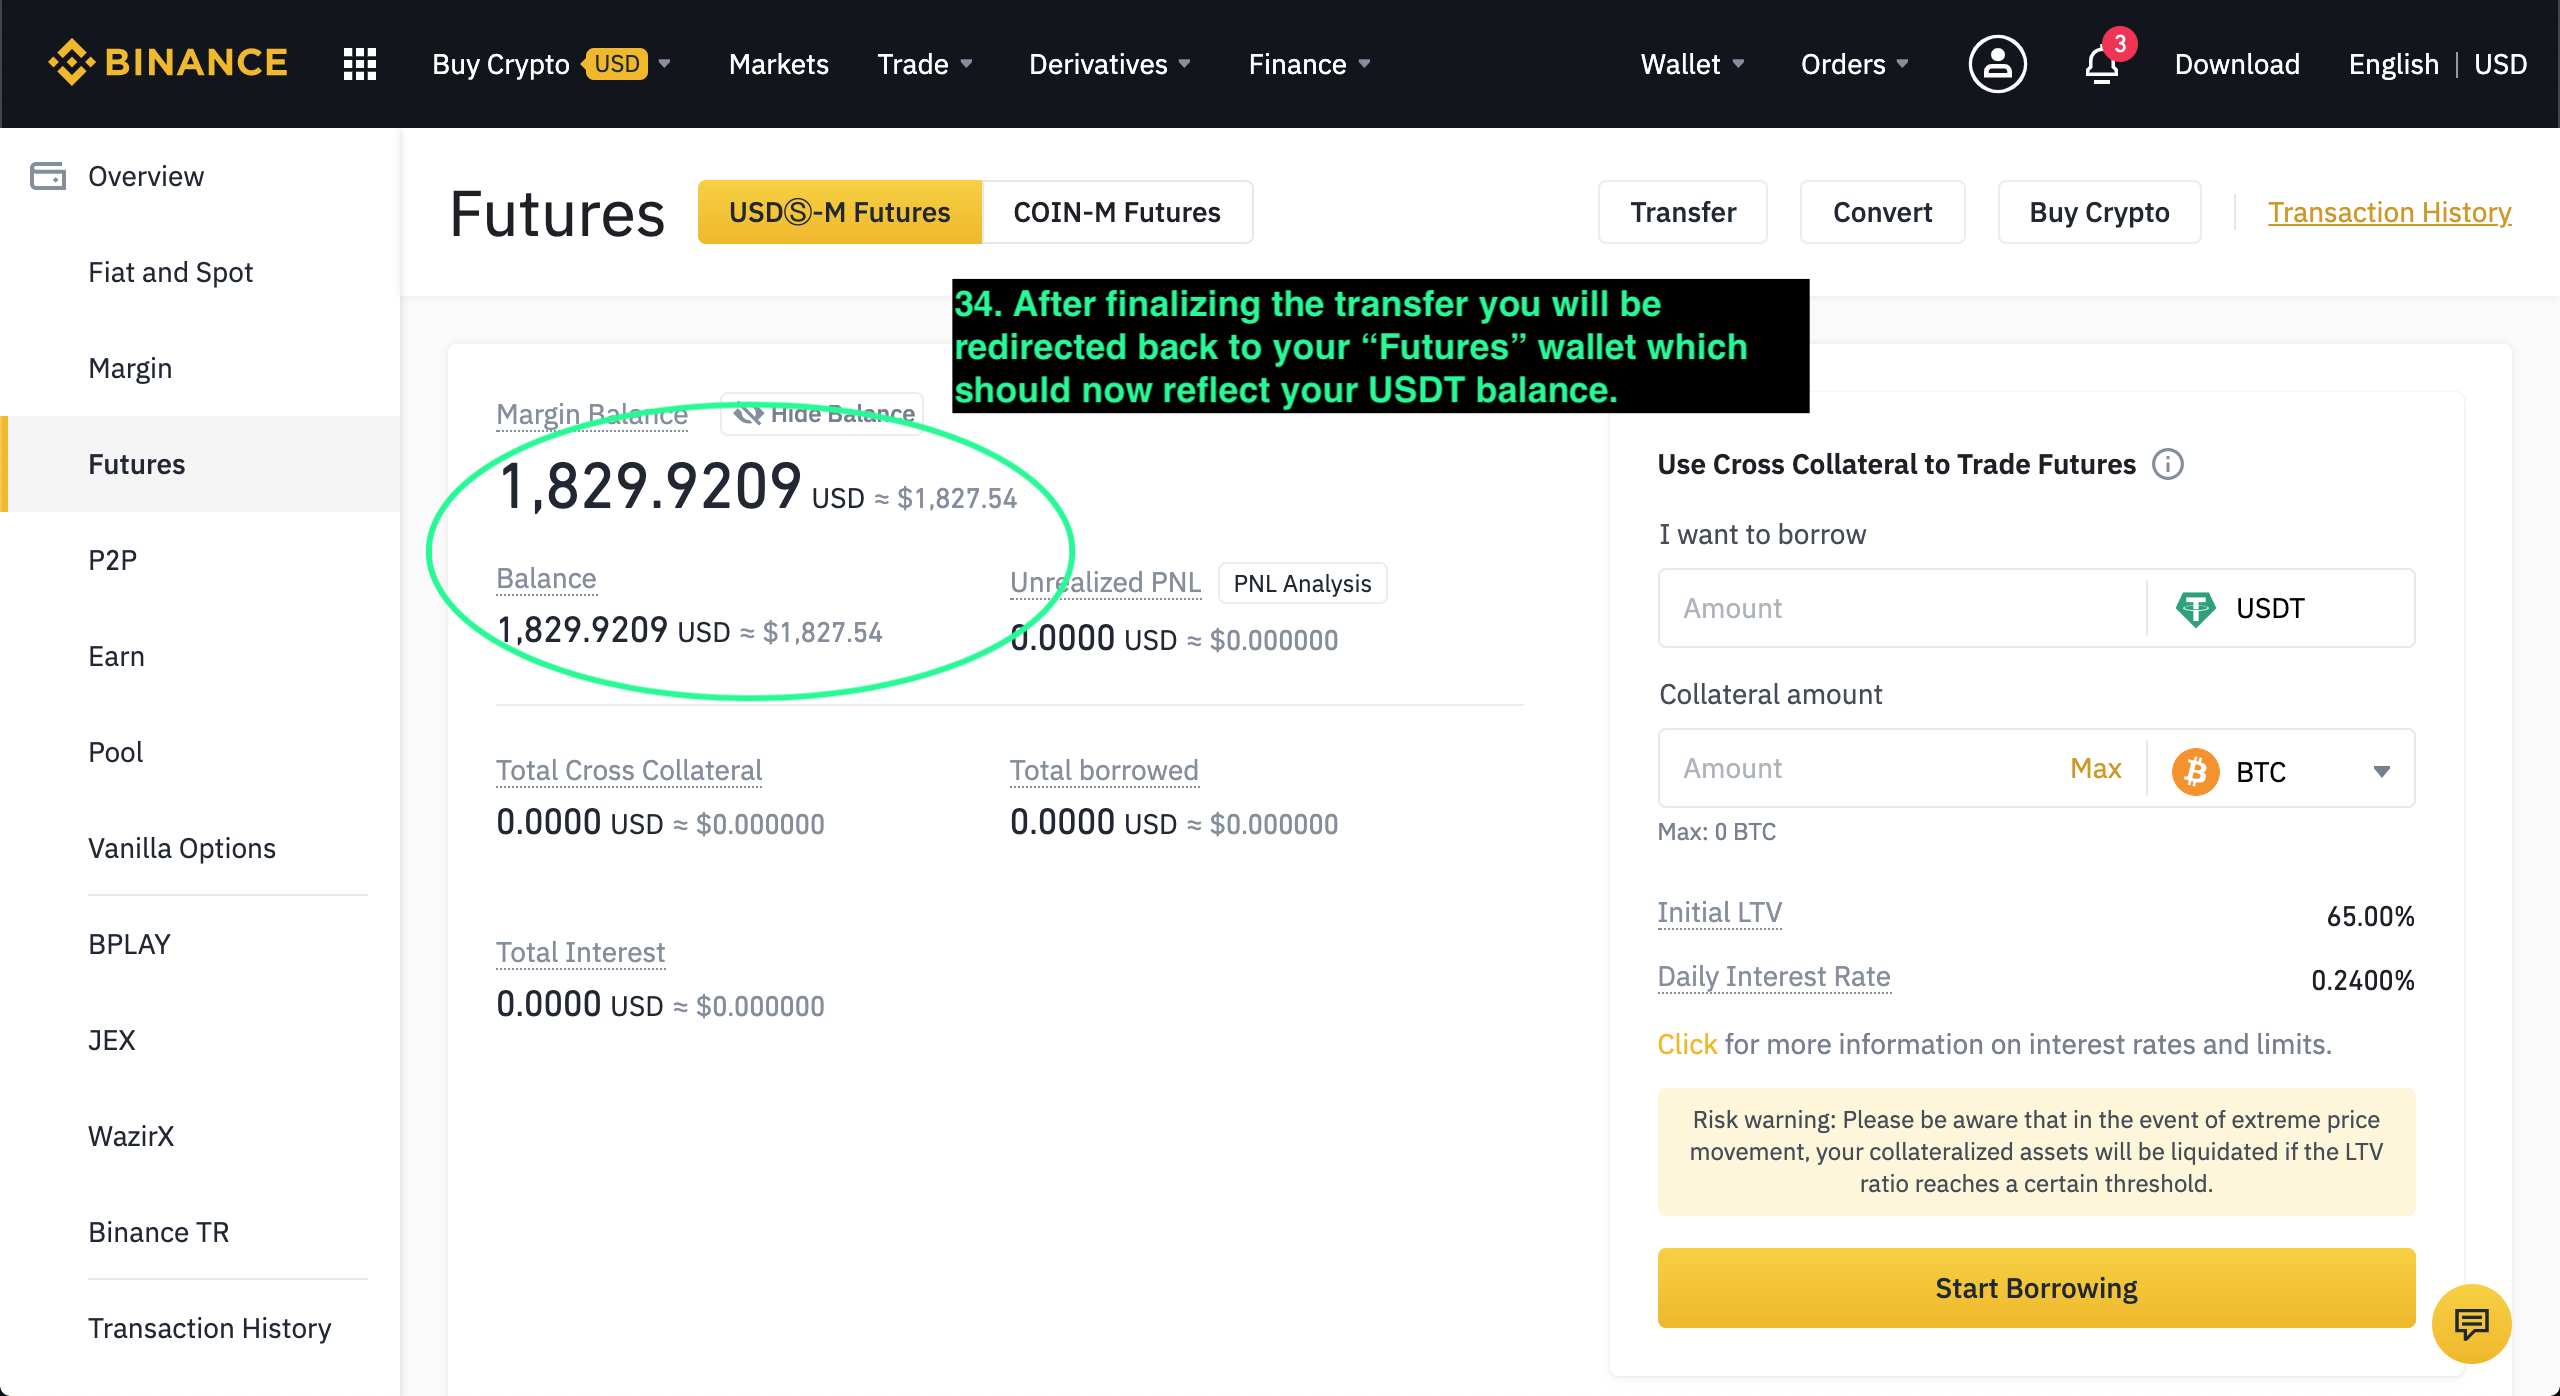
Keep a minimum balance of $50–$150 in your Binance USDT perpetuals futures wallet. The wallet shows 0.00 until you transfer funds from Spot.
Website + 2FA
Log in to Binance on the website if possible — the API menus are easier than the mobile app. Turn on 2FA; Binance often requires it to create or edit API keys.
Least-Privilege API
Your API key needs Reading, Futures, and Spot & Margin Trading. Withdrawals stay disabled — never enable withdrawal permissions for AstraBit connections.
Step-by-Step Setup
Three Parts,
Nine Steps
Fund your Binance futures wallet, create your API key, and connect it in AstraBit.
Required Binance Configuration
- Account: Futures/Derivatives with USDT perpetuals
- Minimum balance: $50–$150 in USDT futures wallet
- API permissions: Reading + Futures + Spot & Margin Trading
- Withdrawals disabled
Already funded? Skip ahead to Part 2 and create your API key.
Part 1 · Fund Your Binance Futures Wallet
Fund Your Binance Fiat and Spot Wallet
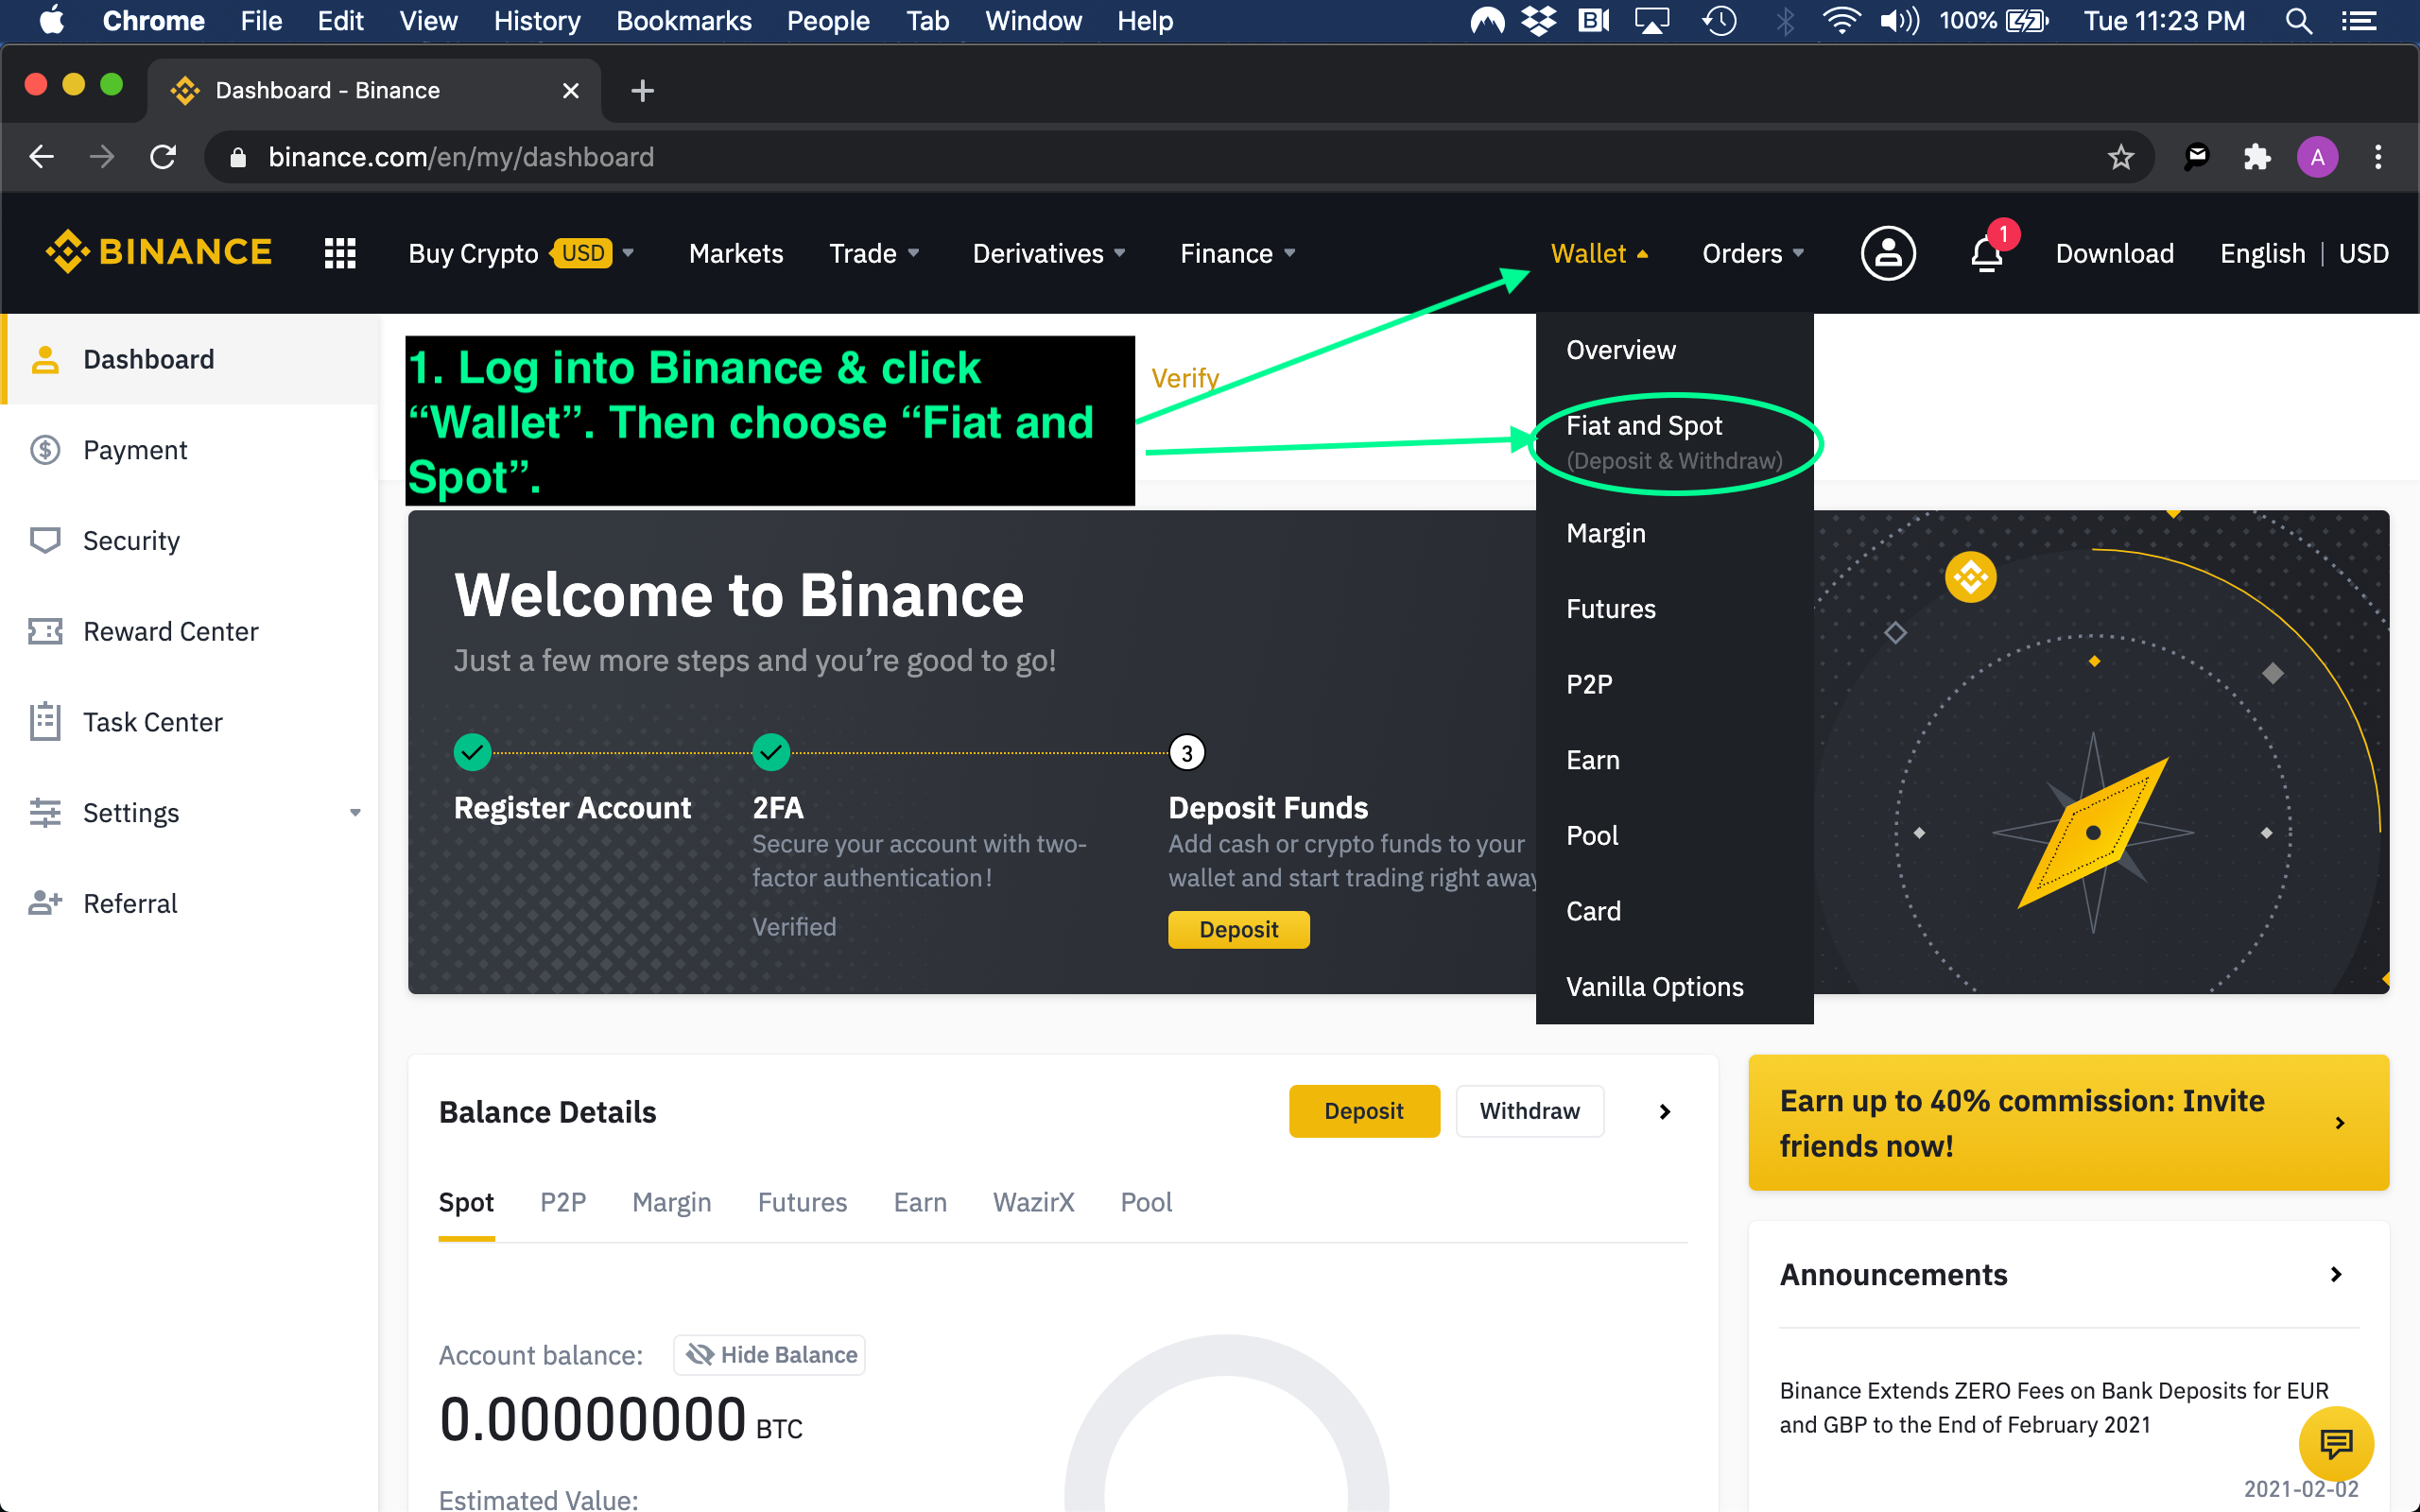
- Log in to your Binance account.
- Click Wallet and choose Fiat and Spot.
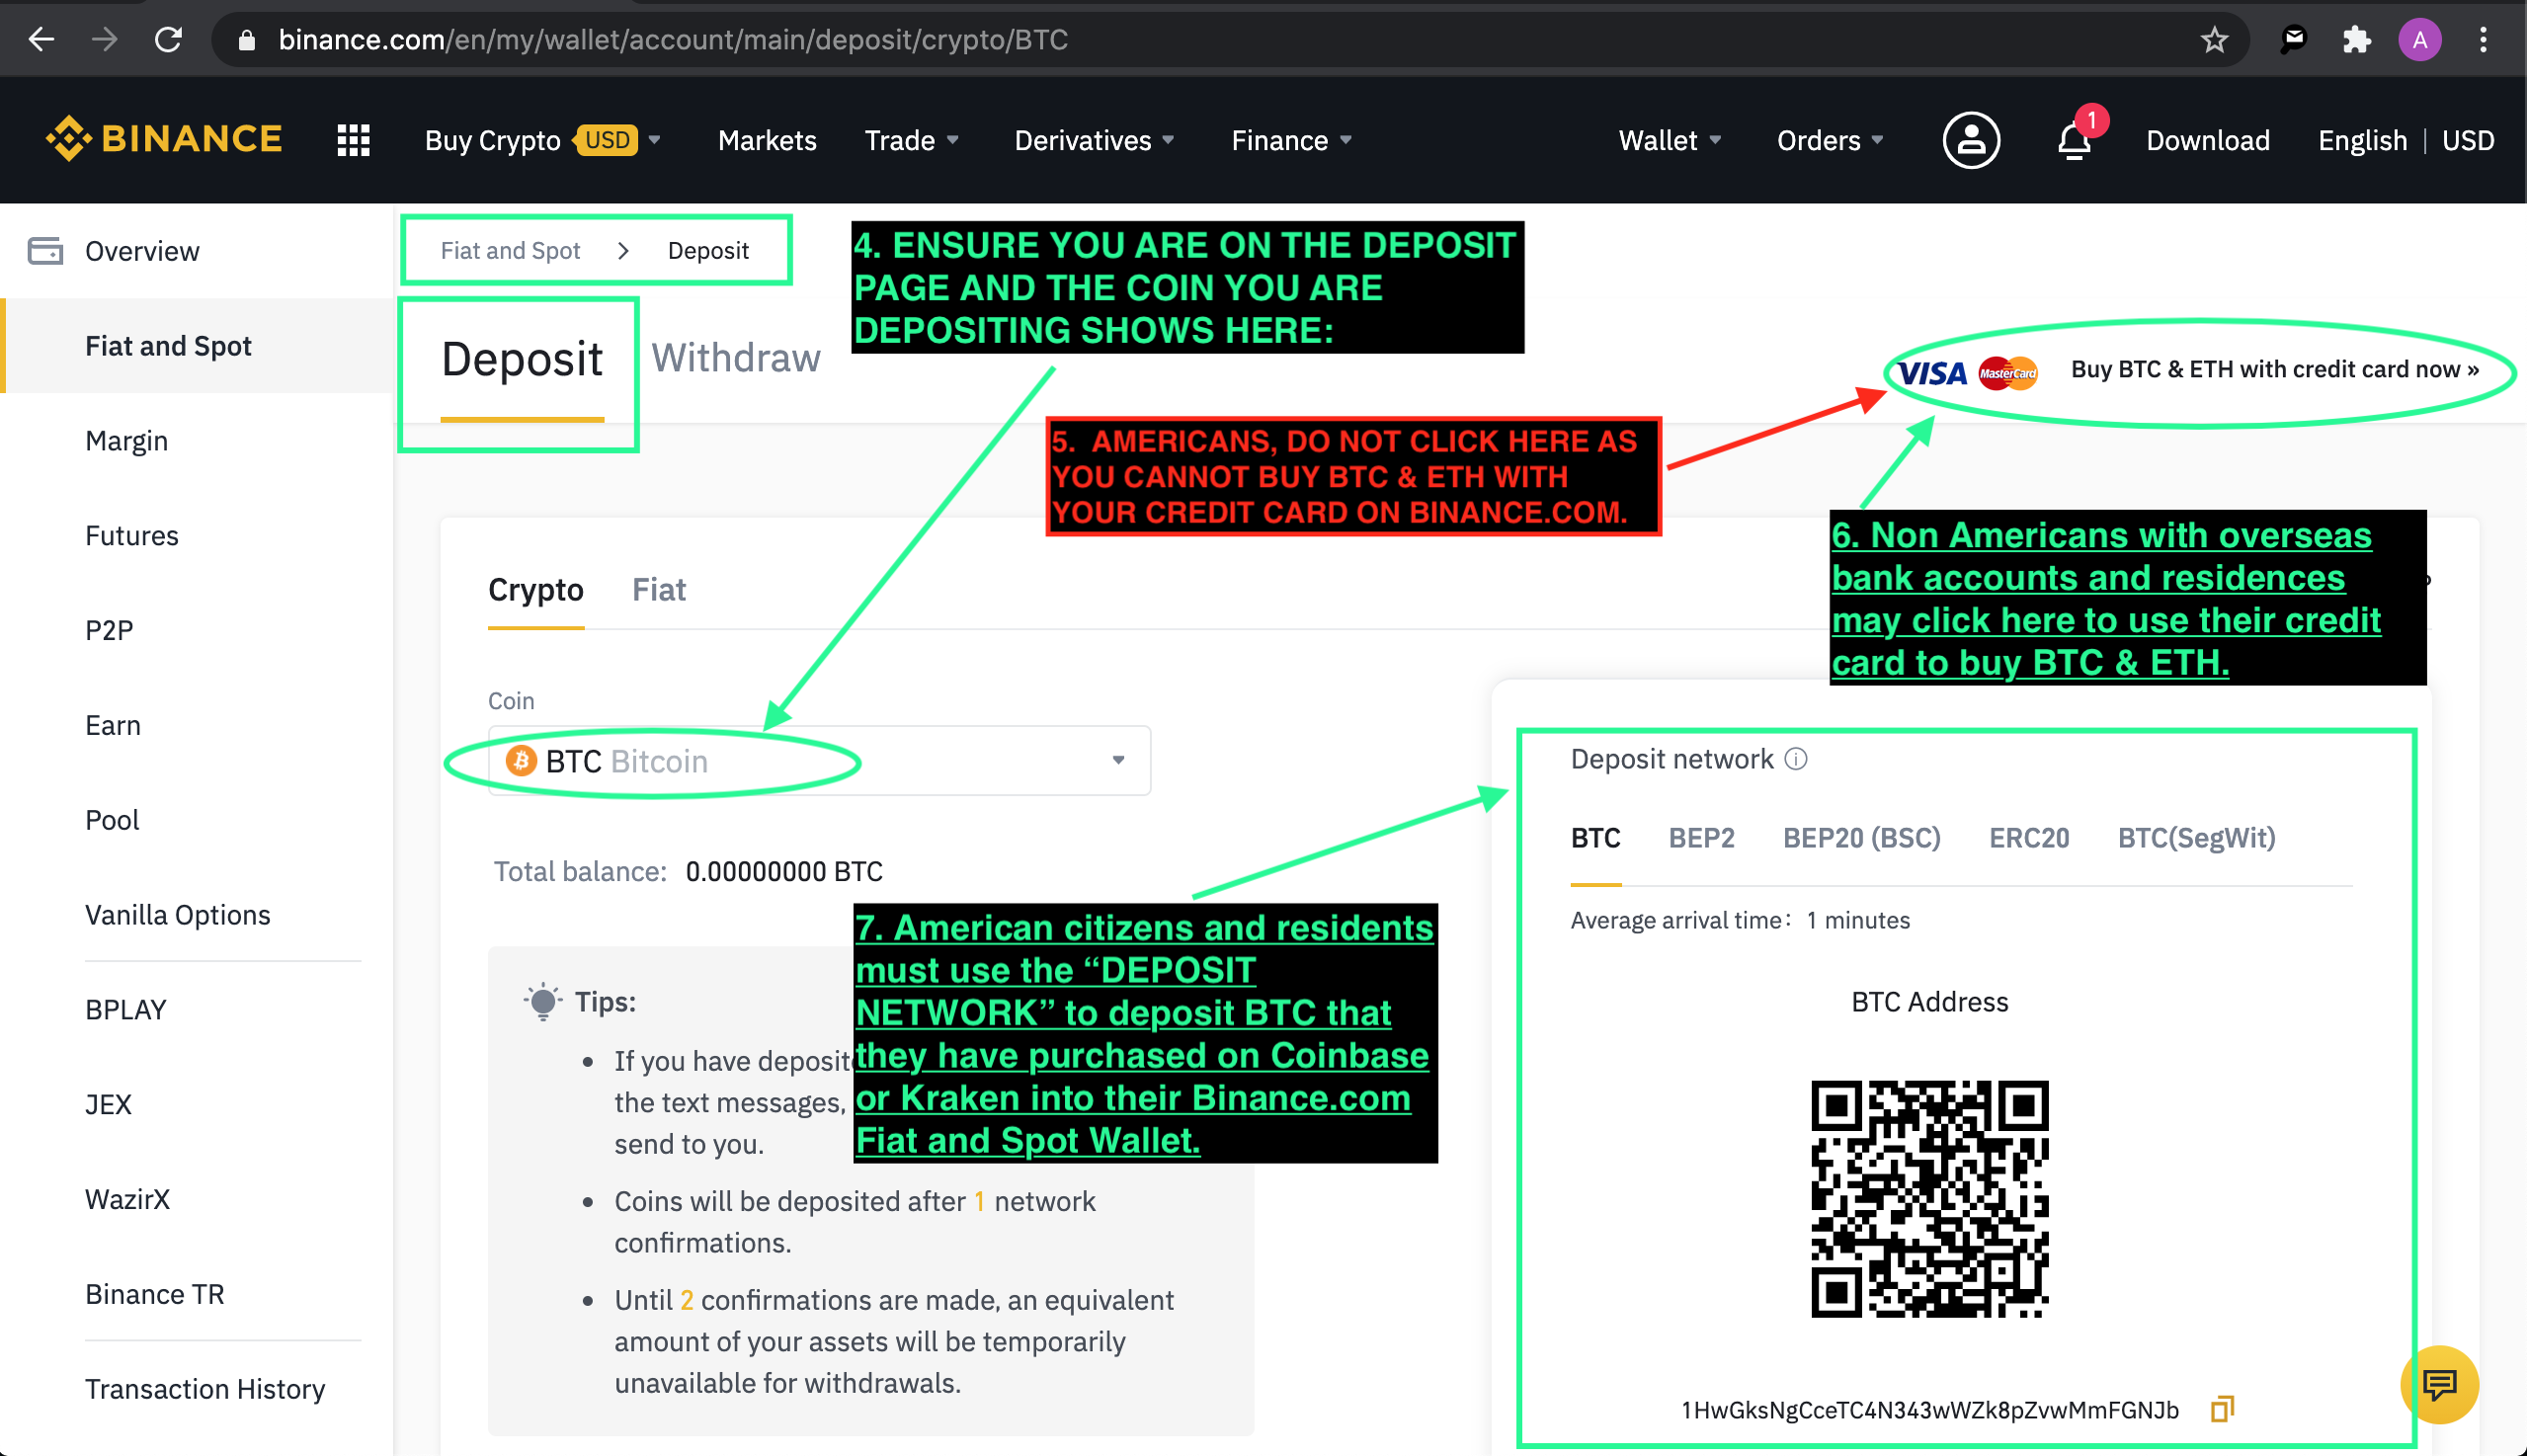
- Click Deposit.
- Make sure the correct coin is selected before continuing.
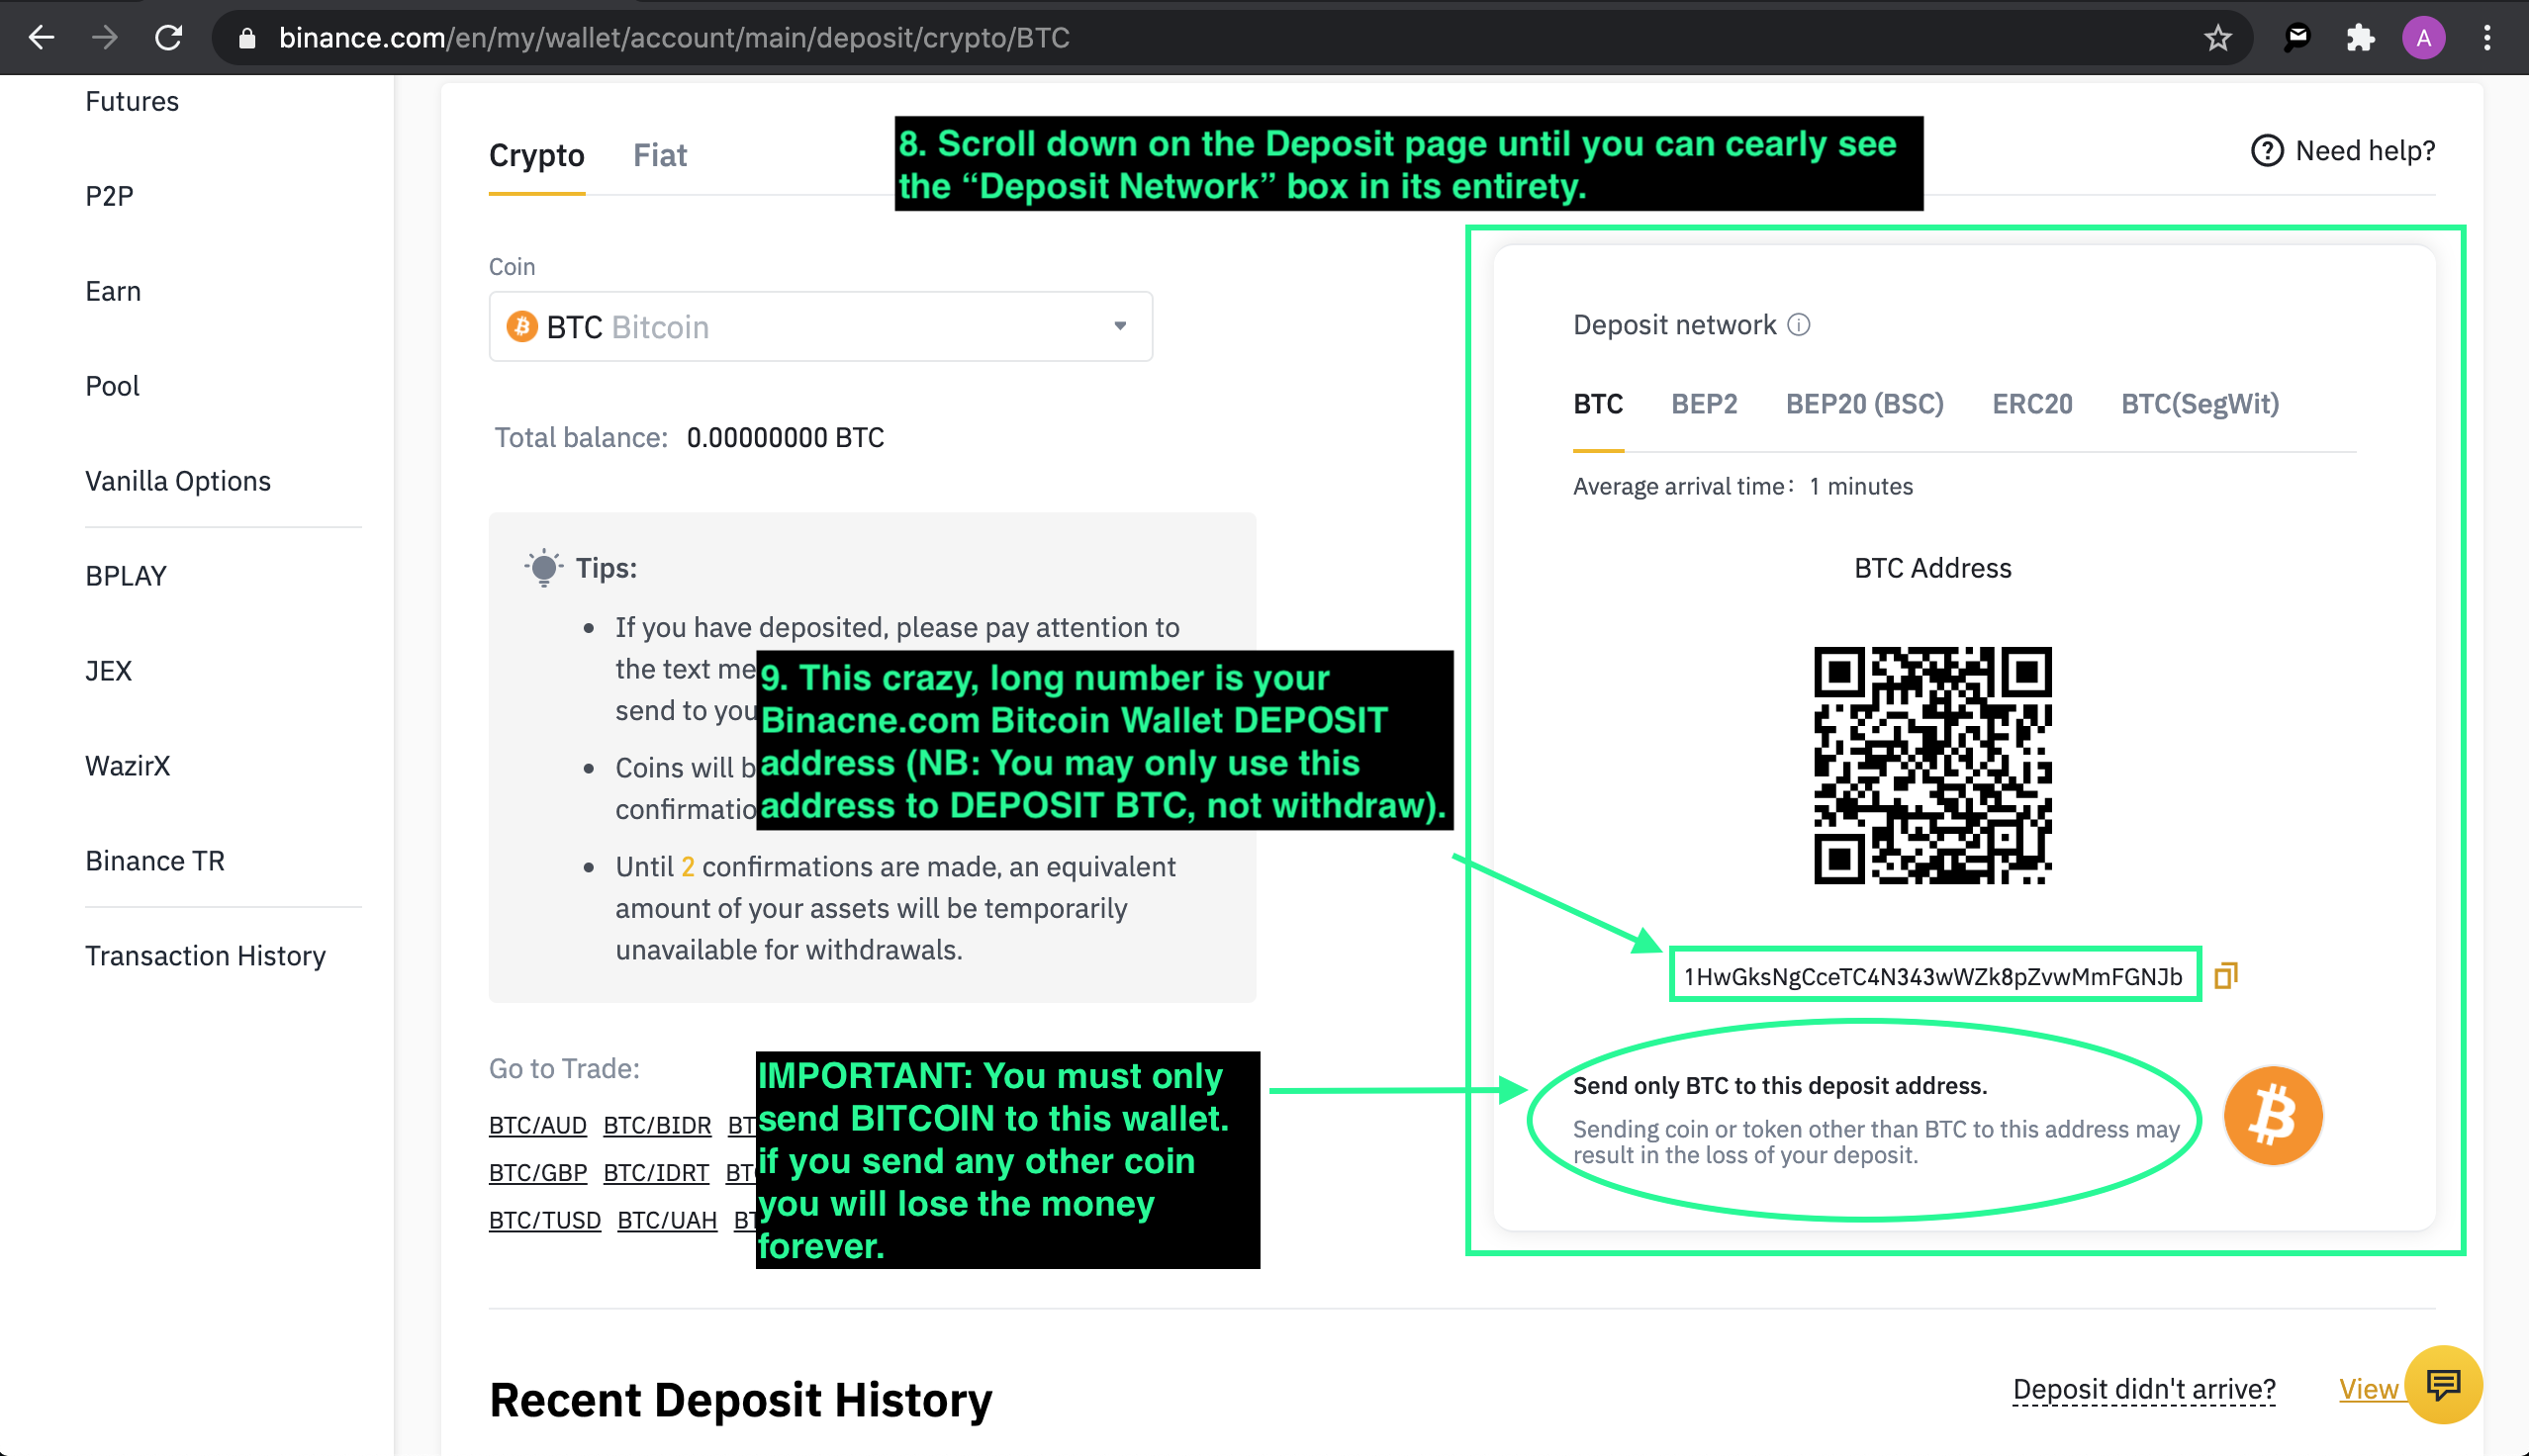
Important: always confirm the asset and network before continuing. Cryptocurrency transactions are irreversible.
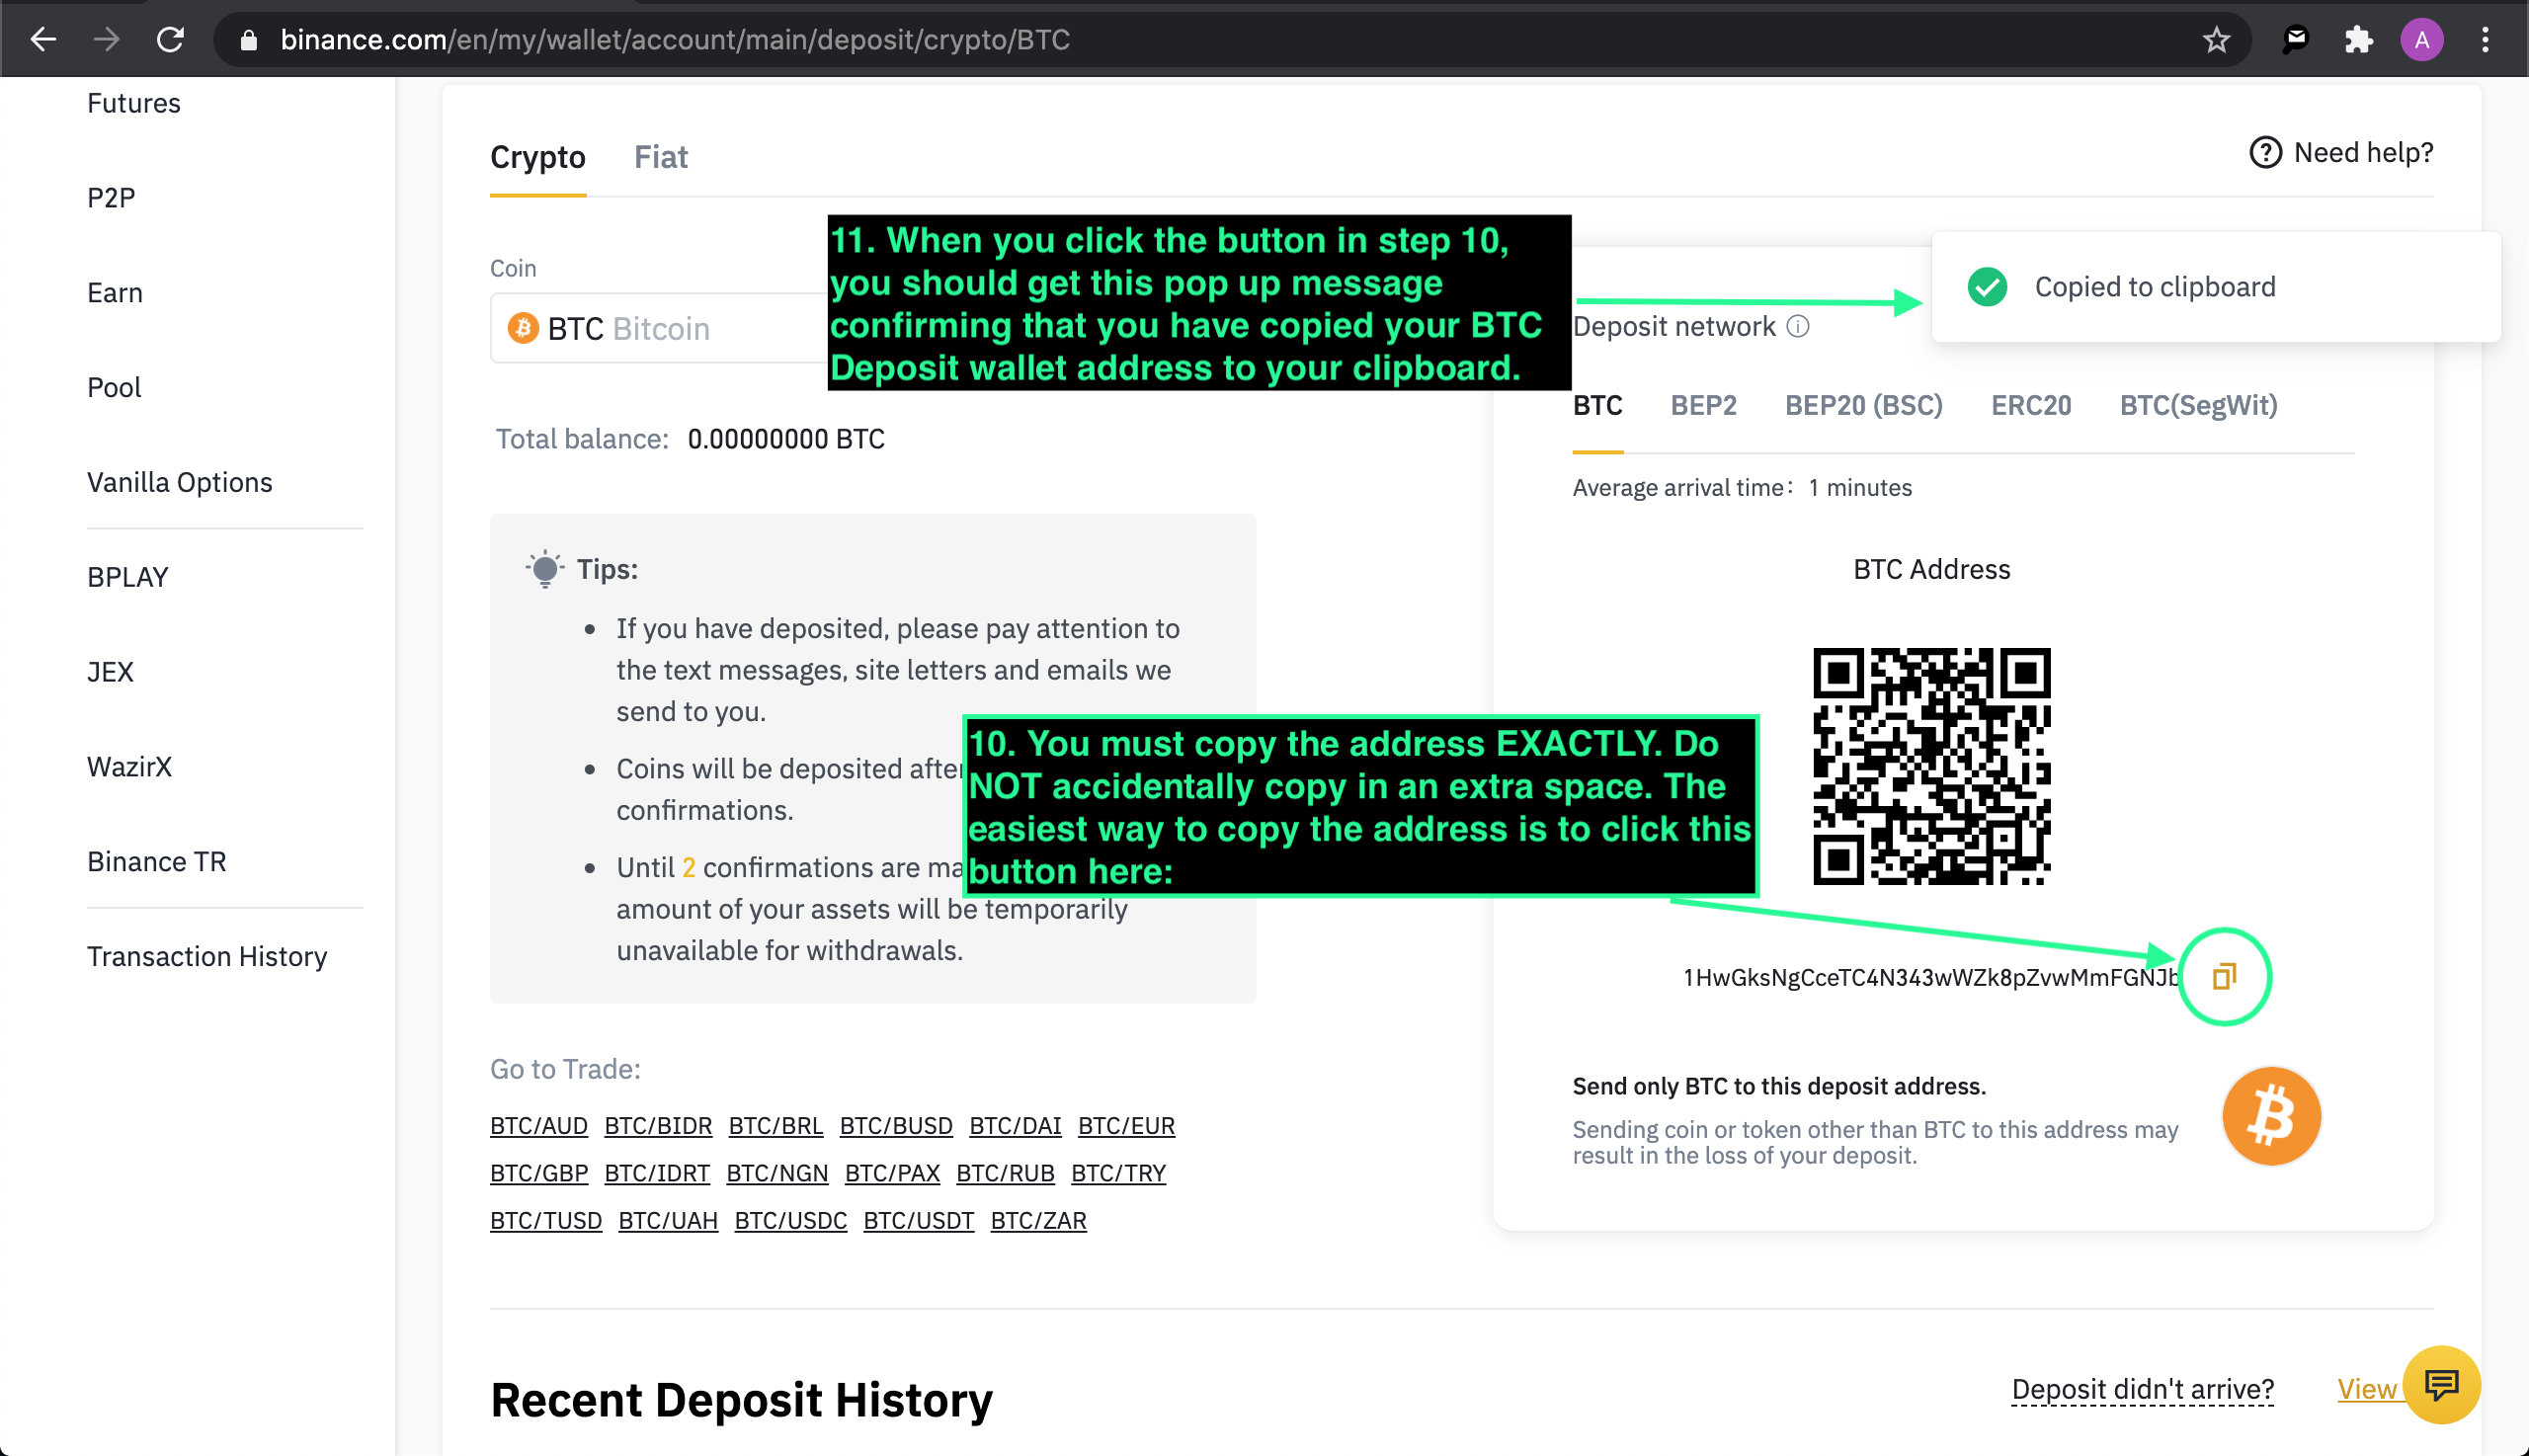
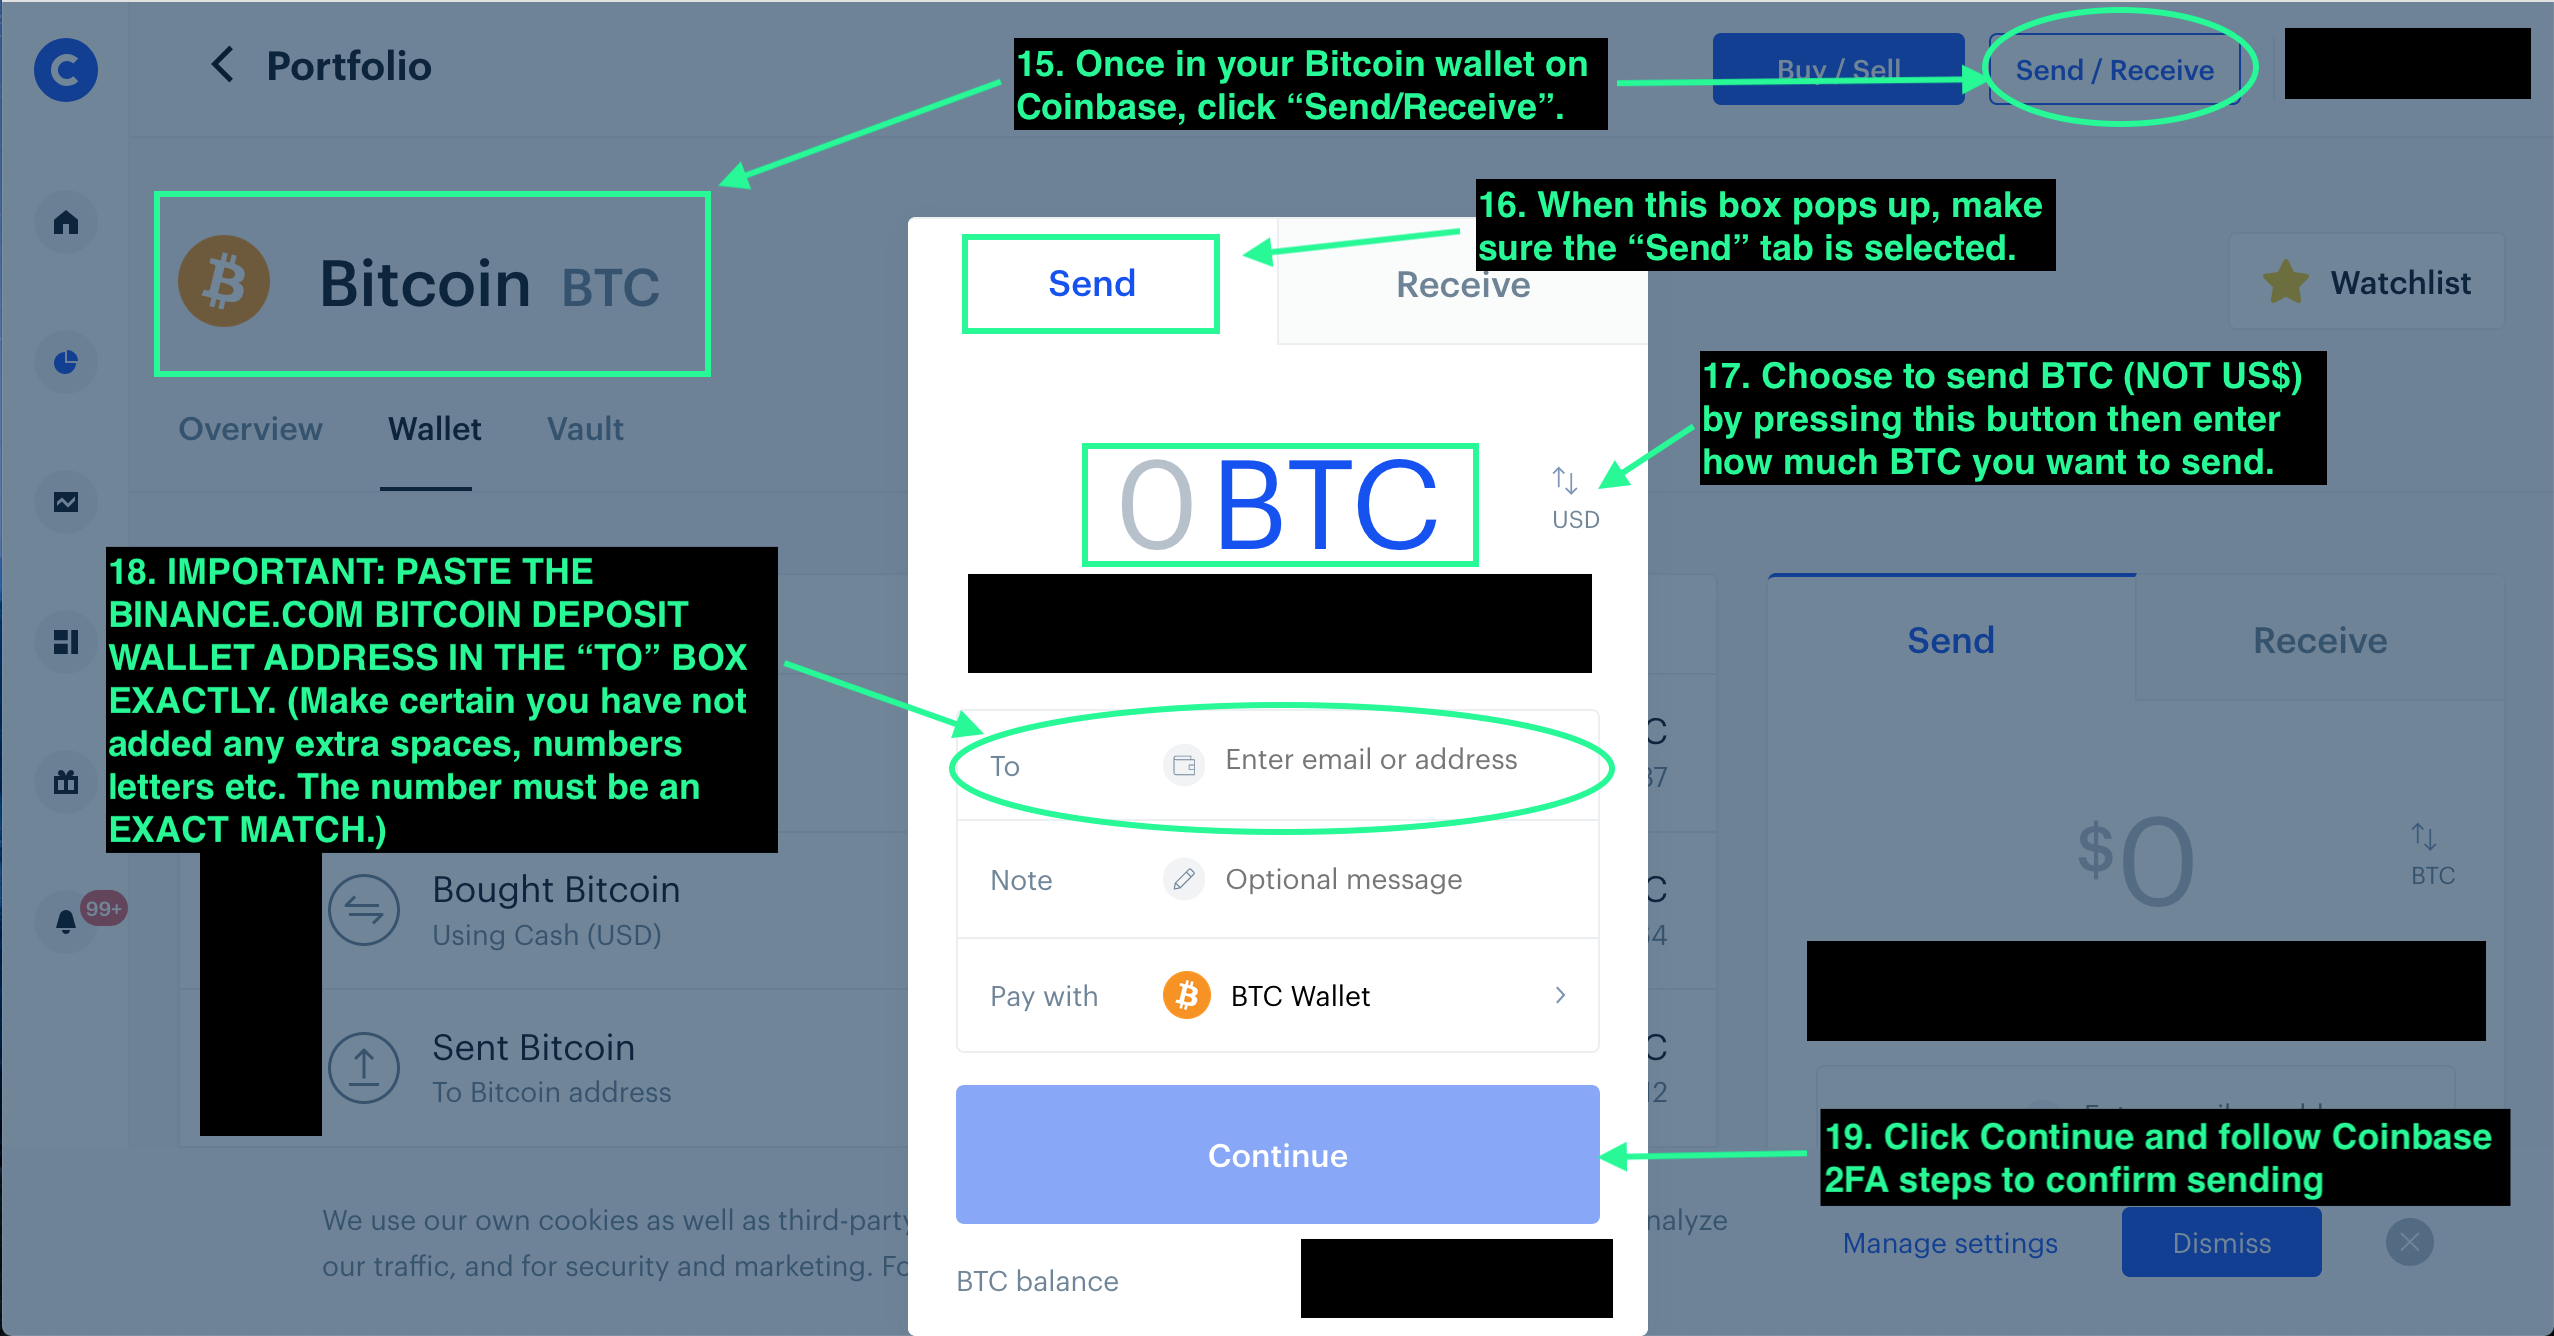
Send BTC to Your Binance Wallet
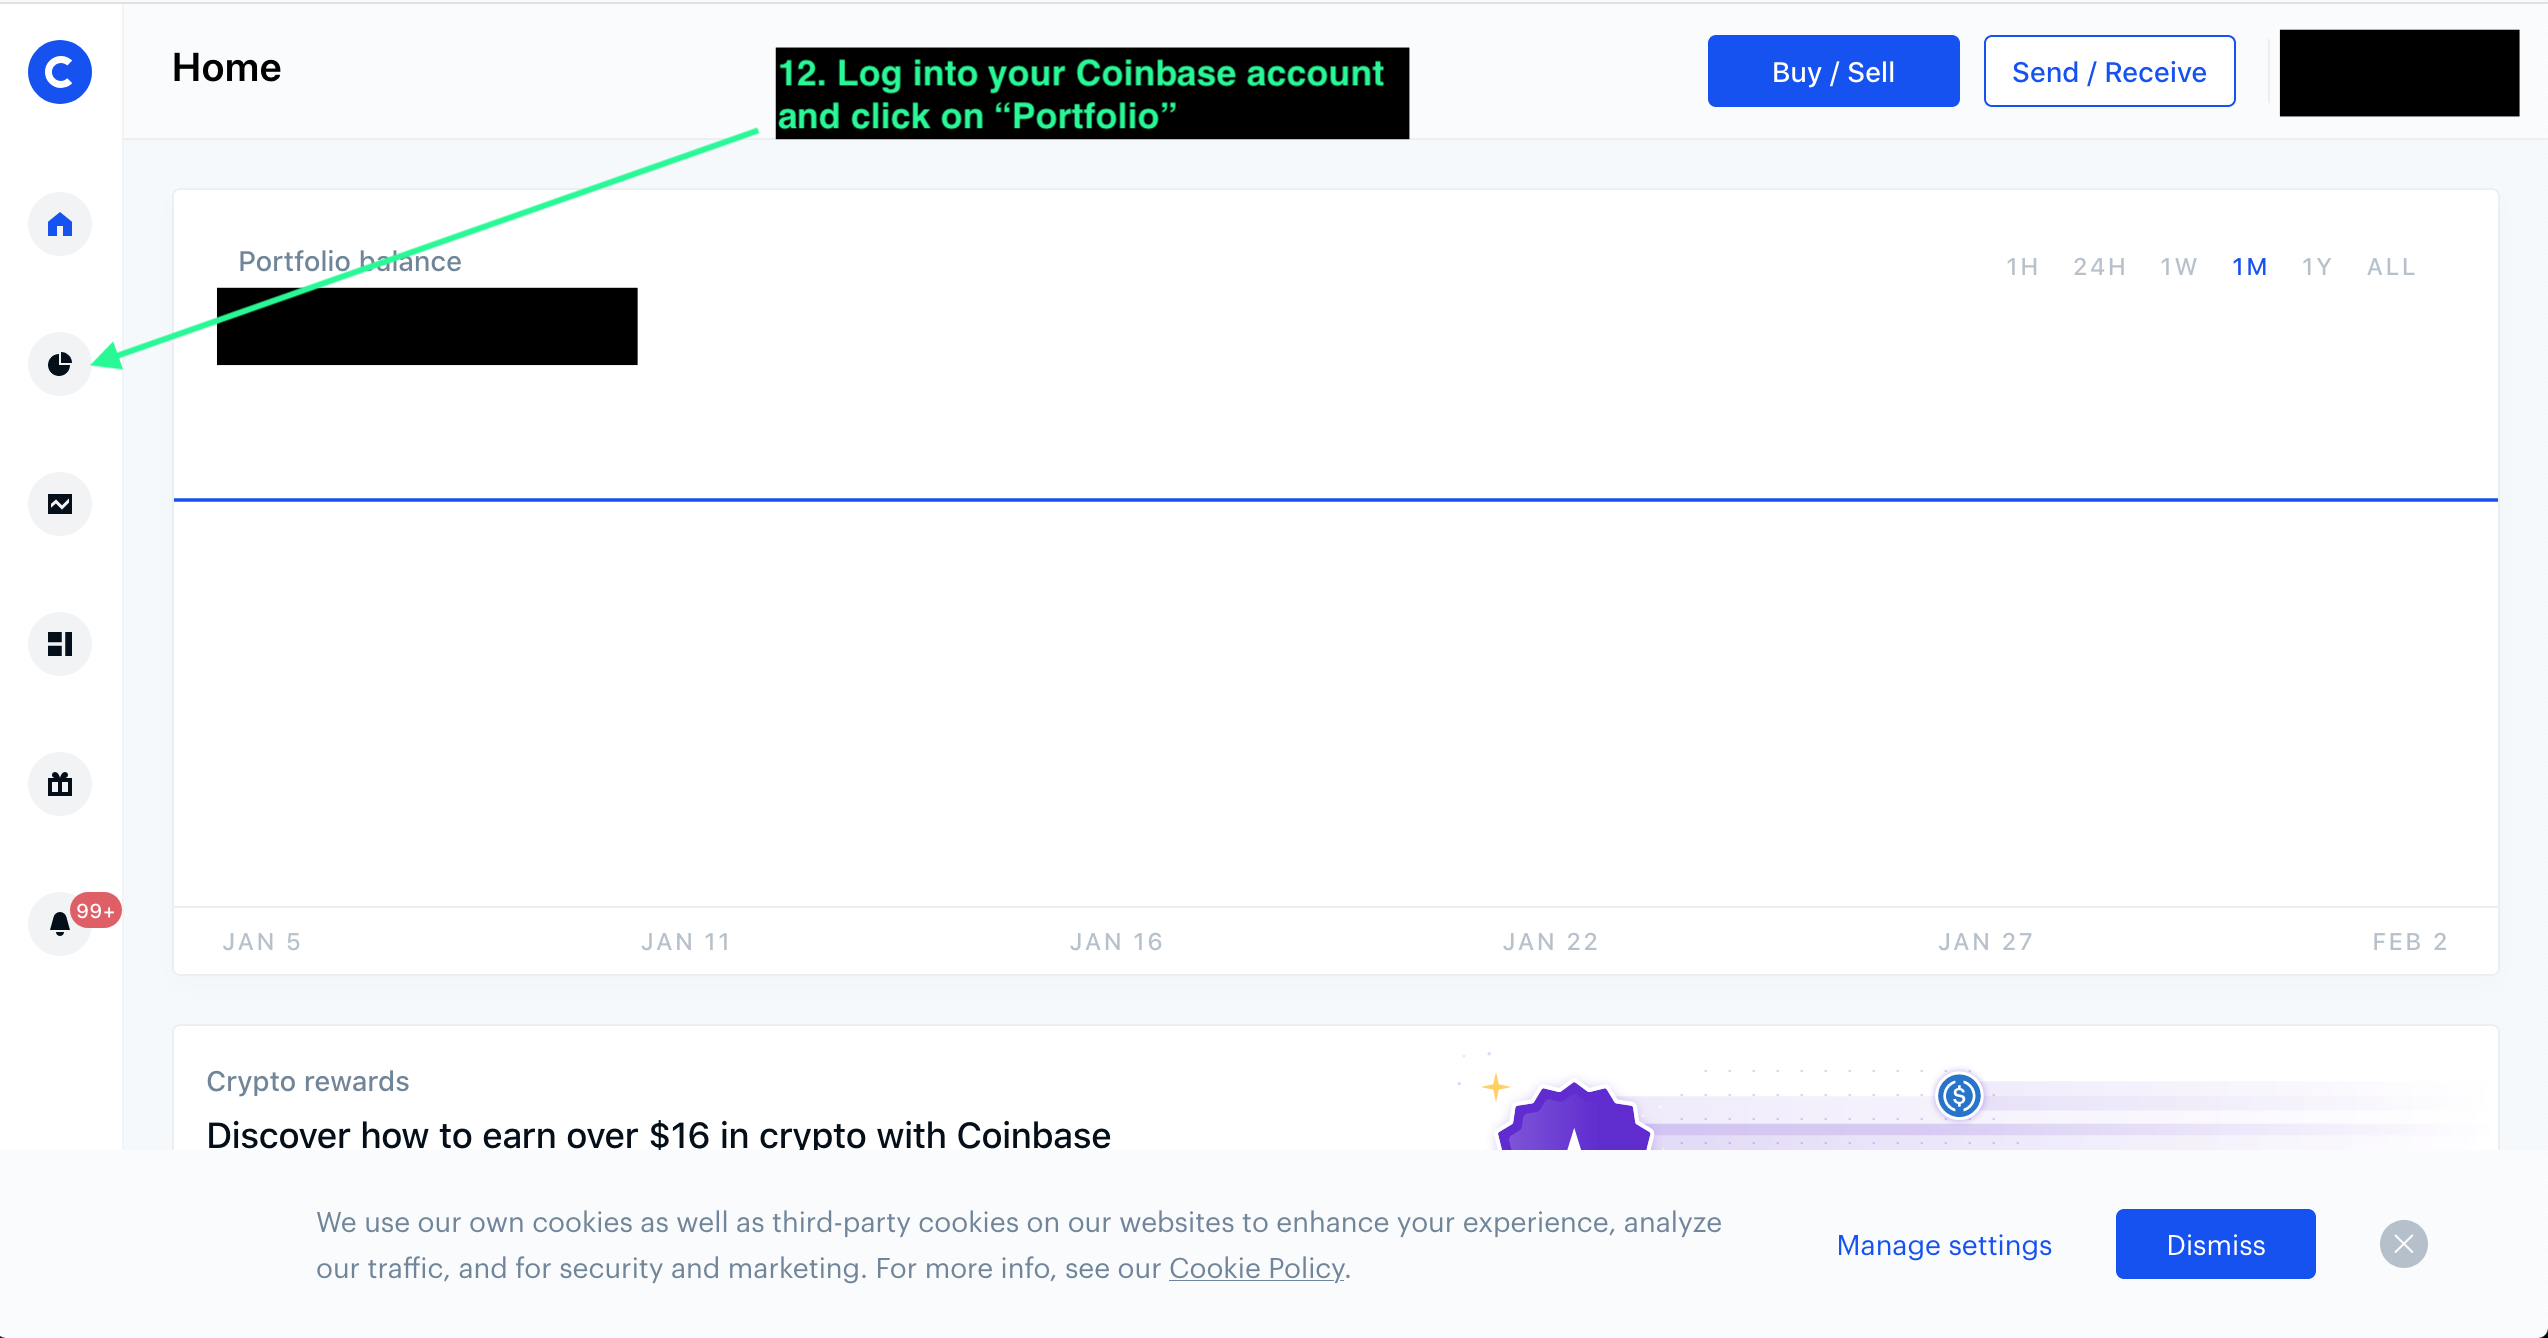
- Log in to your external wallet or exchange.
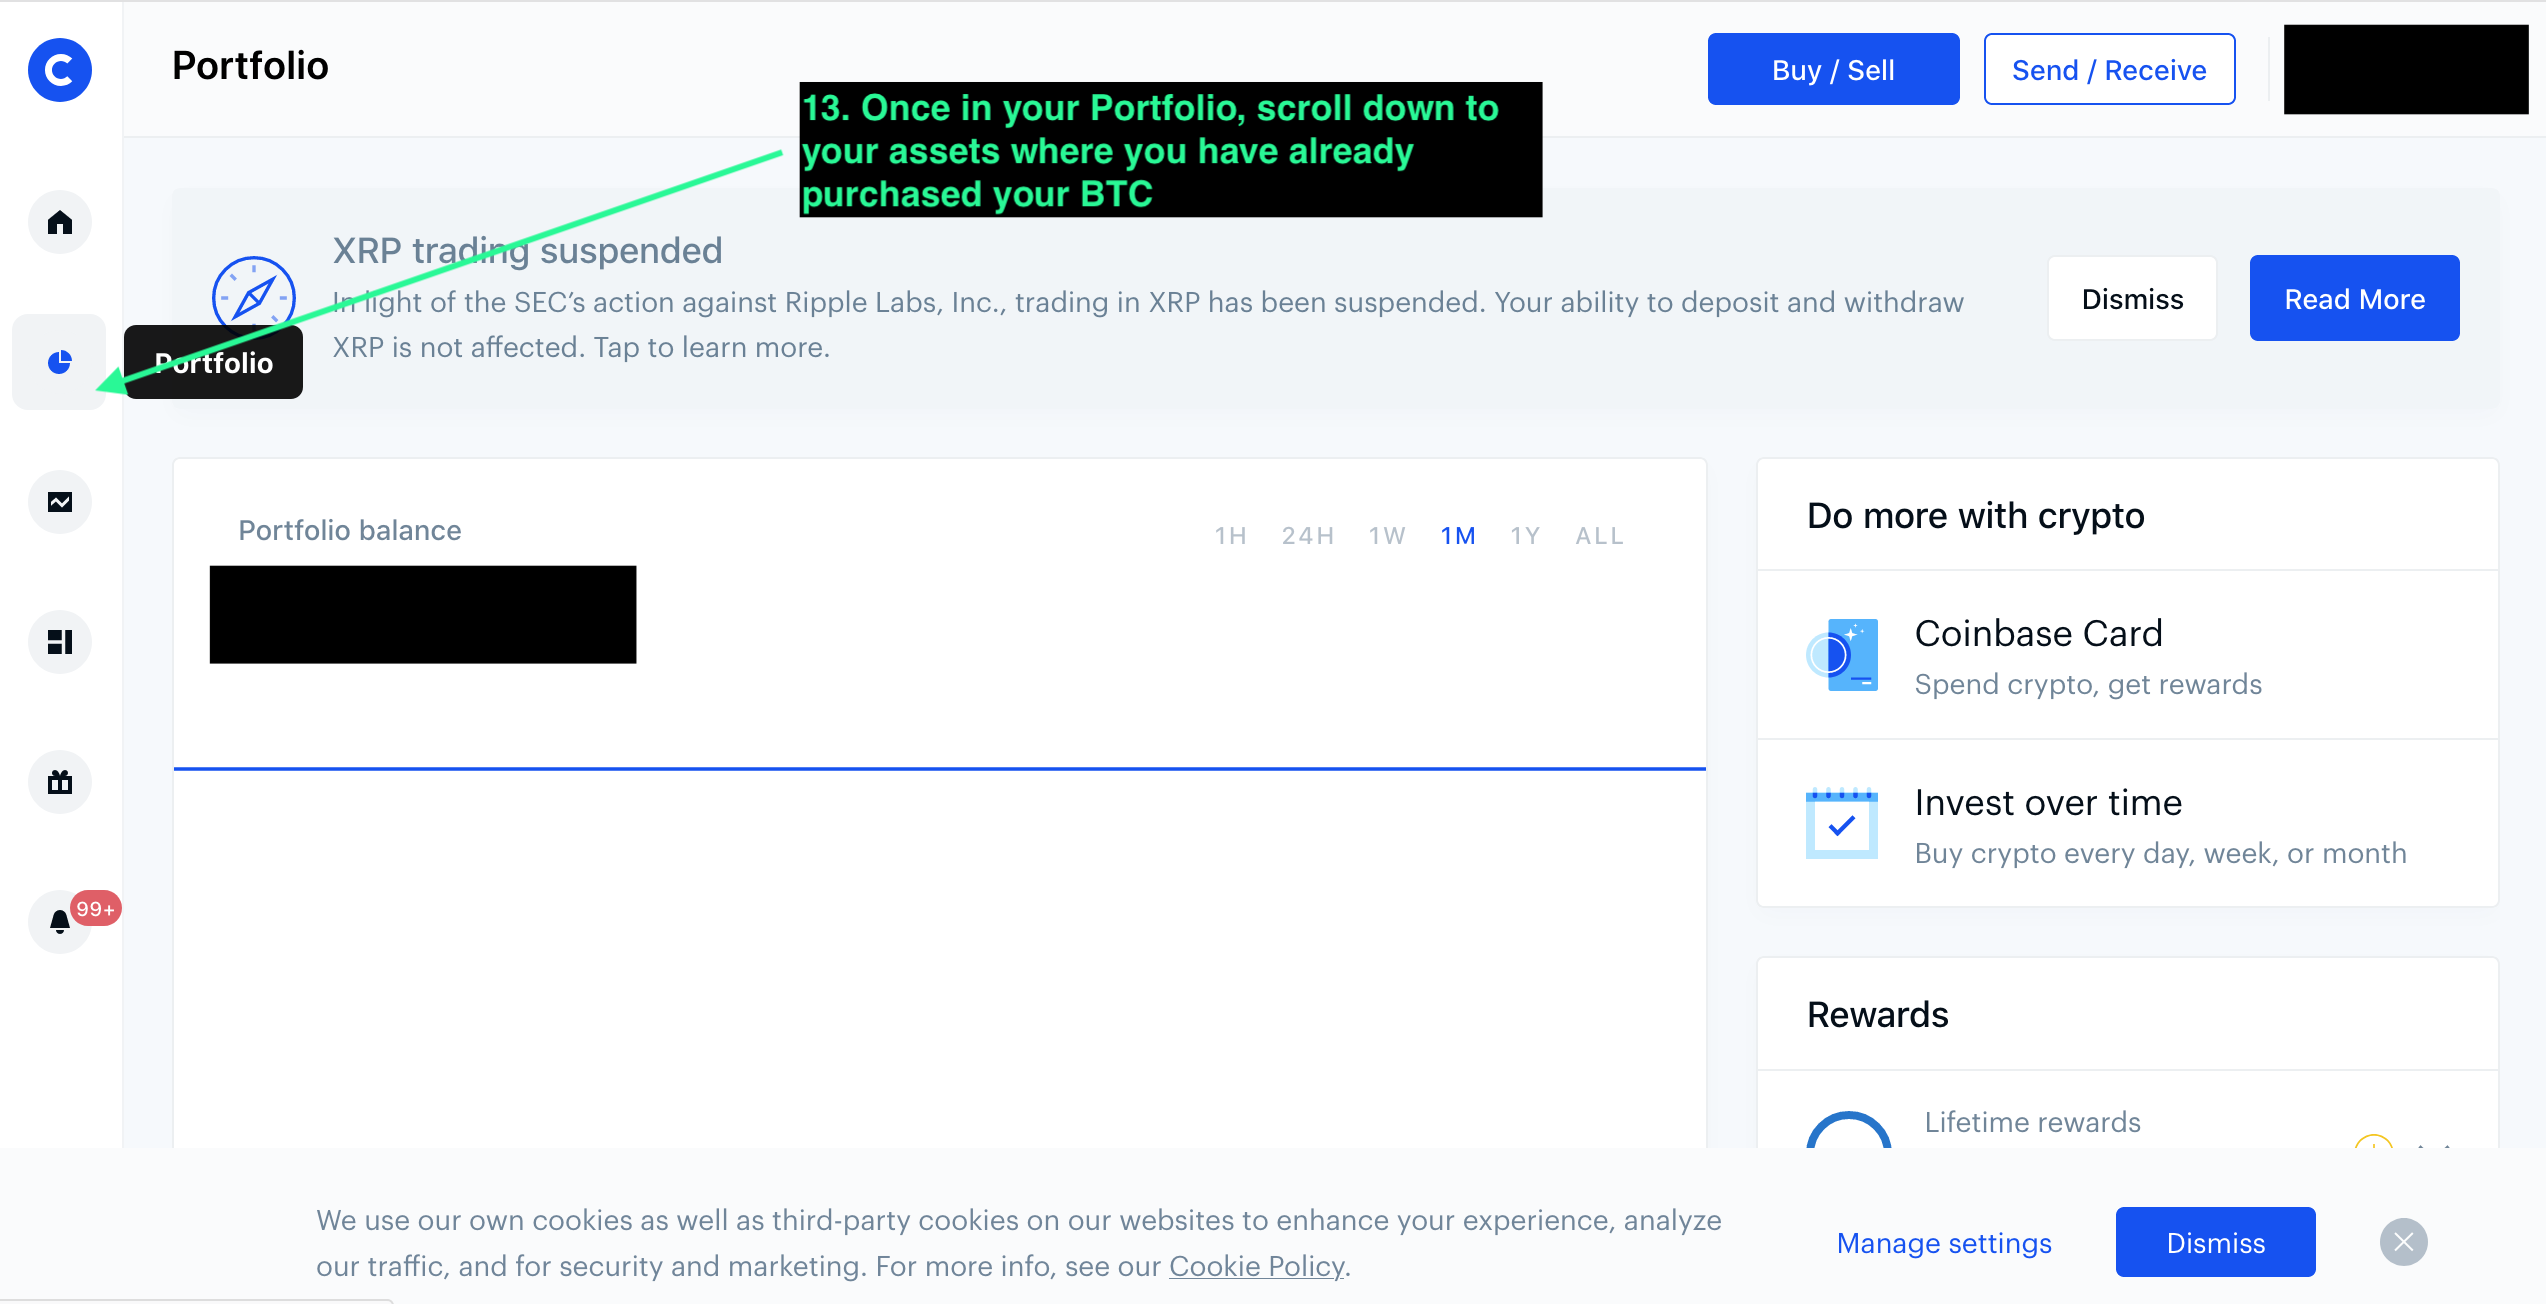
- Open Portfolio or Wallet.
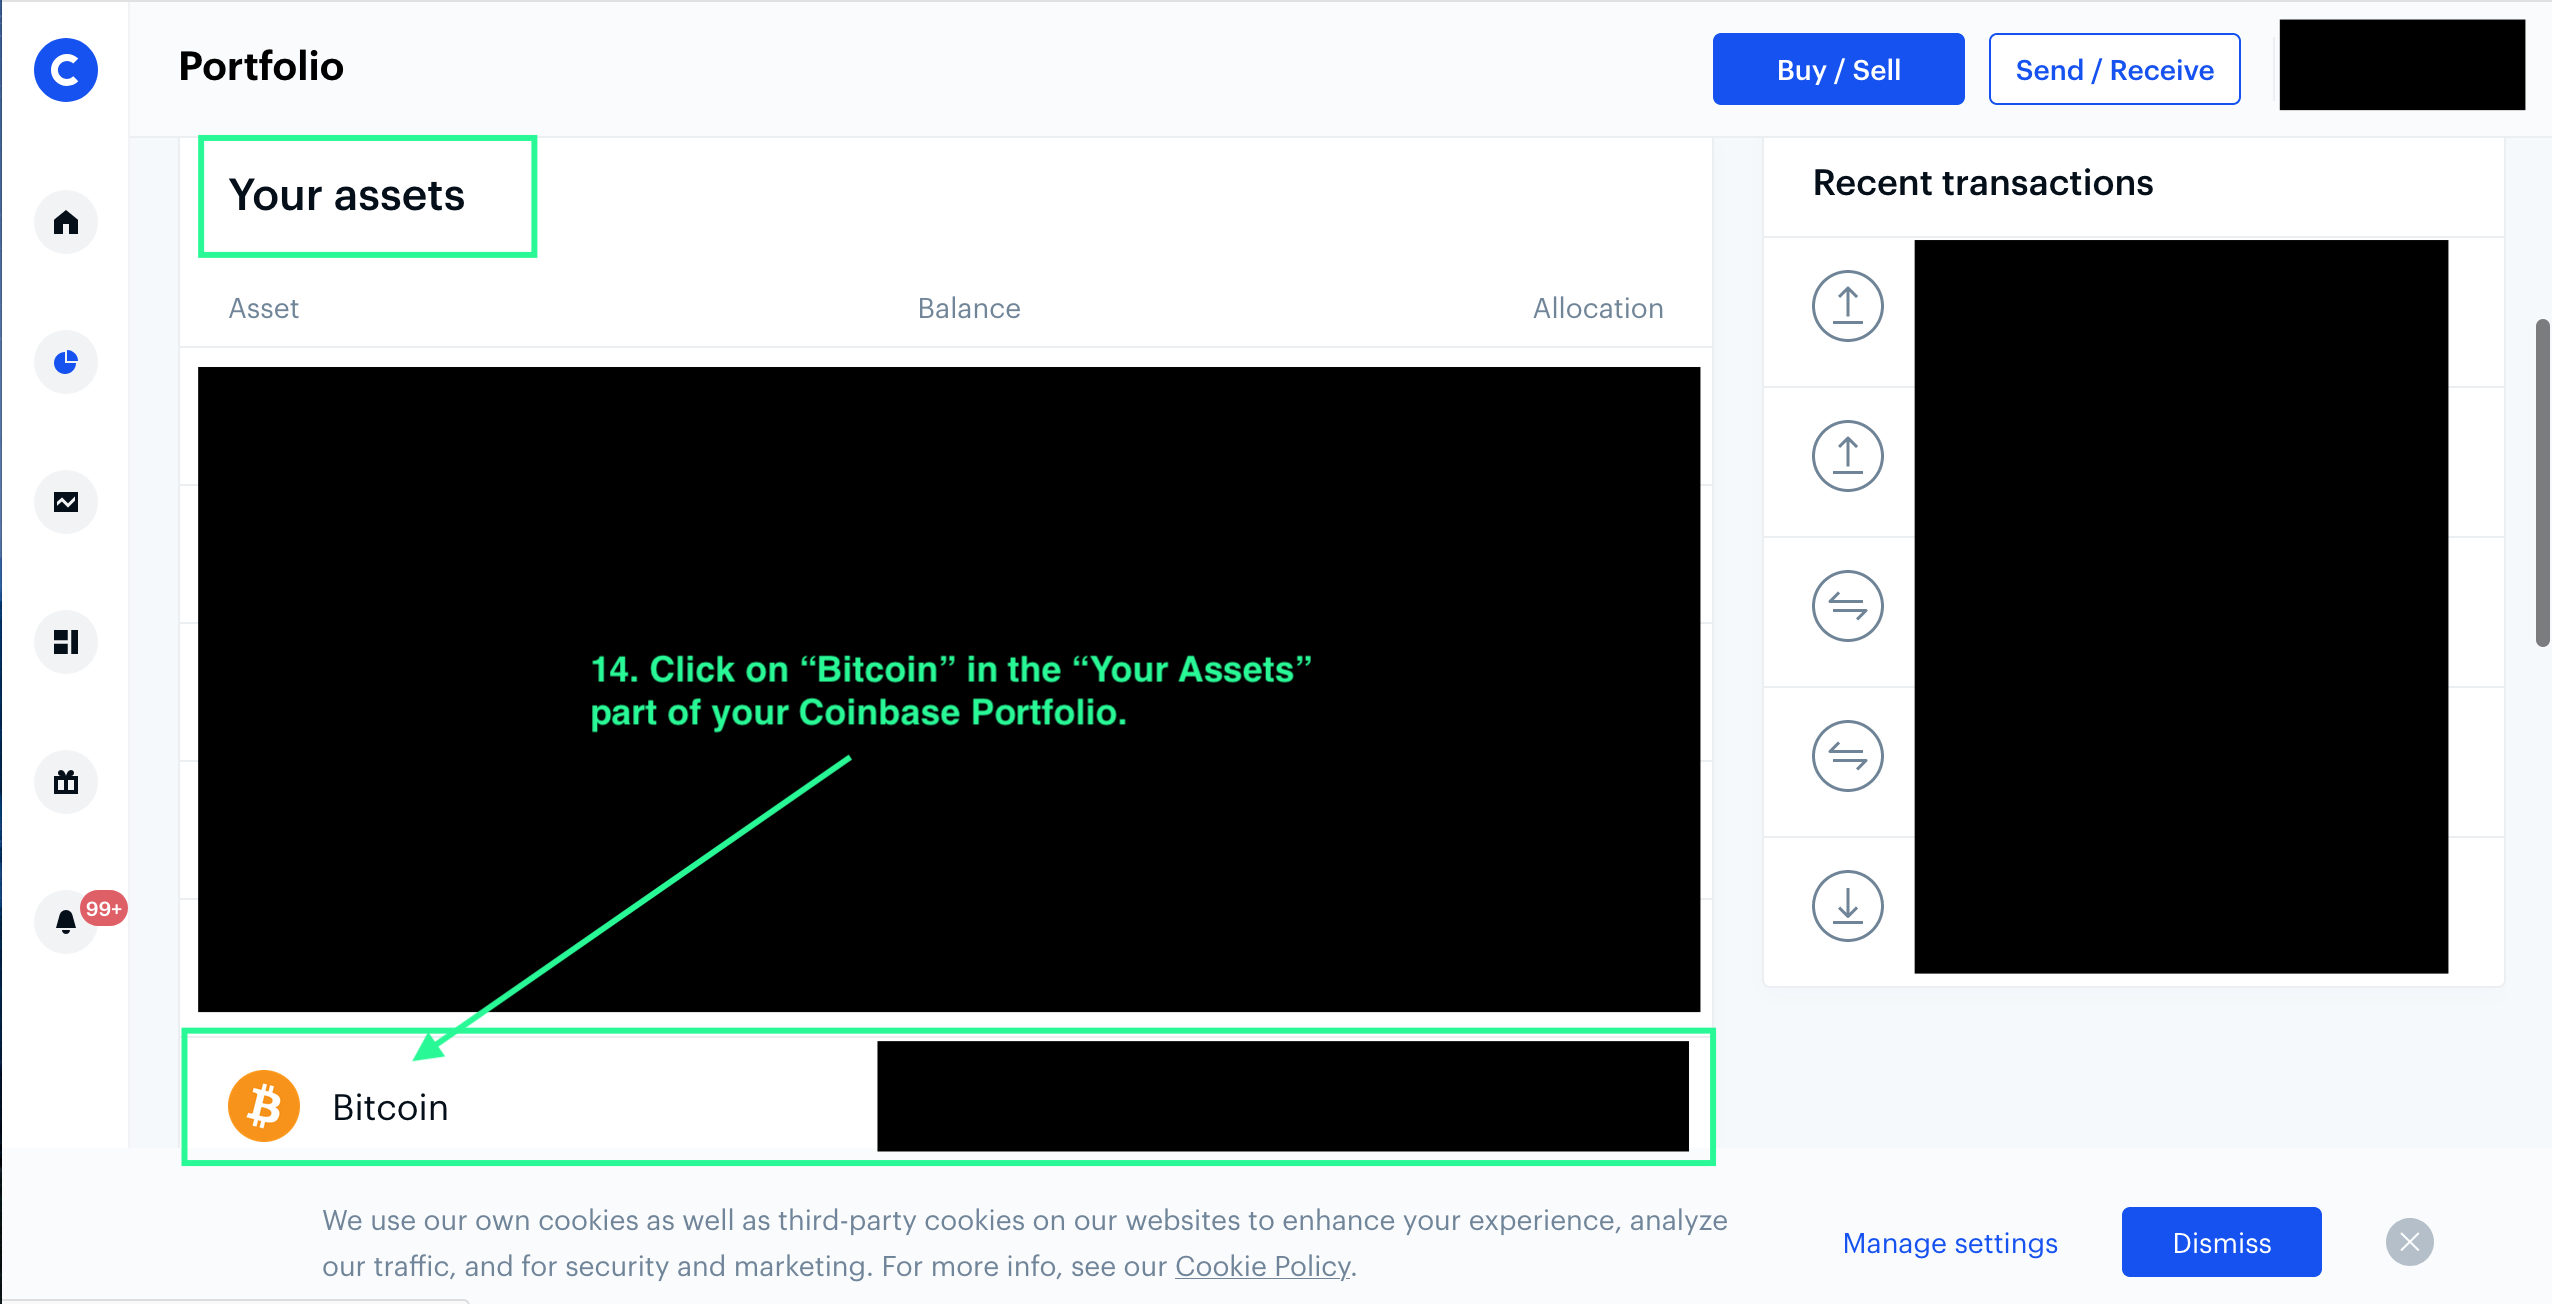
- Select BTC from your asset list.
- Click Send or Withdraw.
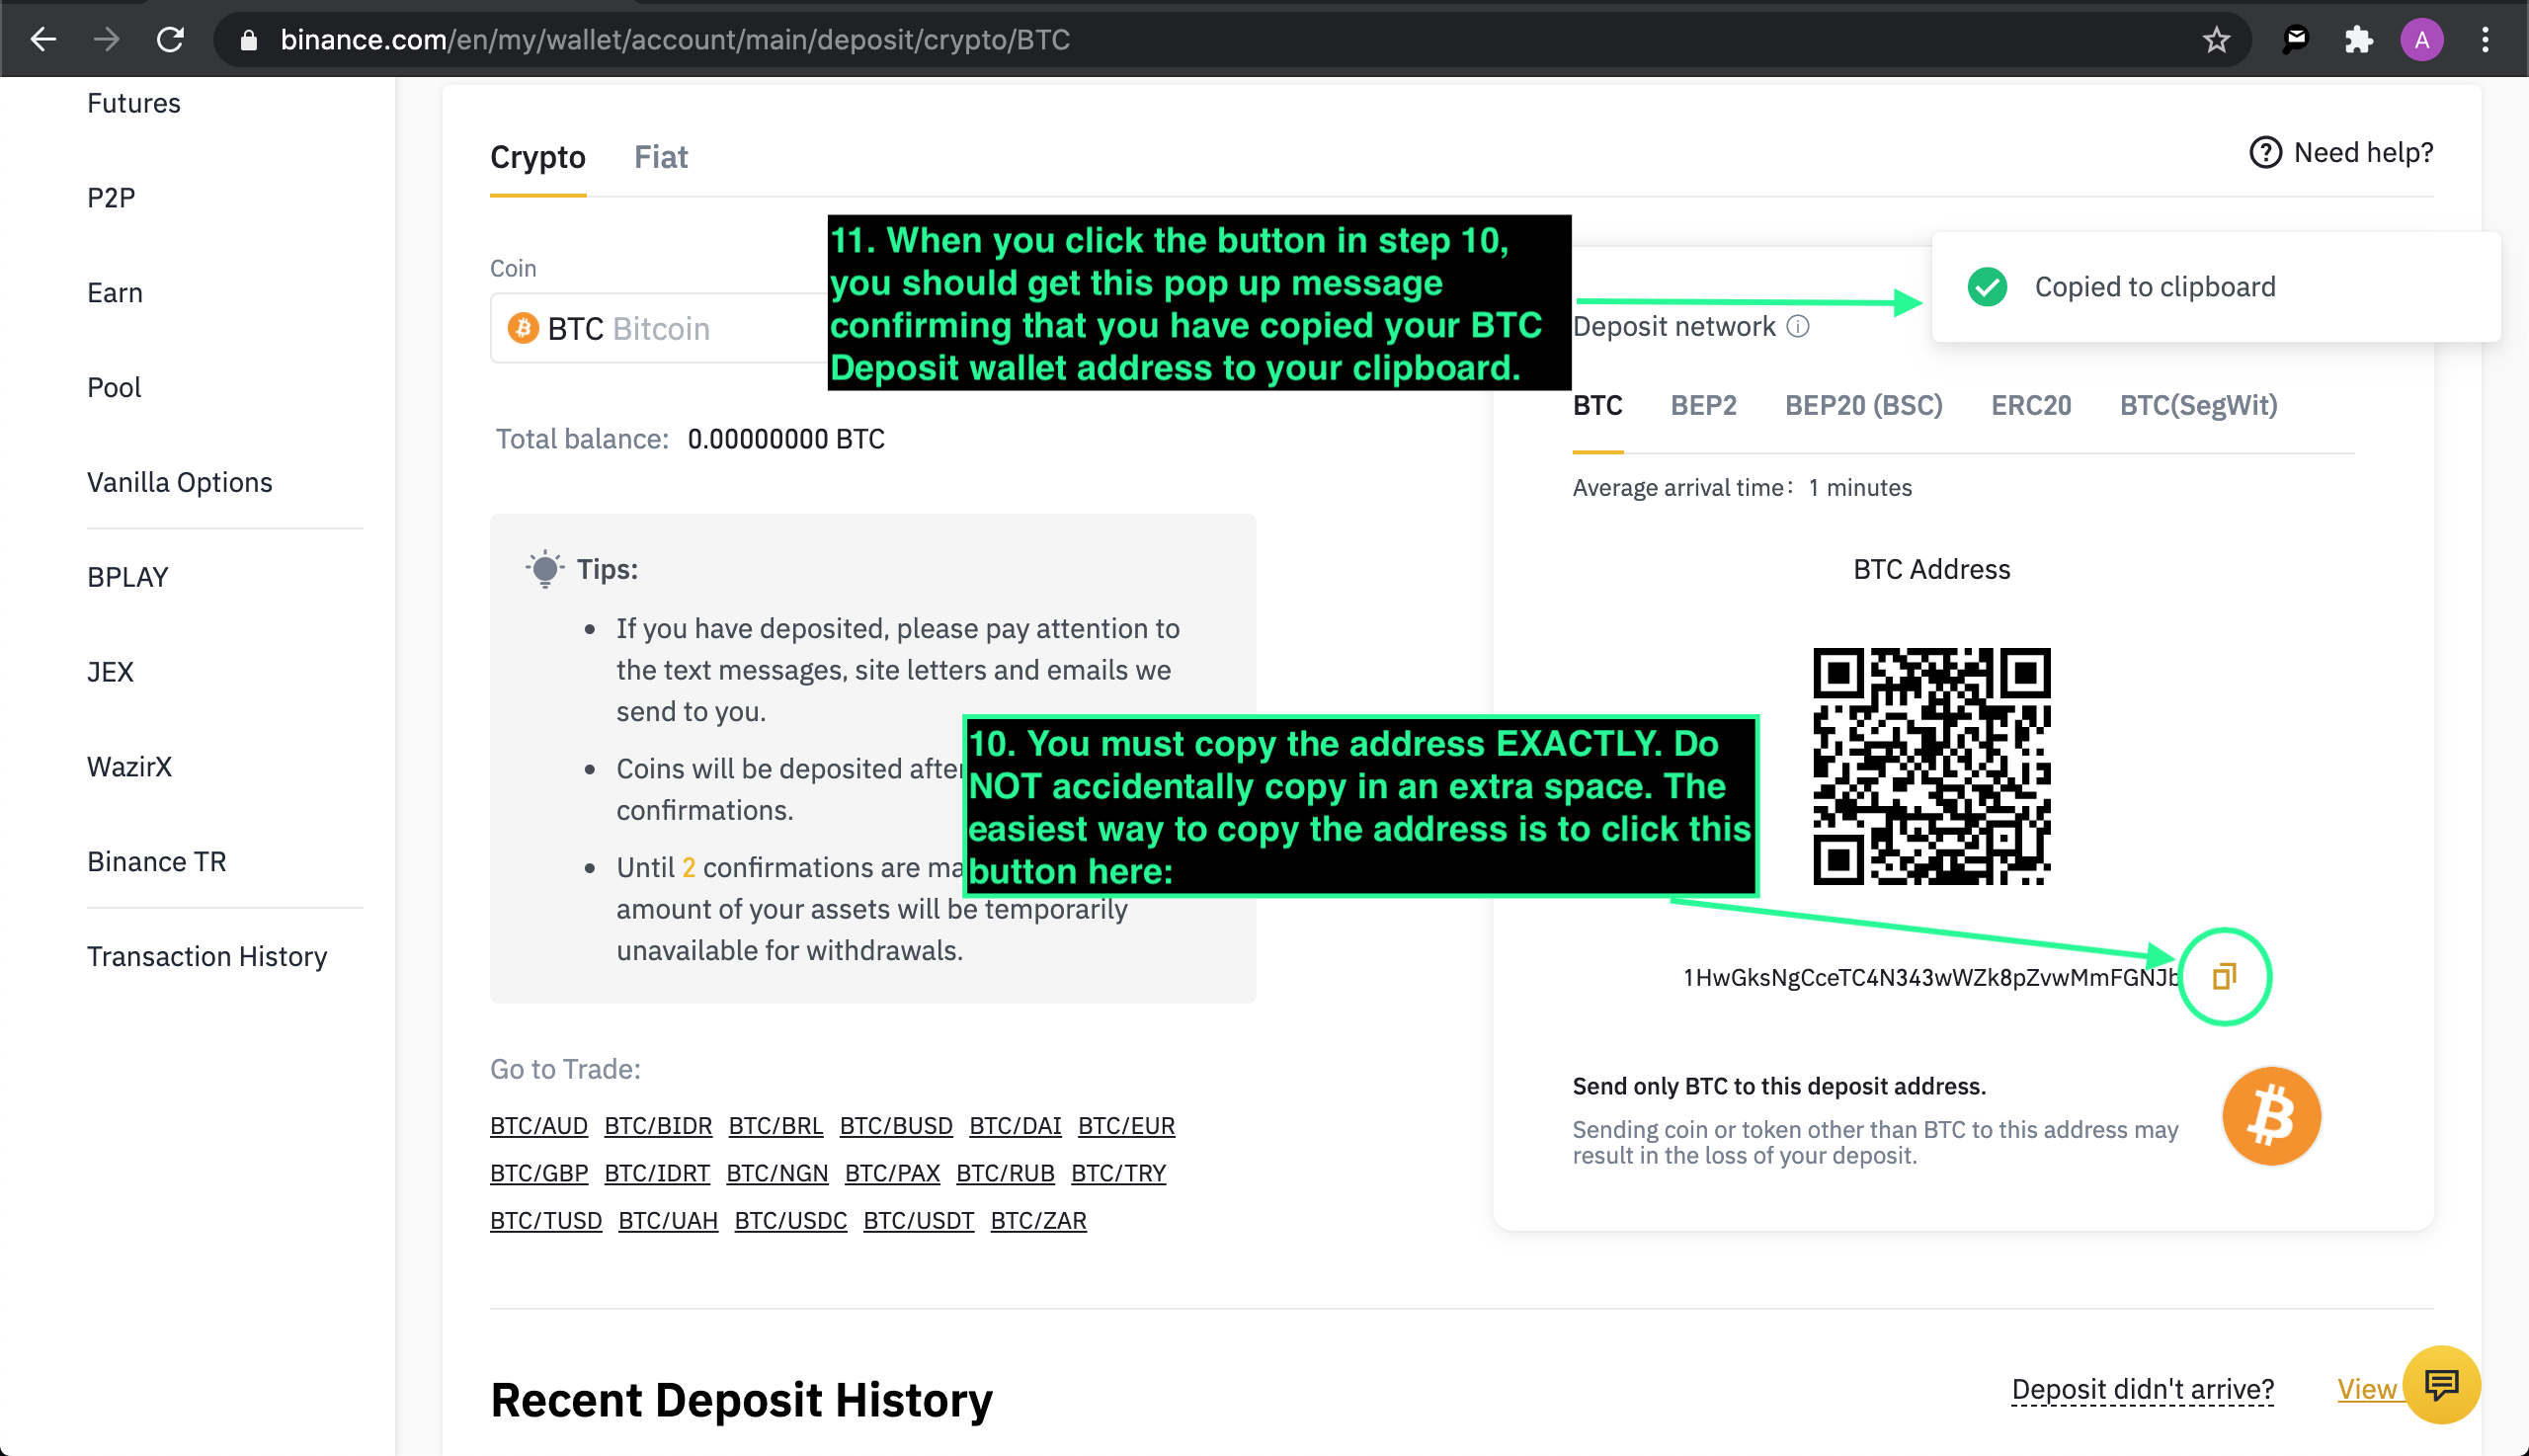
- Paste your Binance BTC deposit address into the recipient field.
- Enter the amount of BTC you want to send.
- Confirm the transaction and complete any required verification steps.
Important: paste the deposit address exactly as copied — no extra spaces or characters. Sending the wrong asset or wrong network may result in loss of funds. (Coinbase is only used as an example here.)
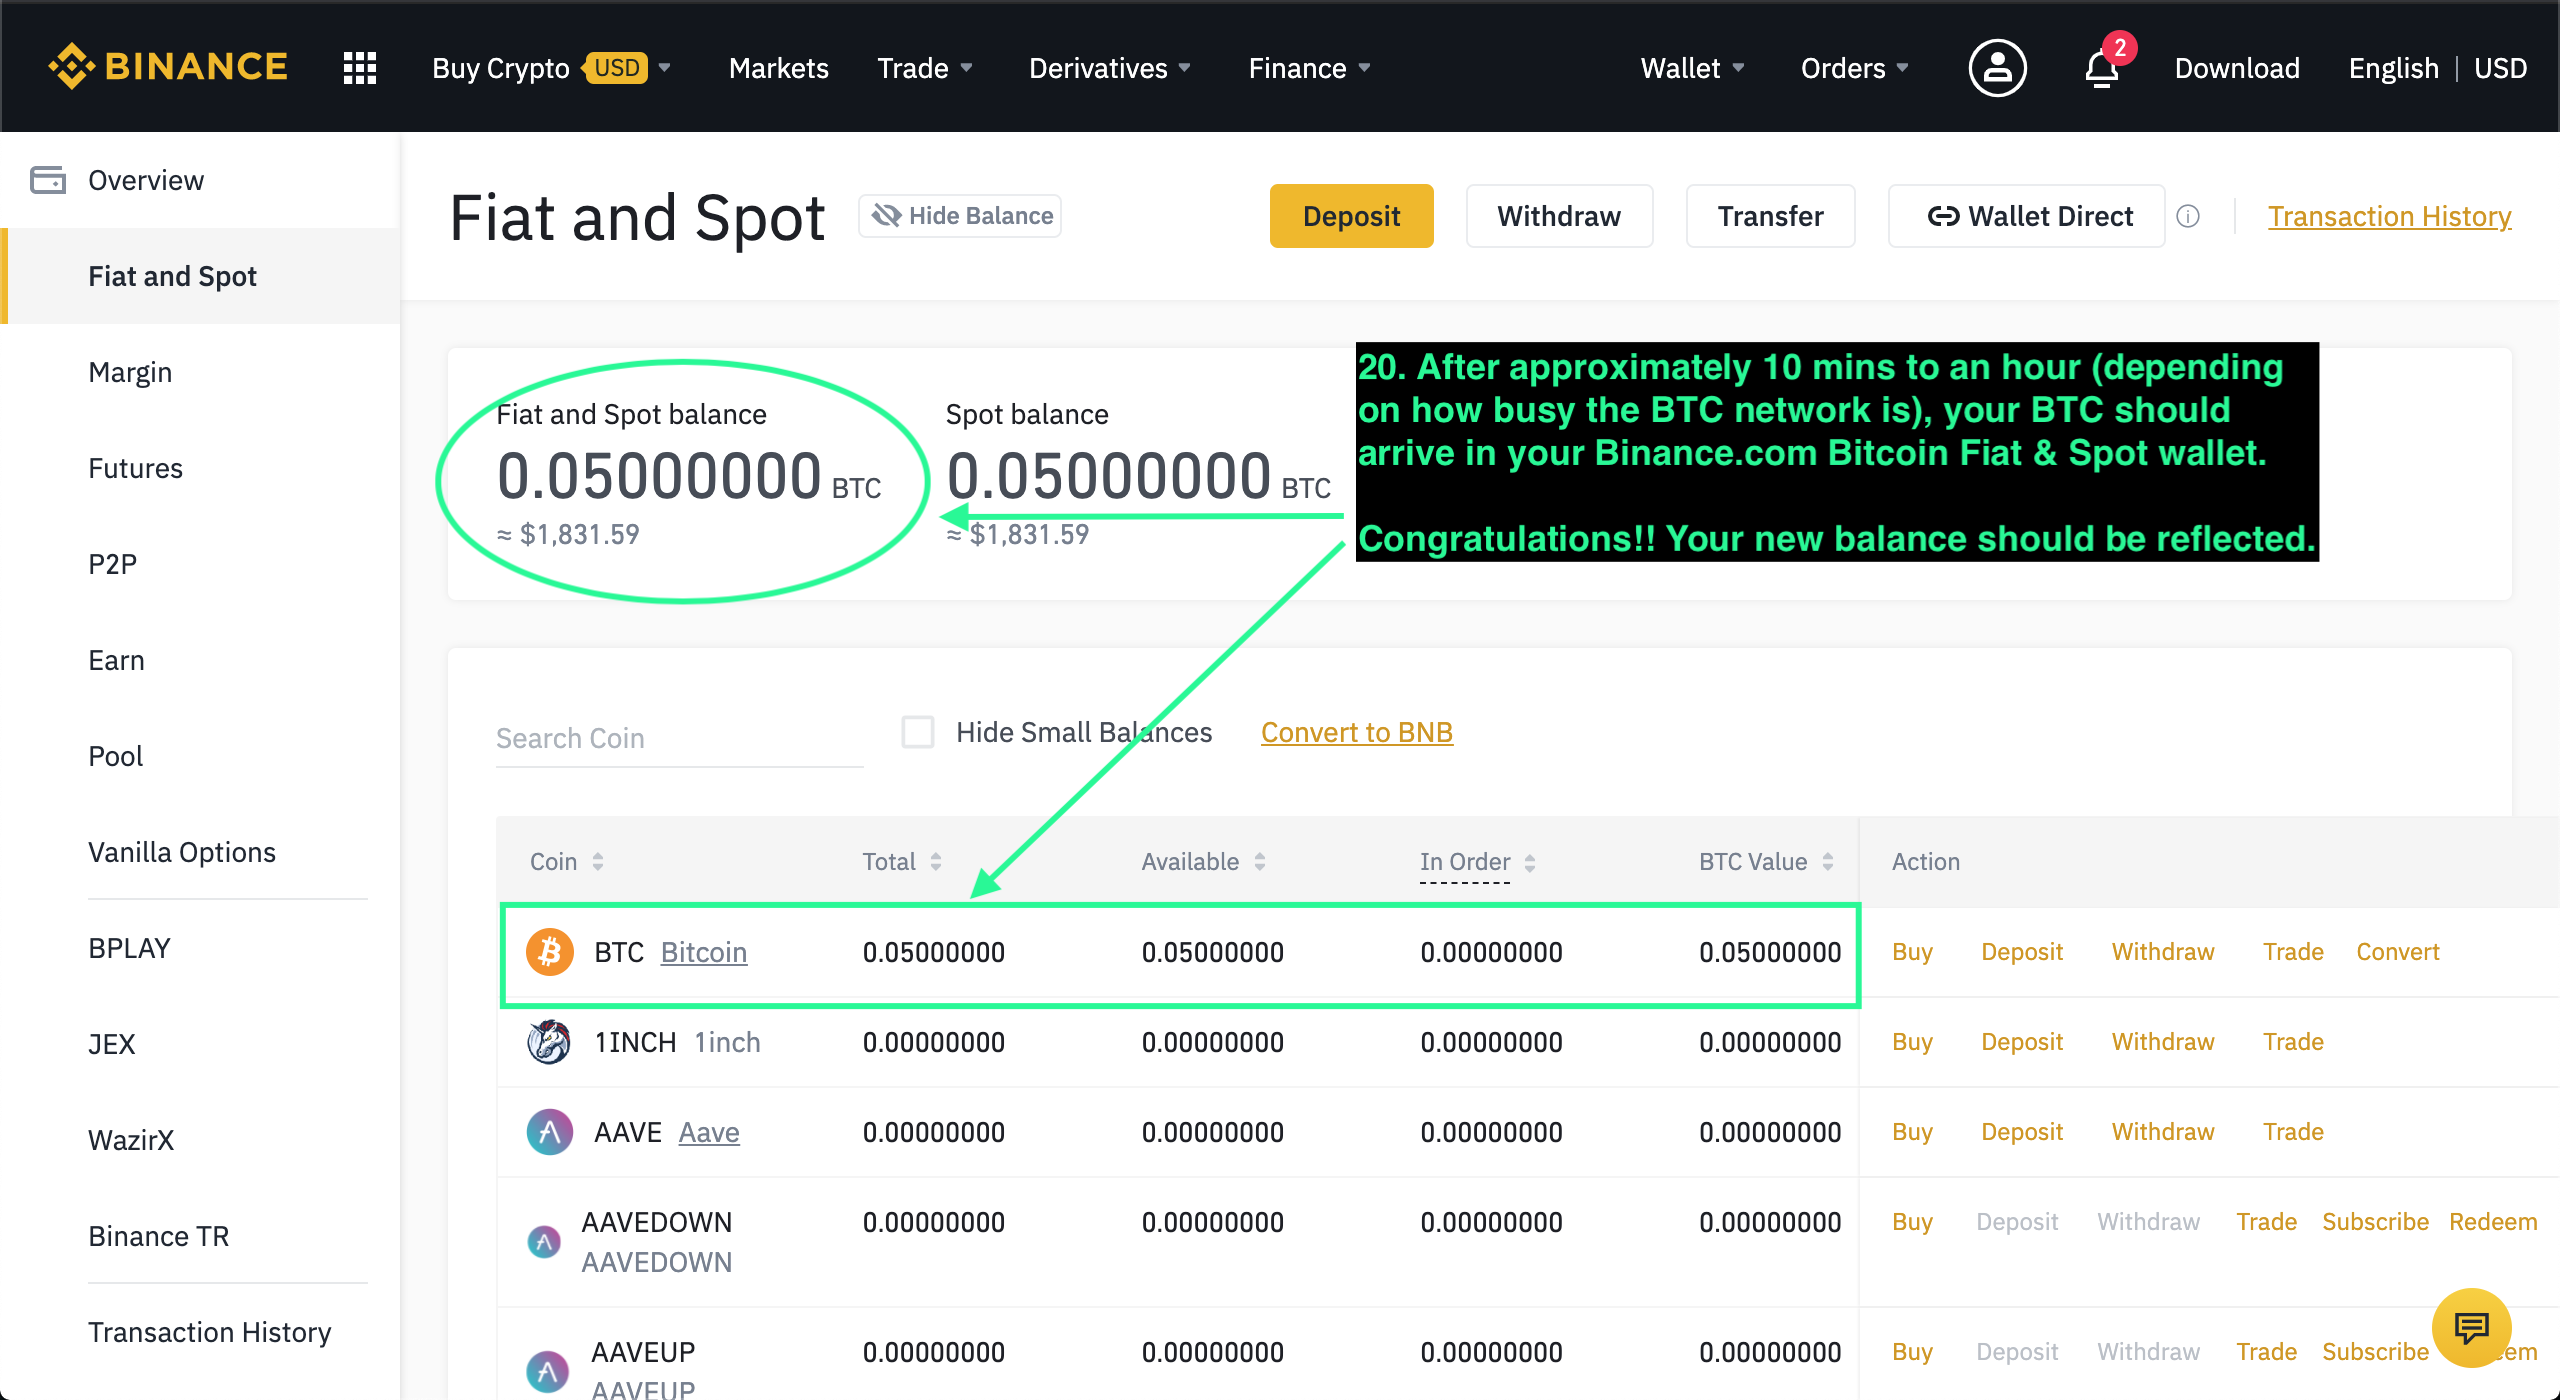
Confirm BTC Arrived in Binance
- Return to your Binance Fiat and Spot wallet.
- Wait for the BTC deposit to complete.
- Confirm your BTC balance is visible in the wallet.
Deposit times may vary depending on network congestion.
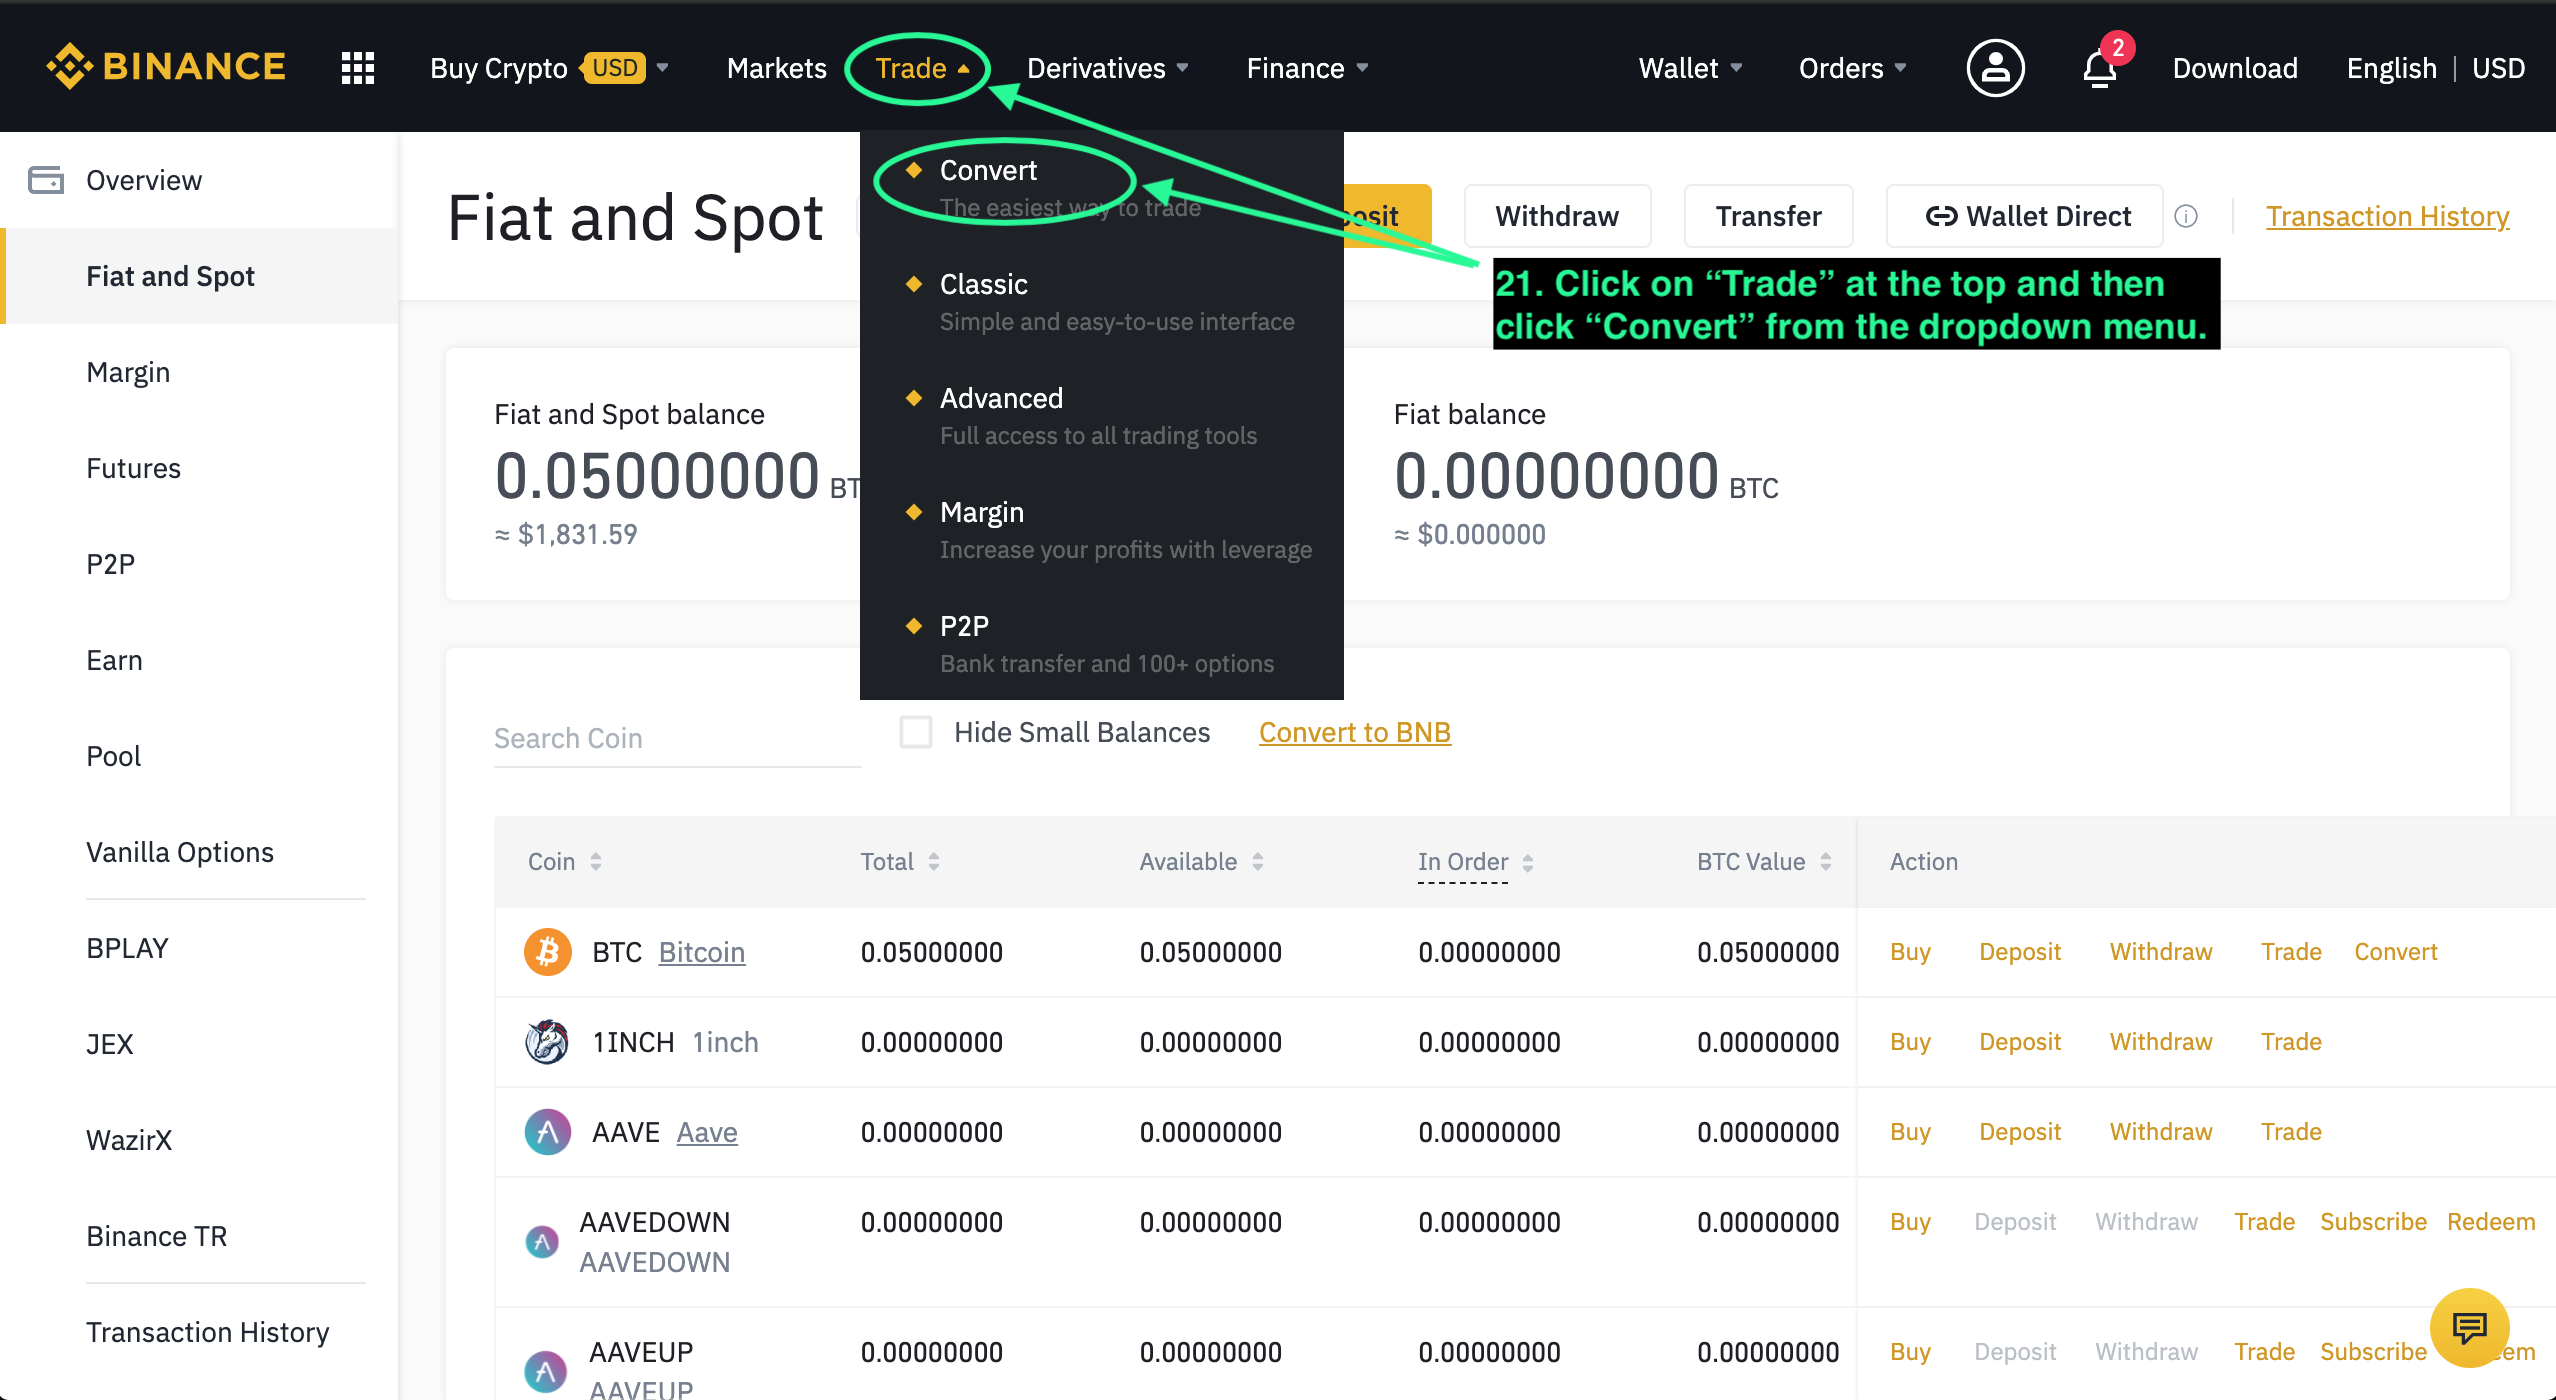
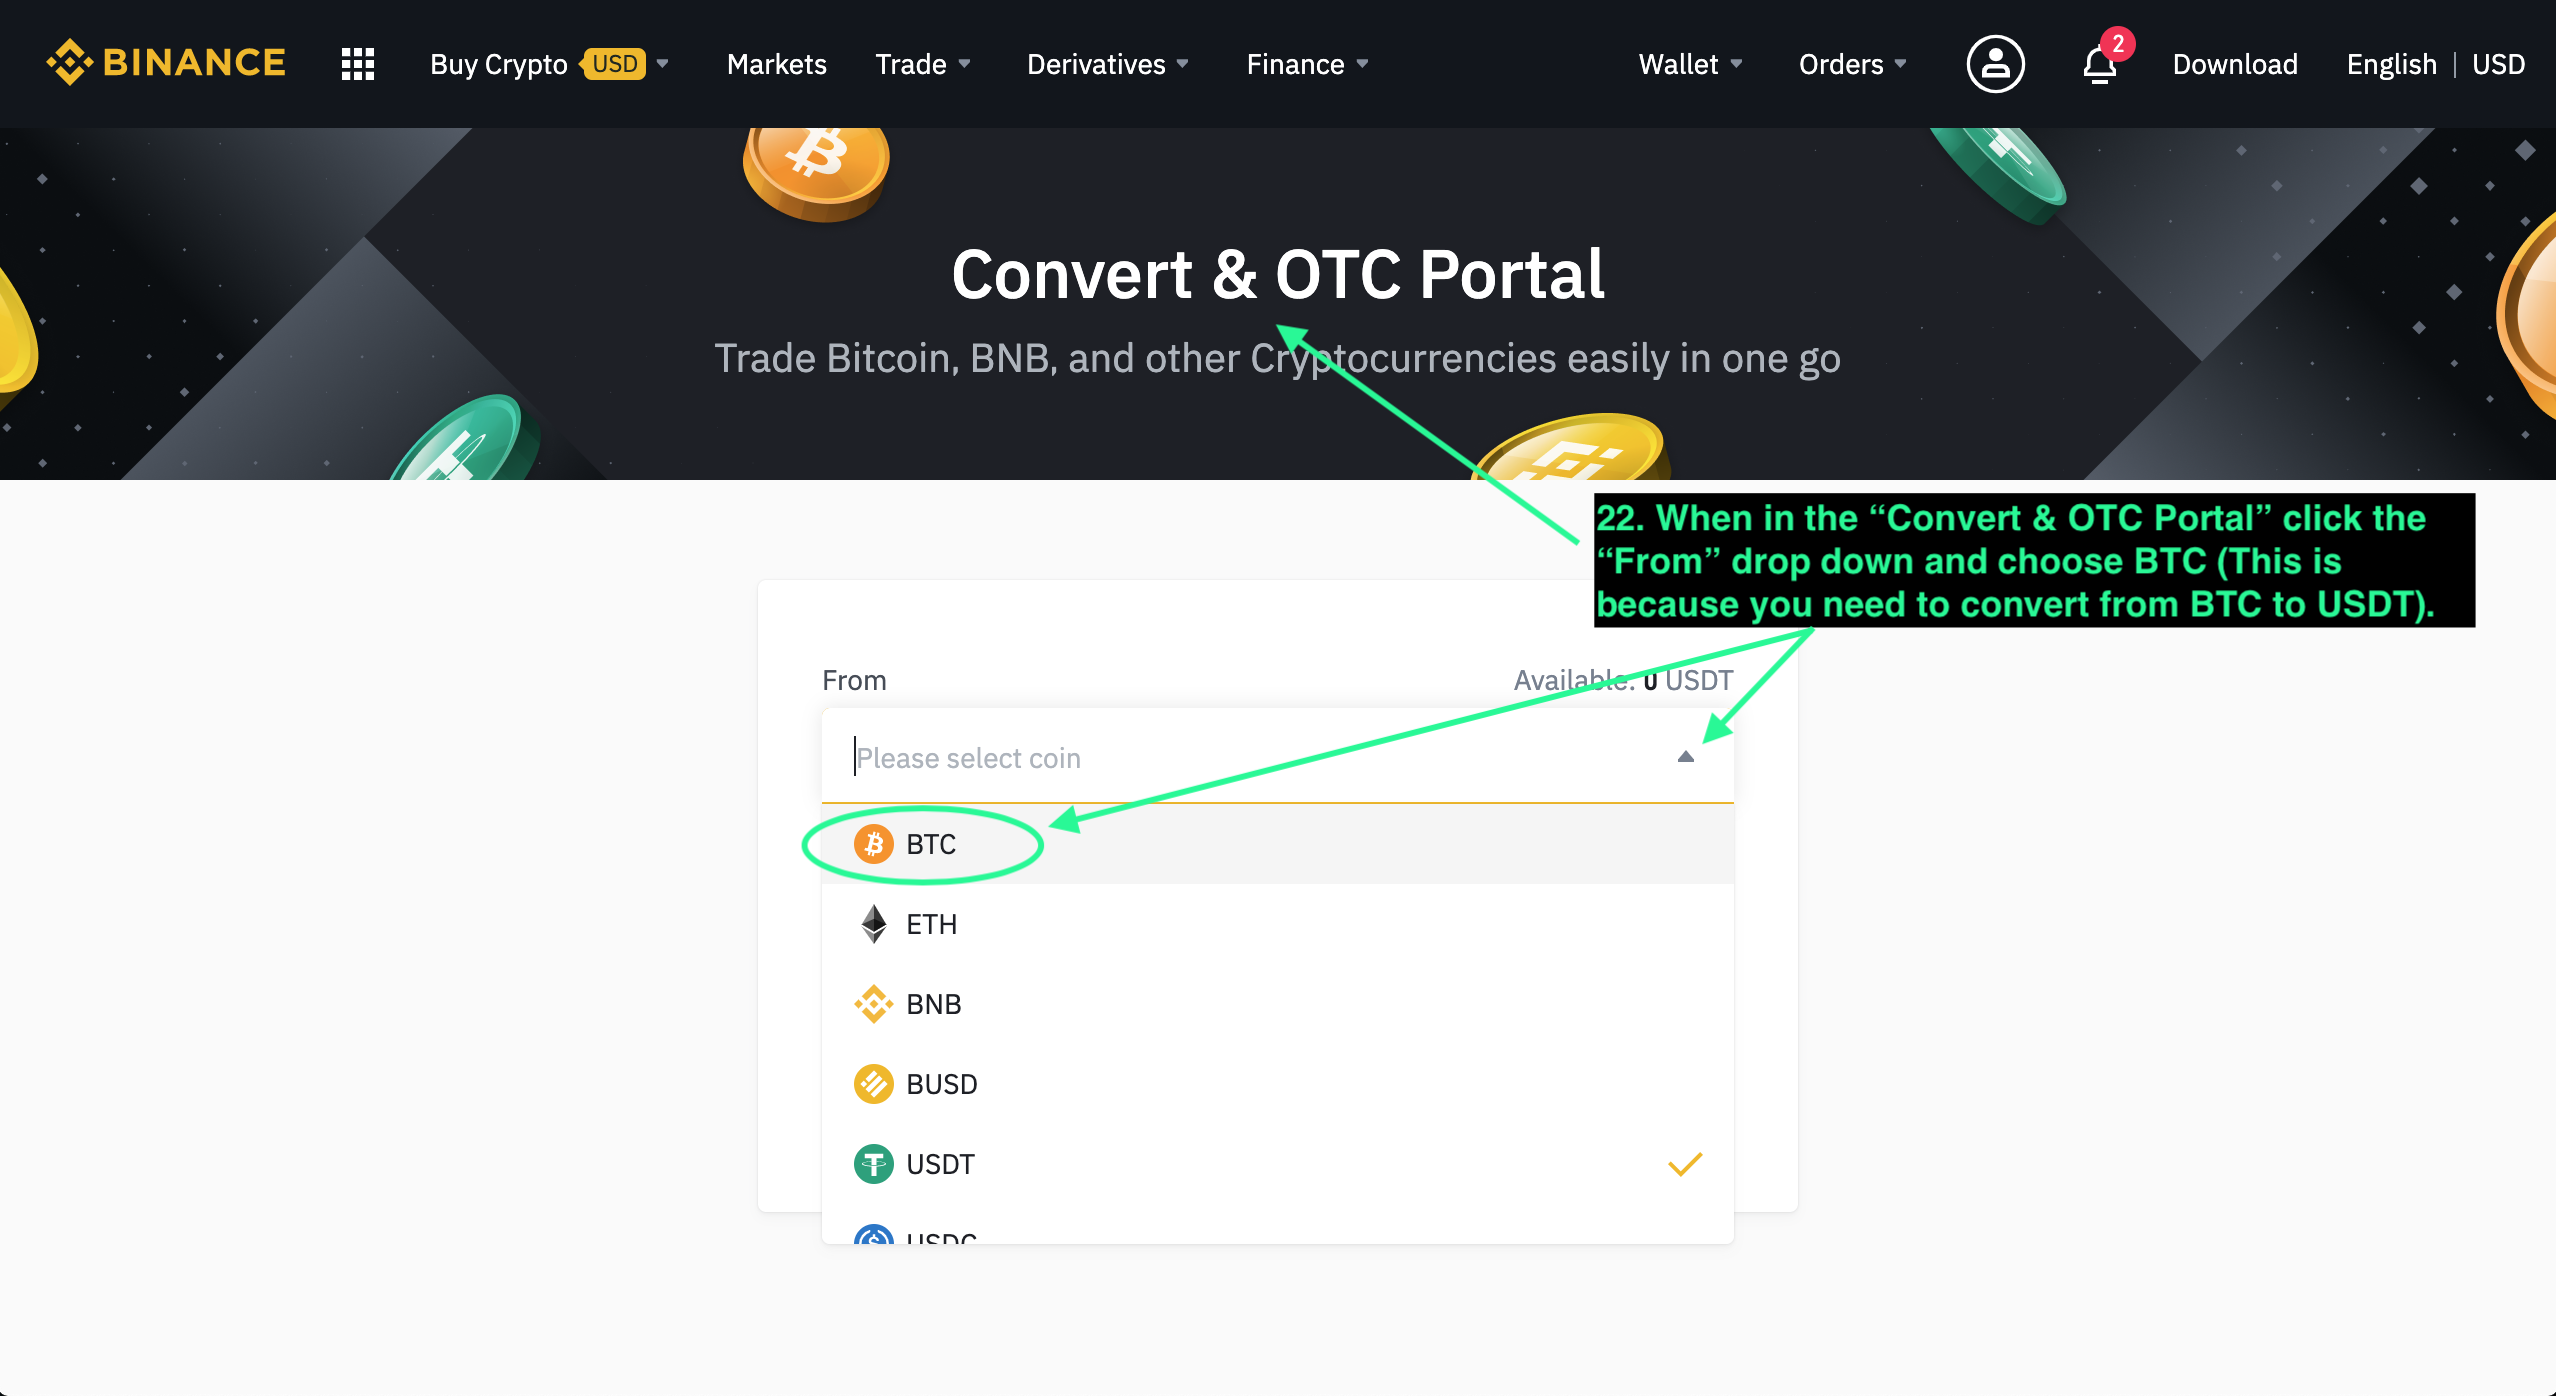
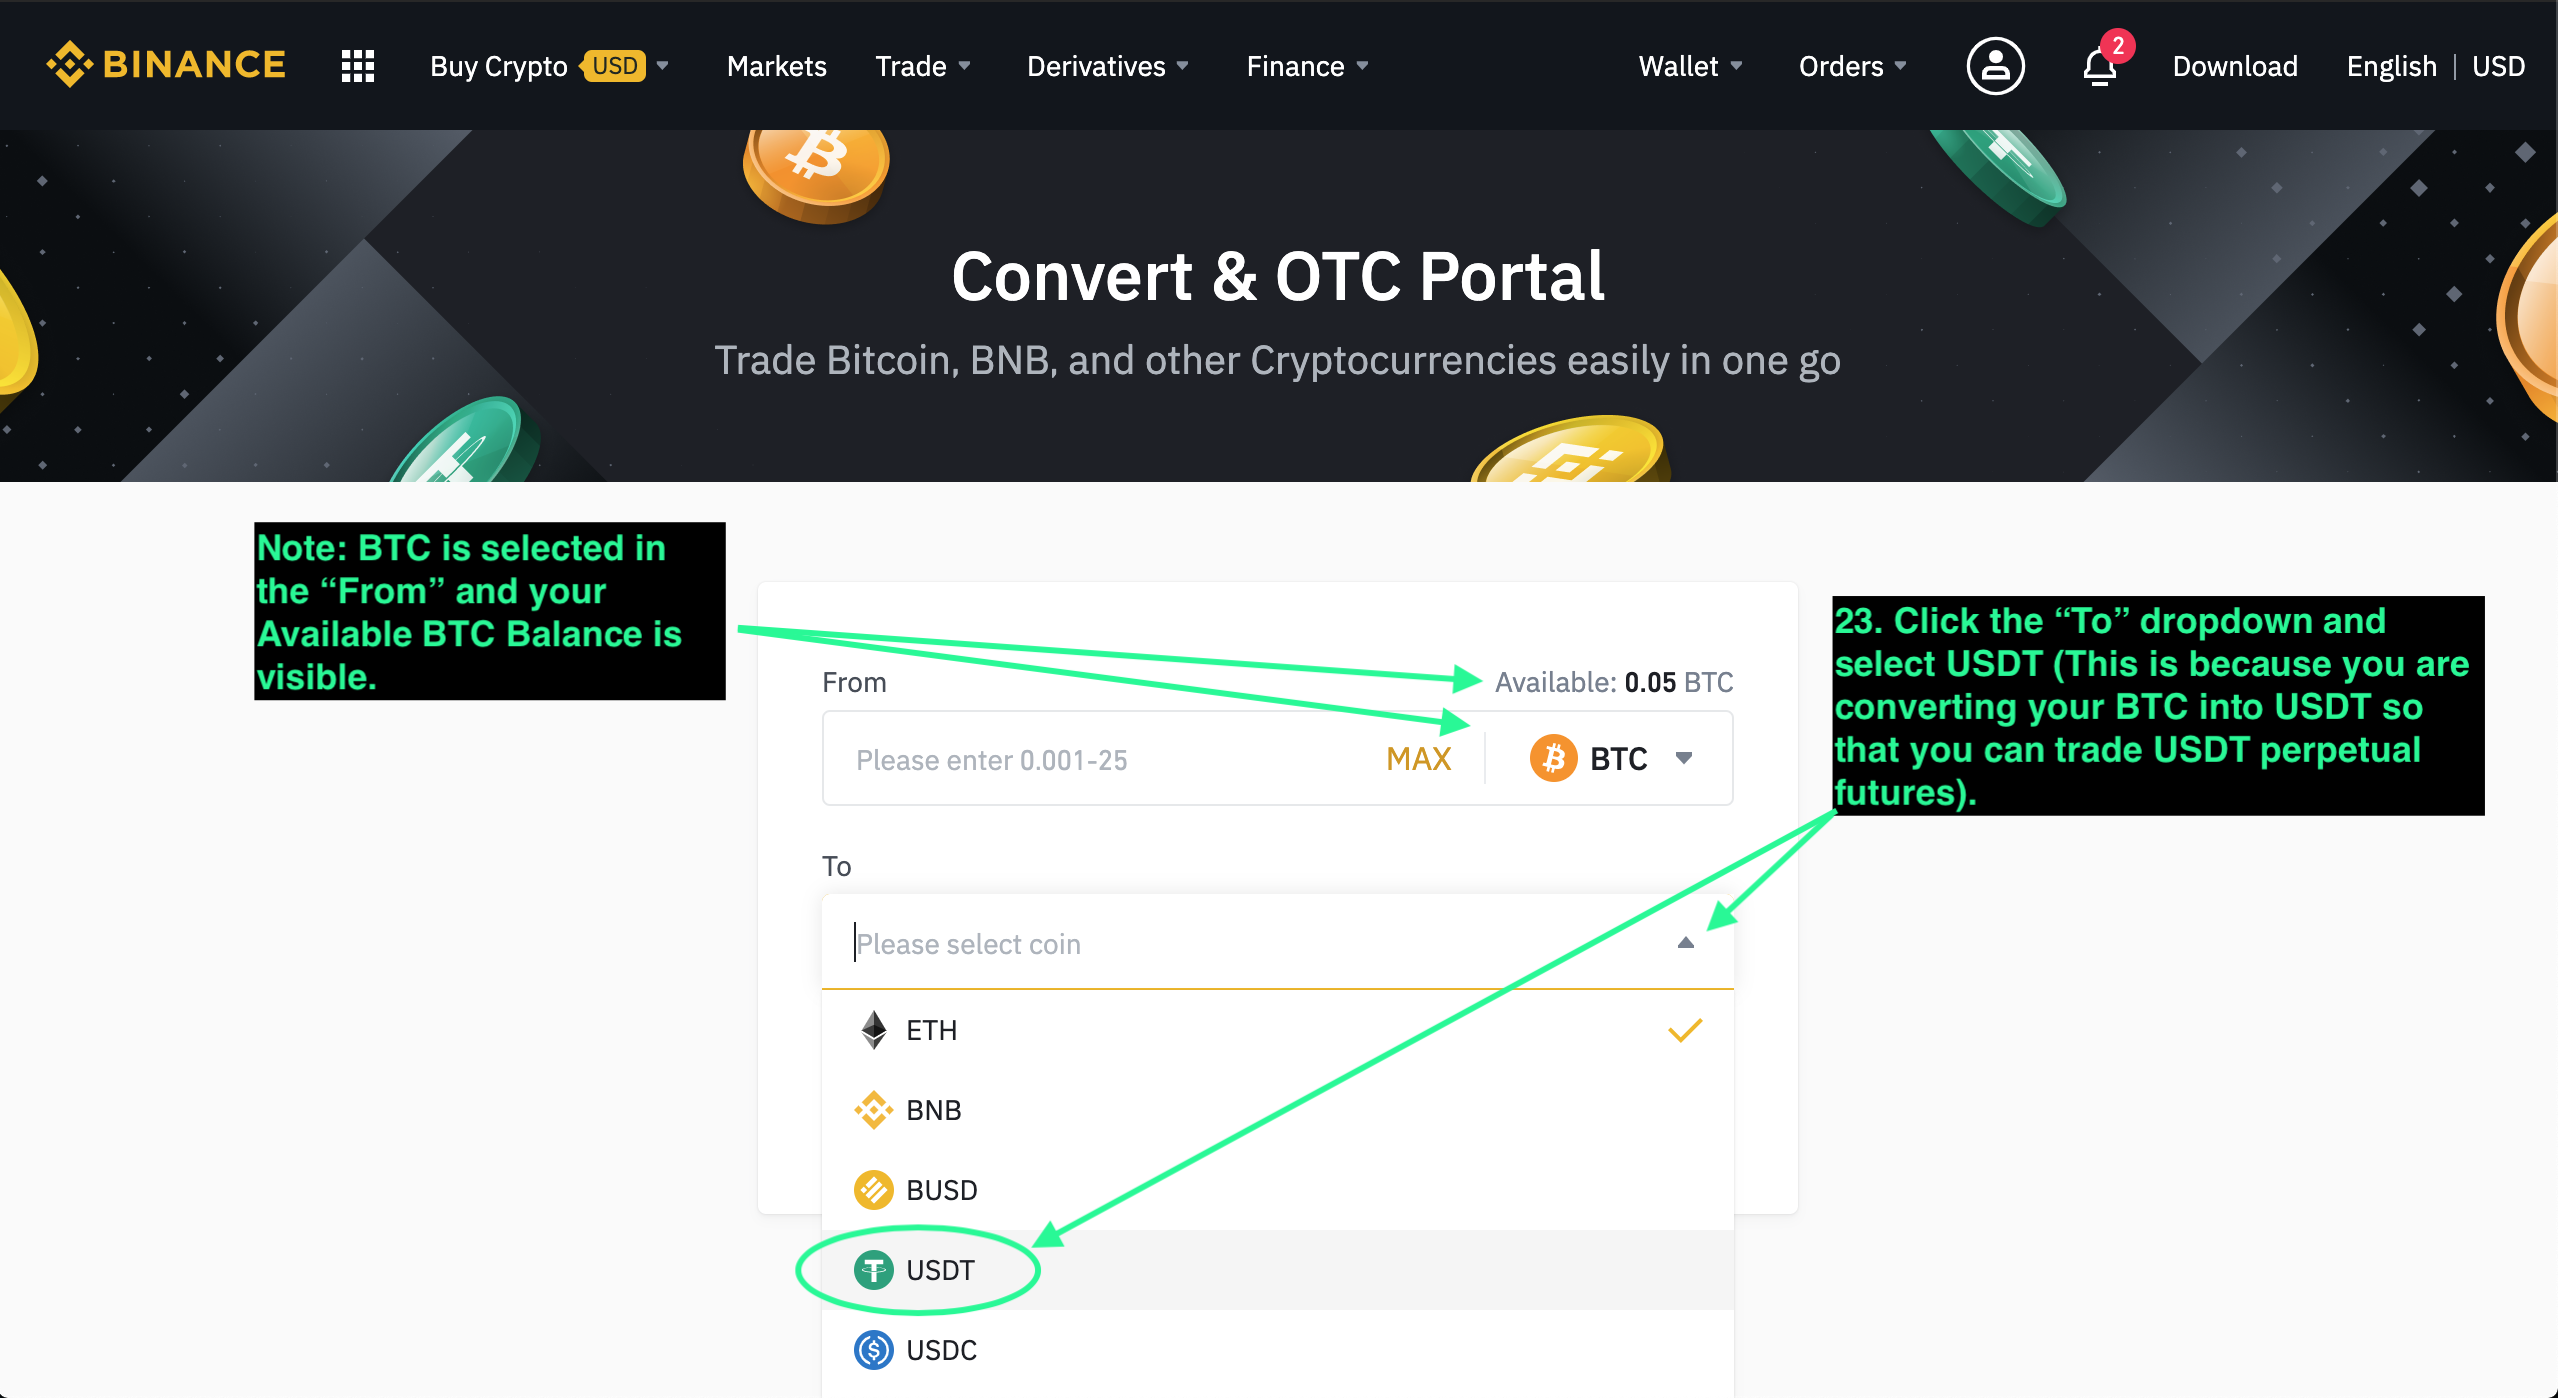
Convert BTC to USDT
- Click Trade at the top of Binance.
- Select Convert.
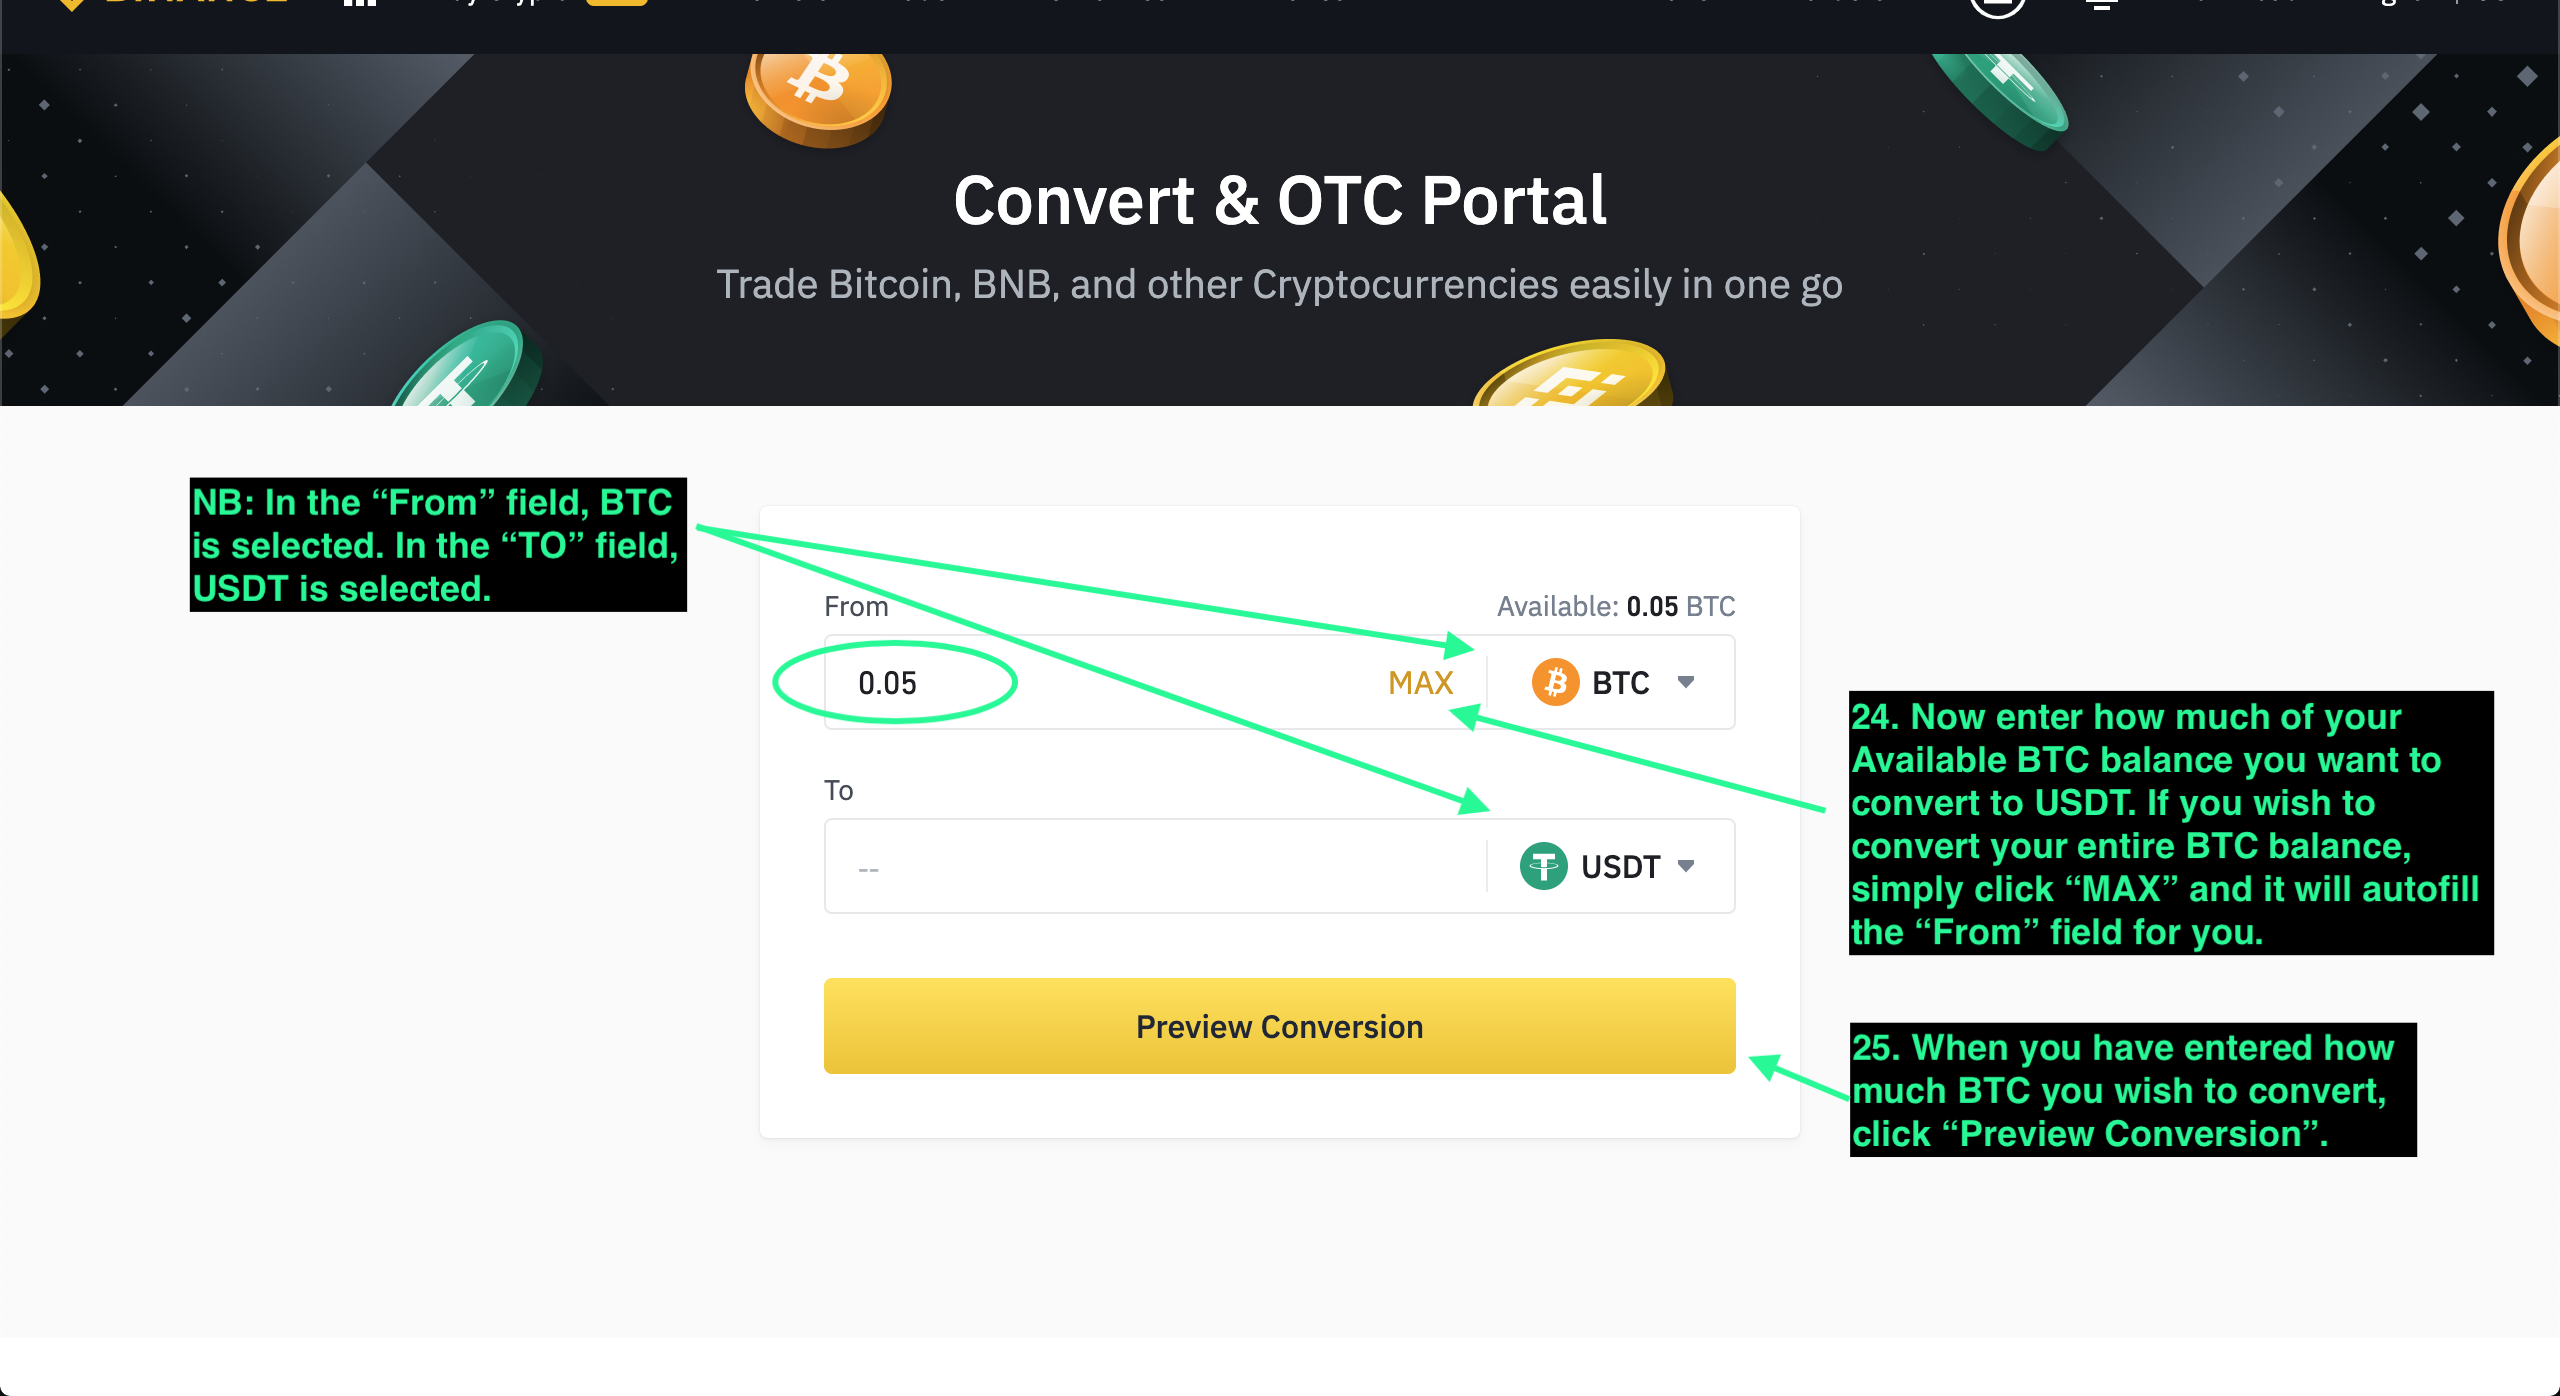
- In the From field, choose BTC.
- In the To field, choose USDT.
- Enter the amount of BTC to convert, or click MAX.
- Click Preview Conversion.
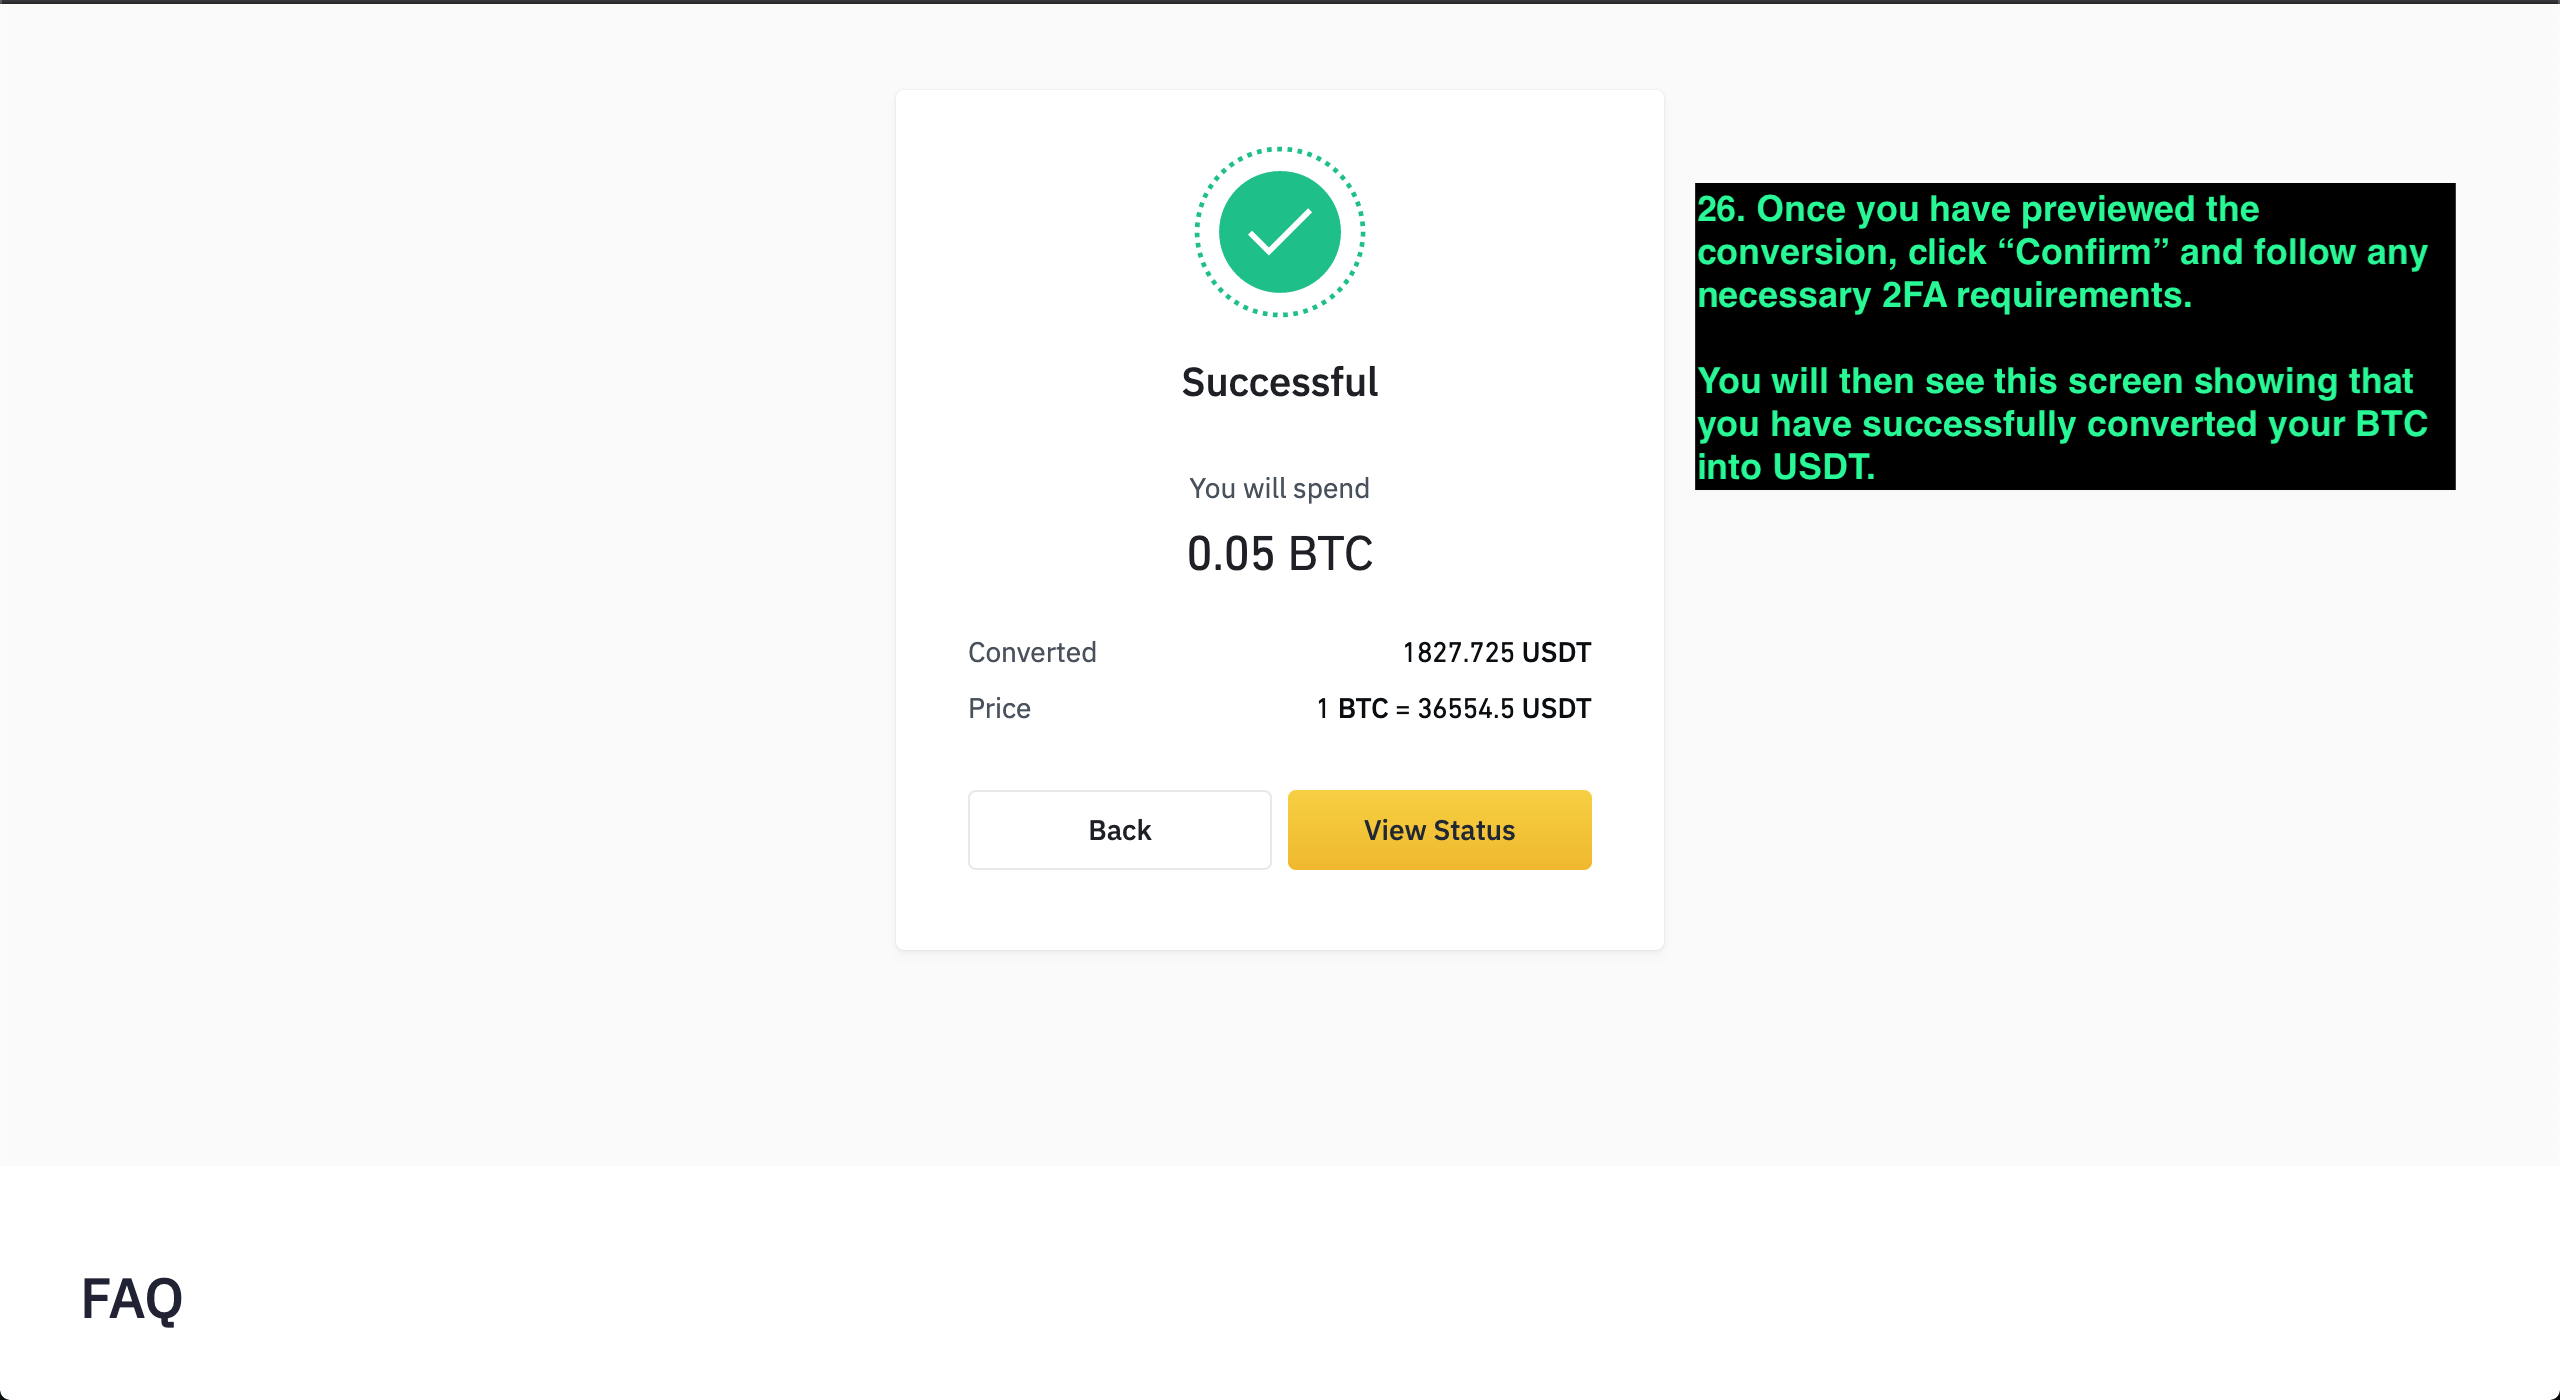
- Review the conversion details and click Confirm.
Many AstraBit strategies use USDT, so this conversion is required before futures trading. Review all conversion details before confirming.
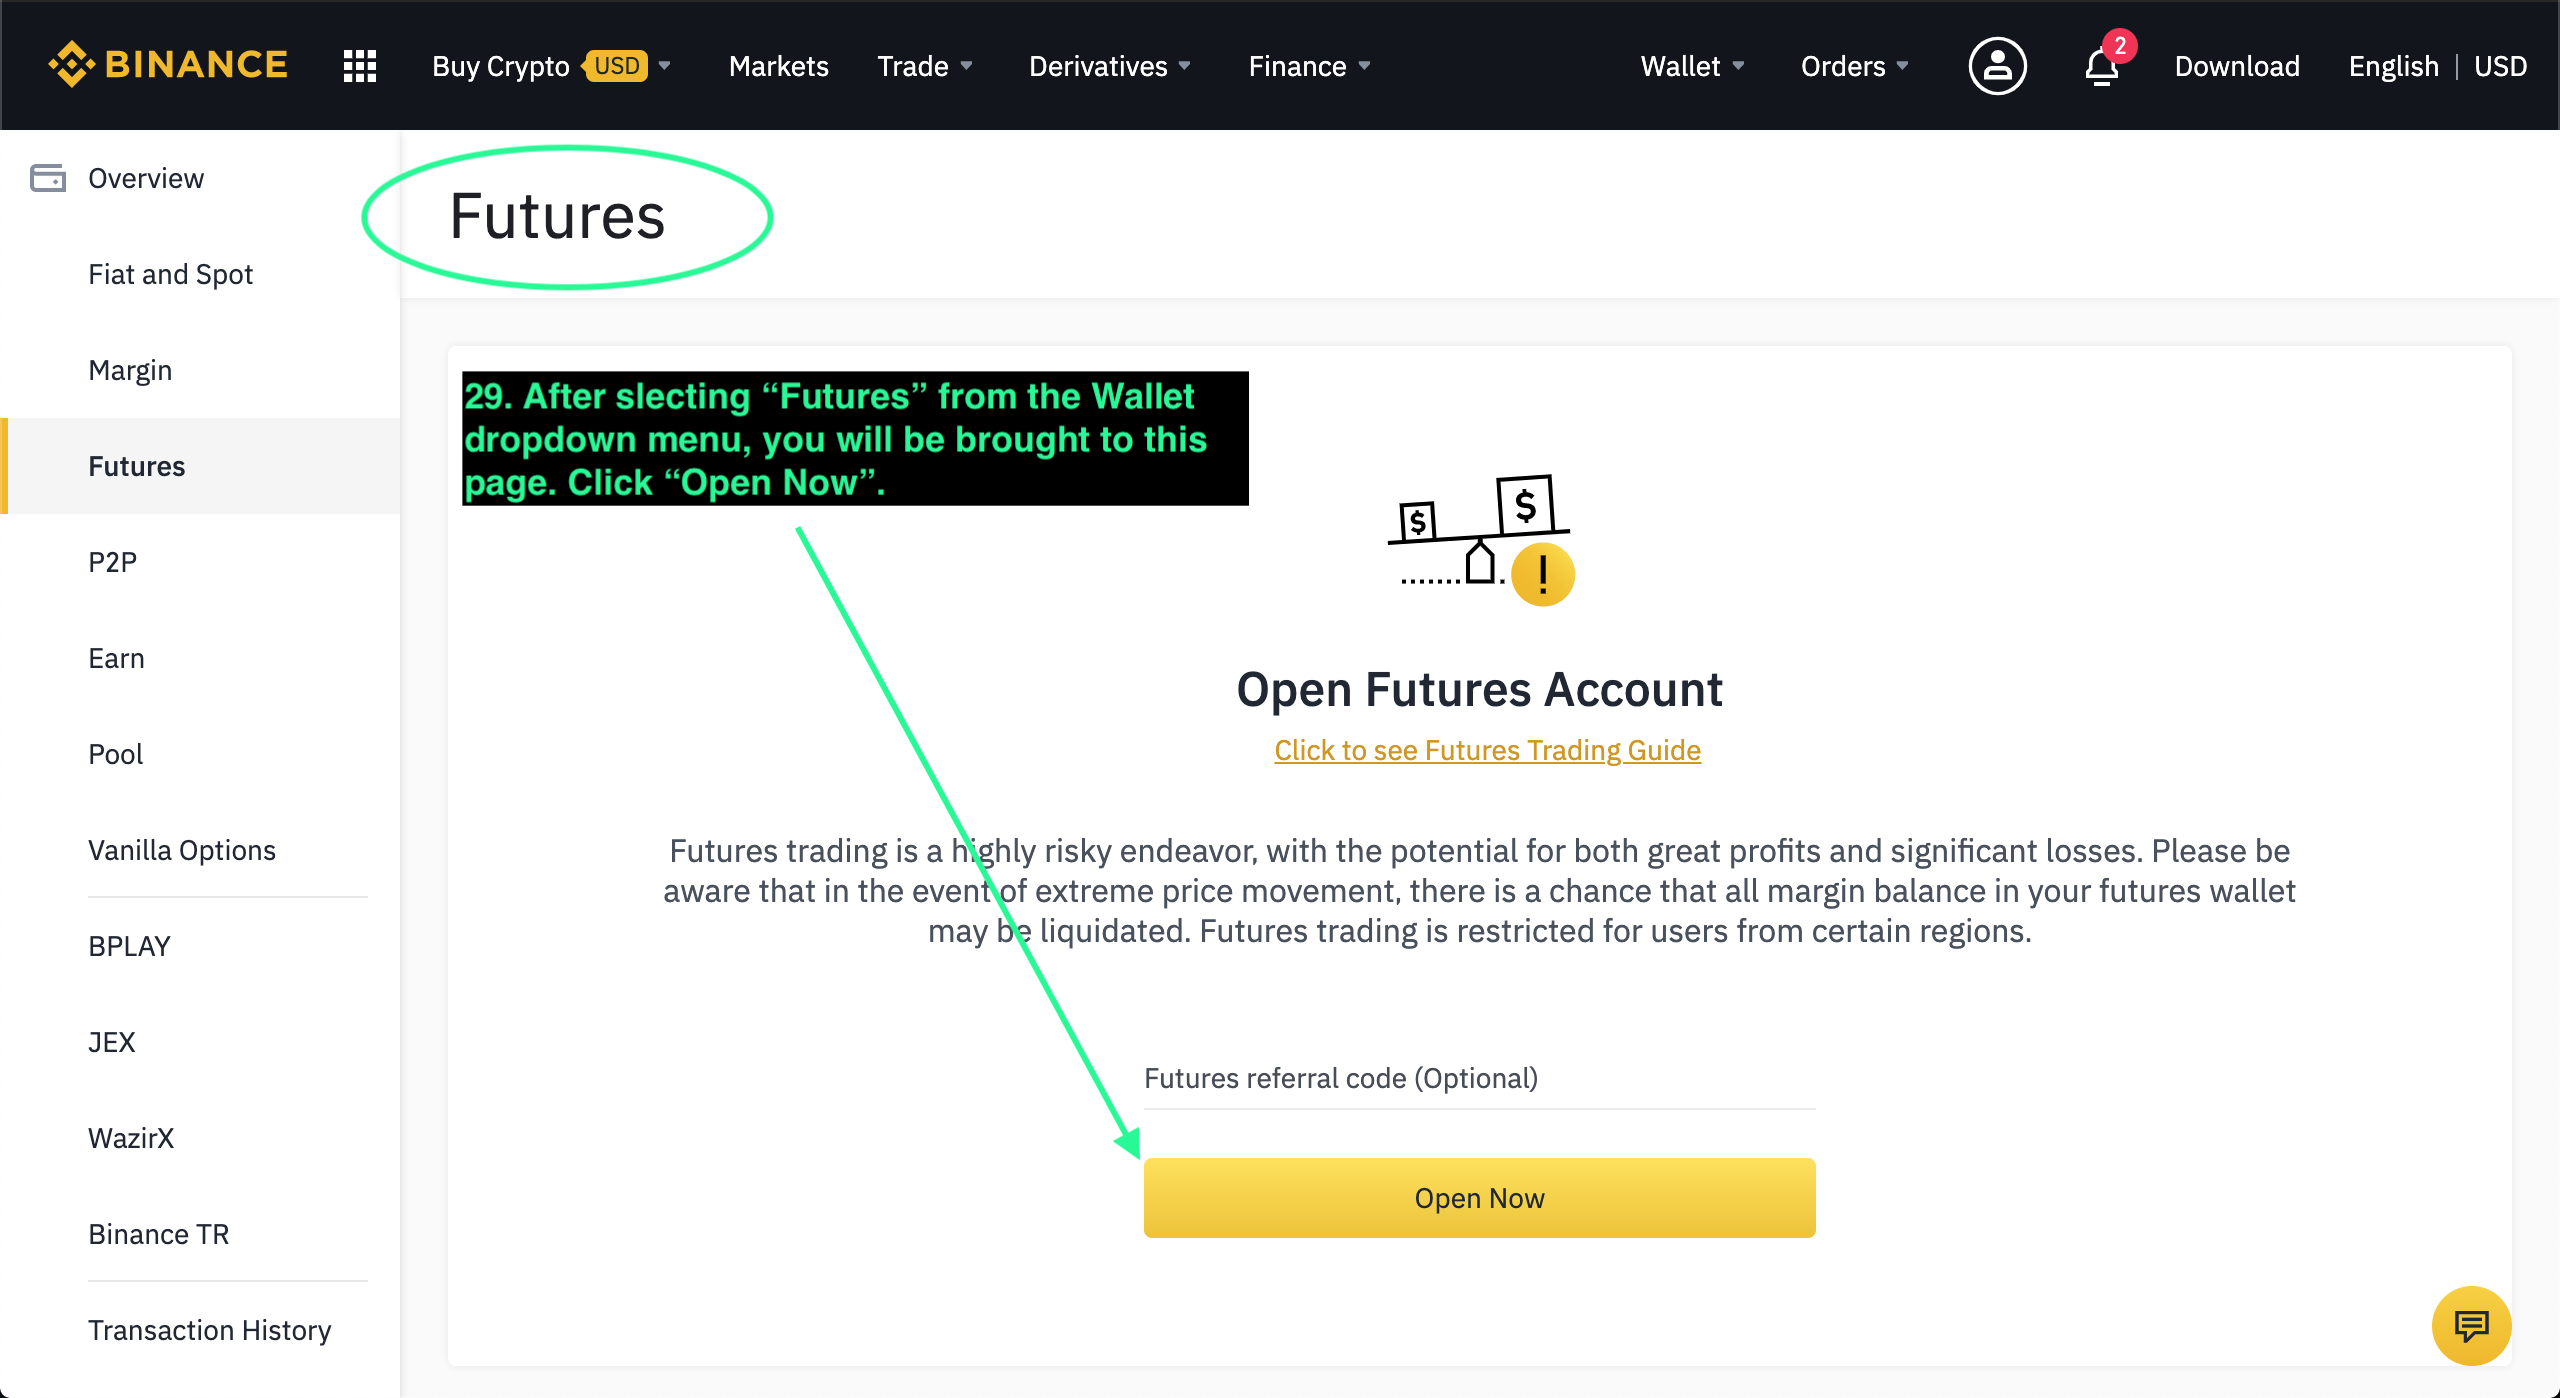
Open Your Binance Futures Wallet
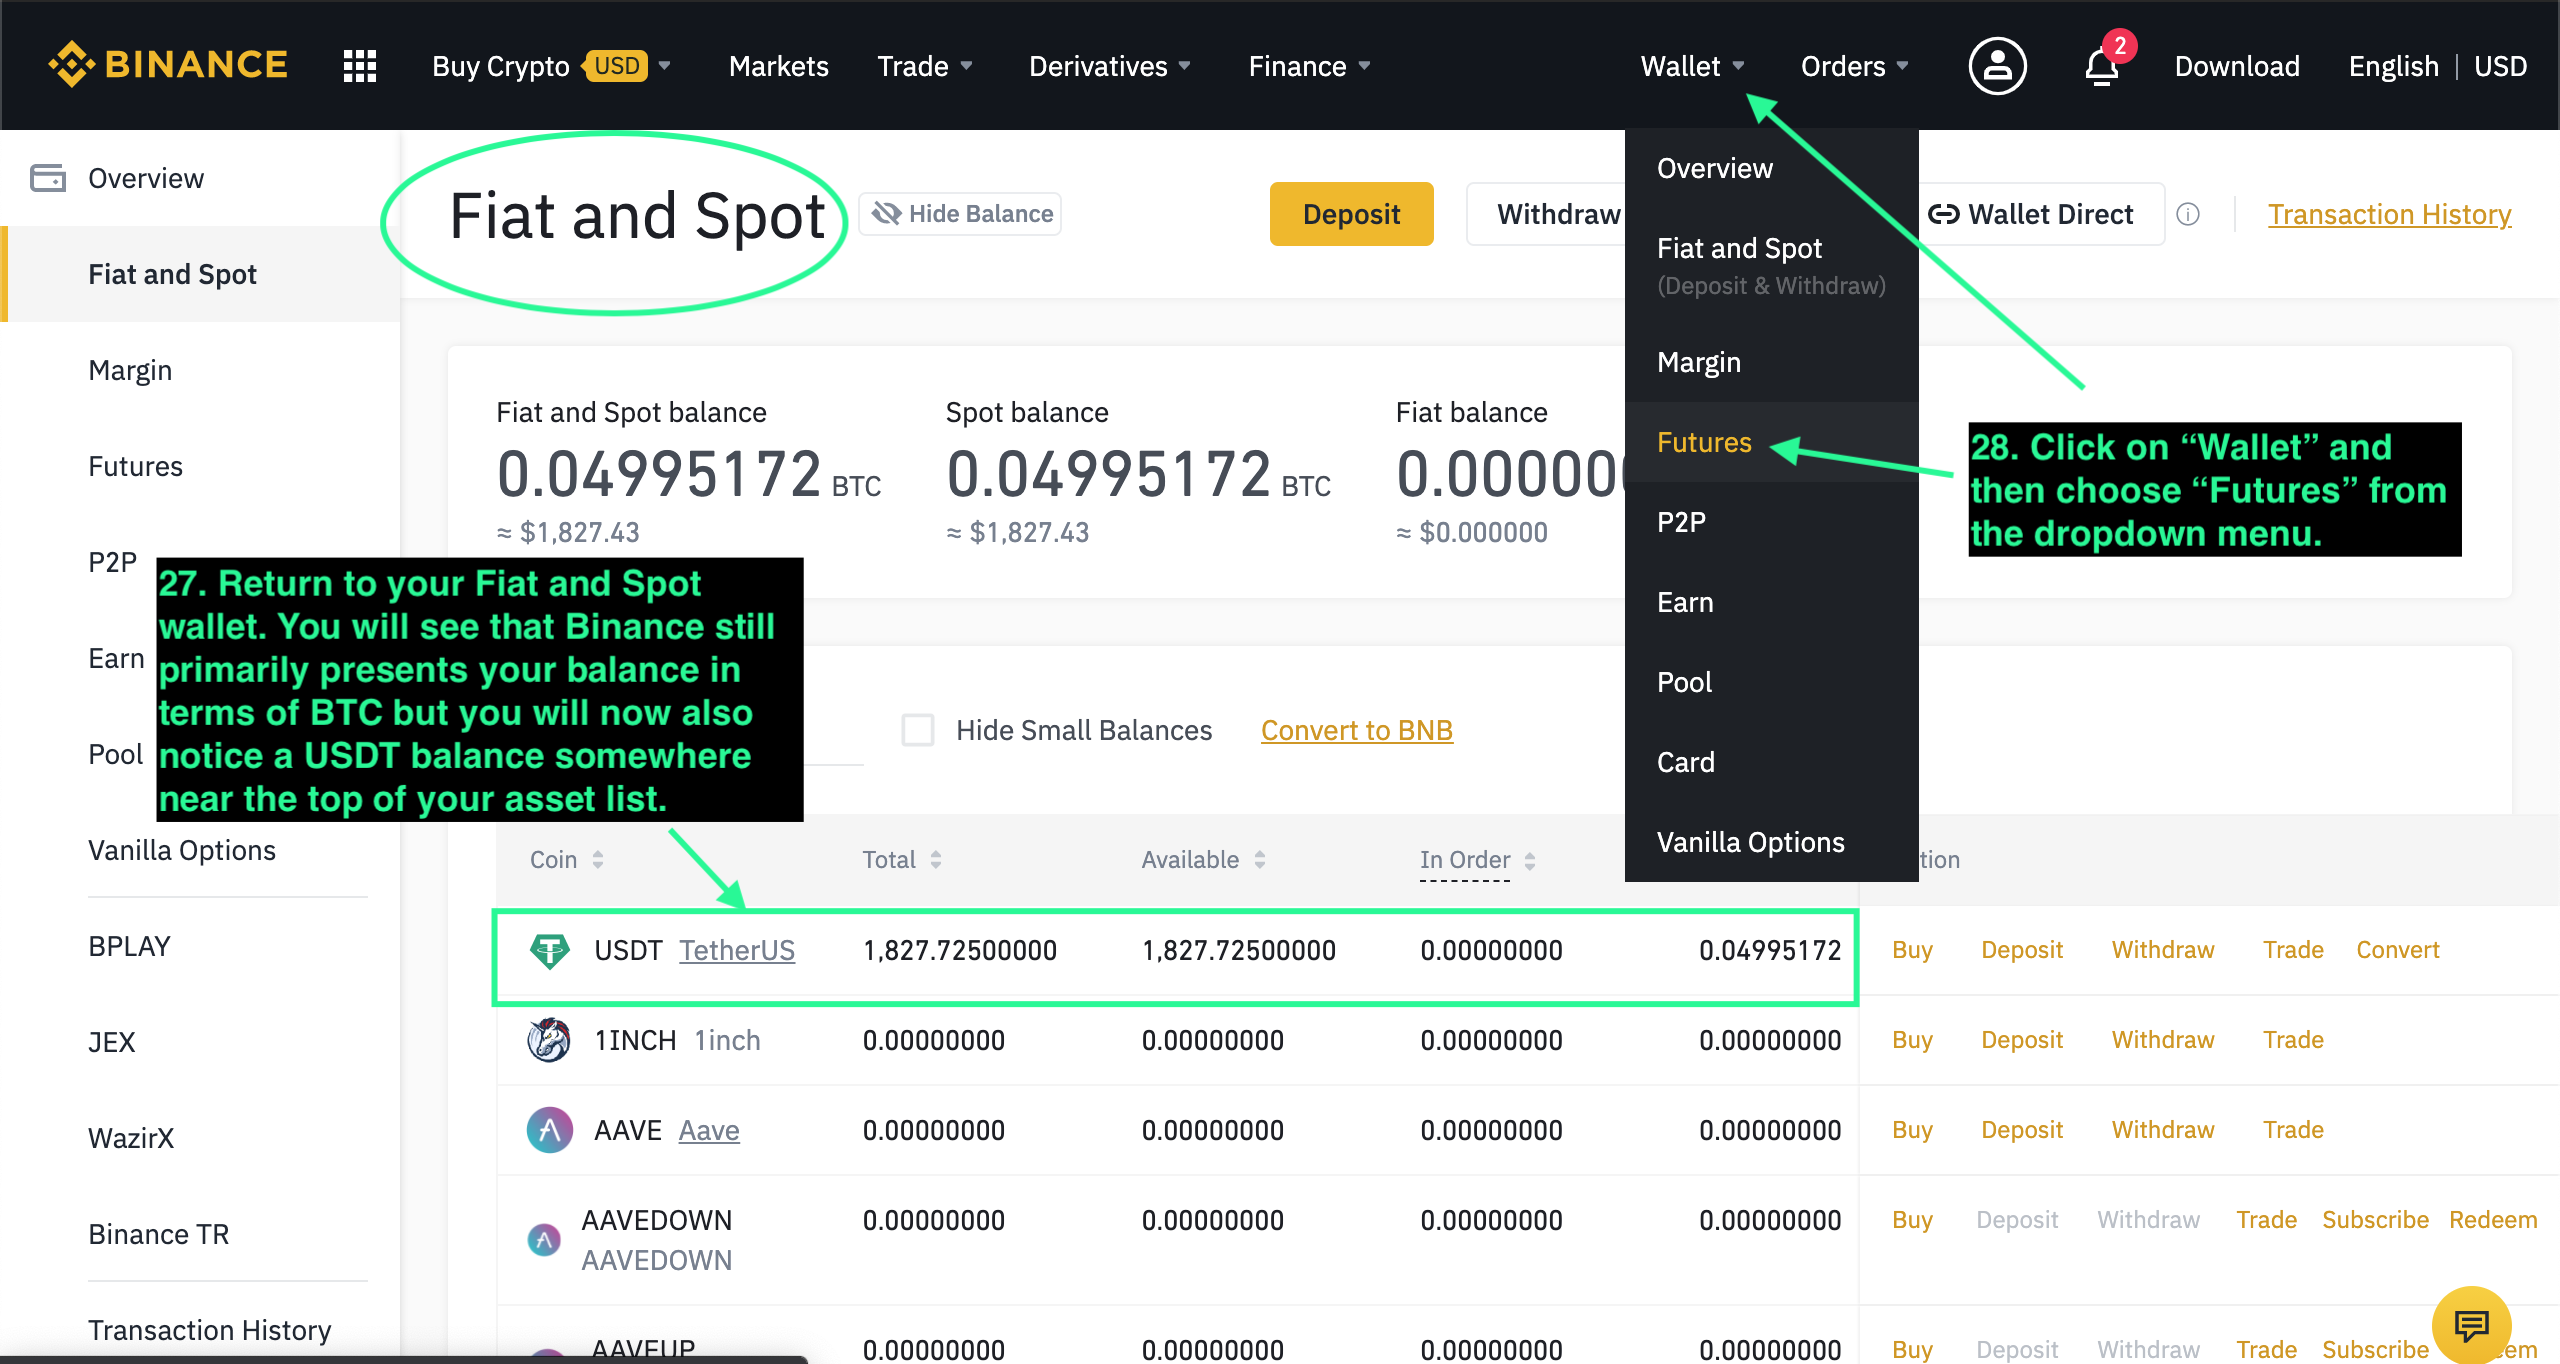
- Return to Wallet.
- Select Futures.
- If prompted, click Open Now to activate your Futures account.
Futures trading involves significant risk and may not be available in all regions.
Transfer USDT to Binance Futures
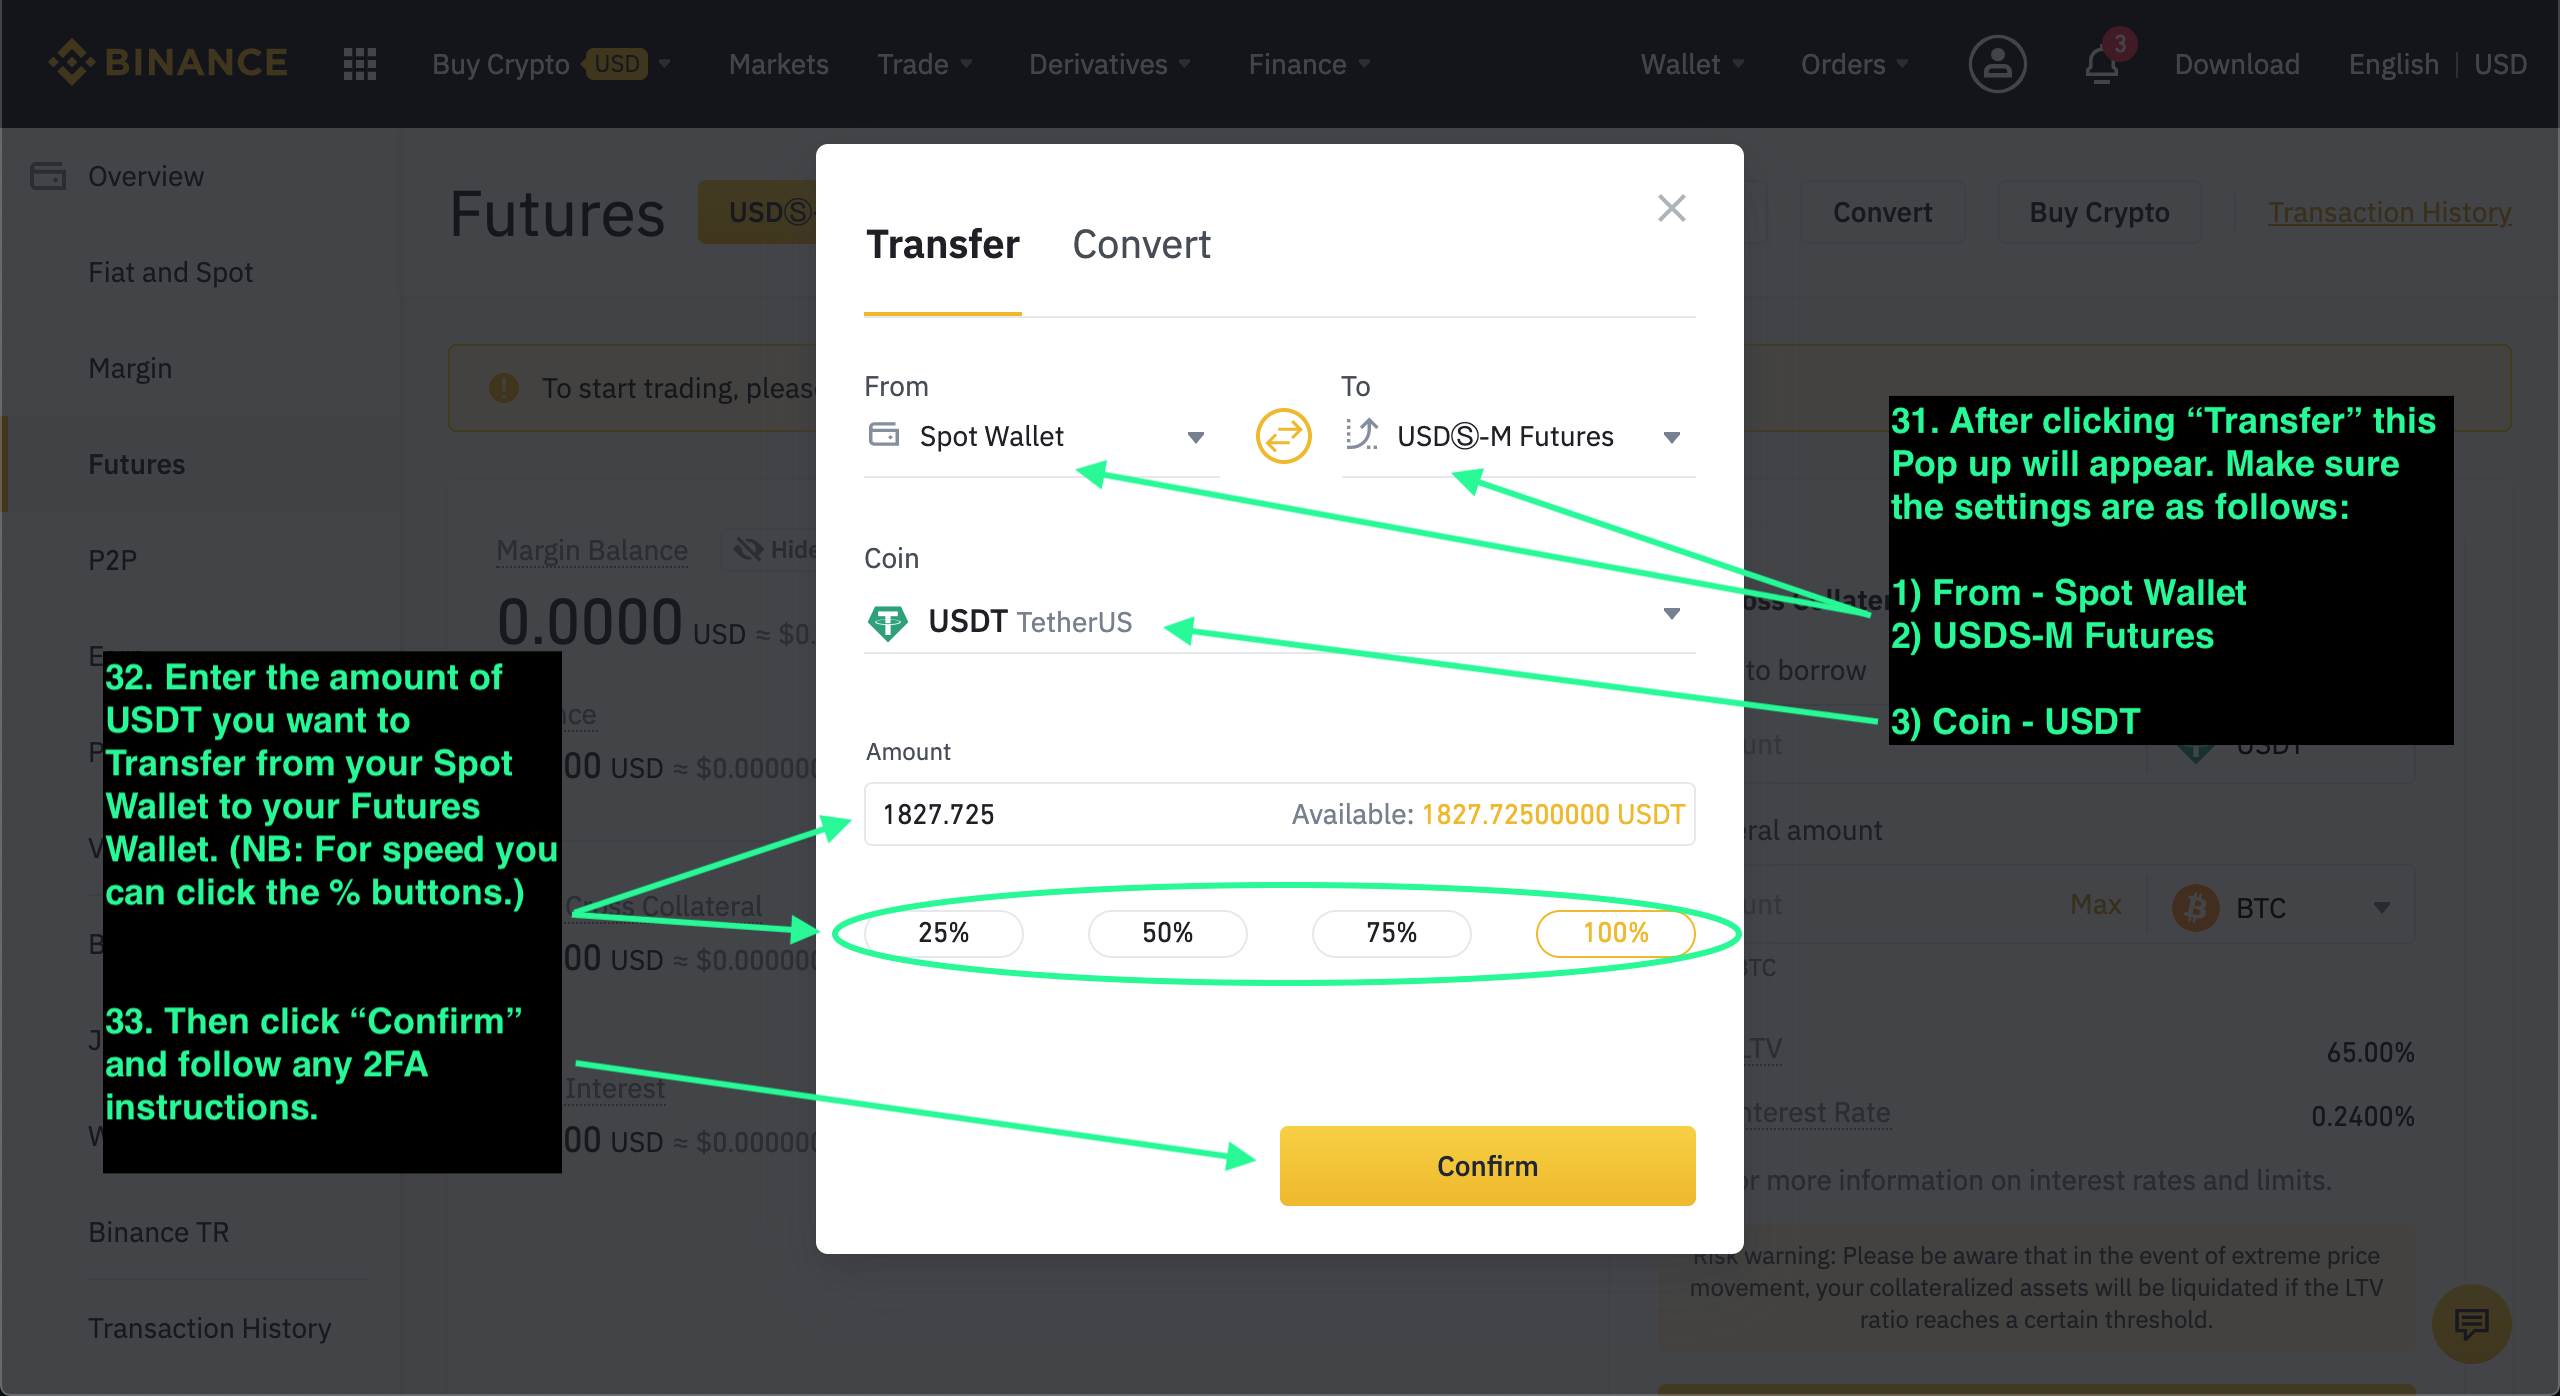
- In your Futures wallet, click Transfer.
- Set From to Spot Wallet.
- Set To to USDⓈ-M Futures.
- Set Coin to USDT.
- Enter the amount you want to transfer.
- Click Confirm.
Your Futures wallet shows 0.00 until funds are transferred from Spot. The percentage buttons make transfer selection faster.
Part 2 · Create Your Binance API Key
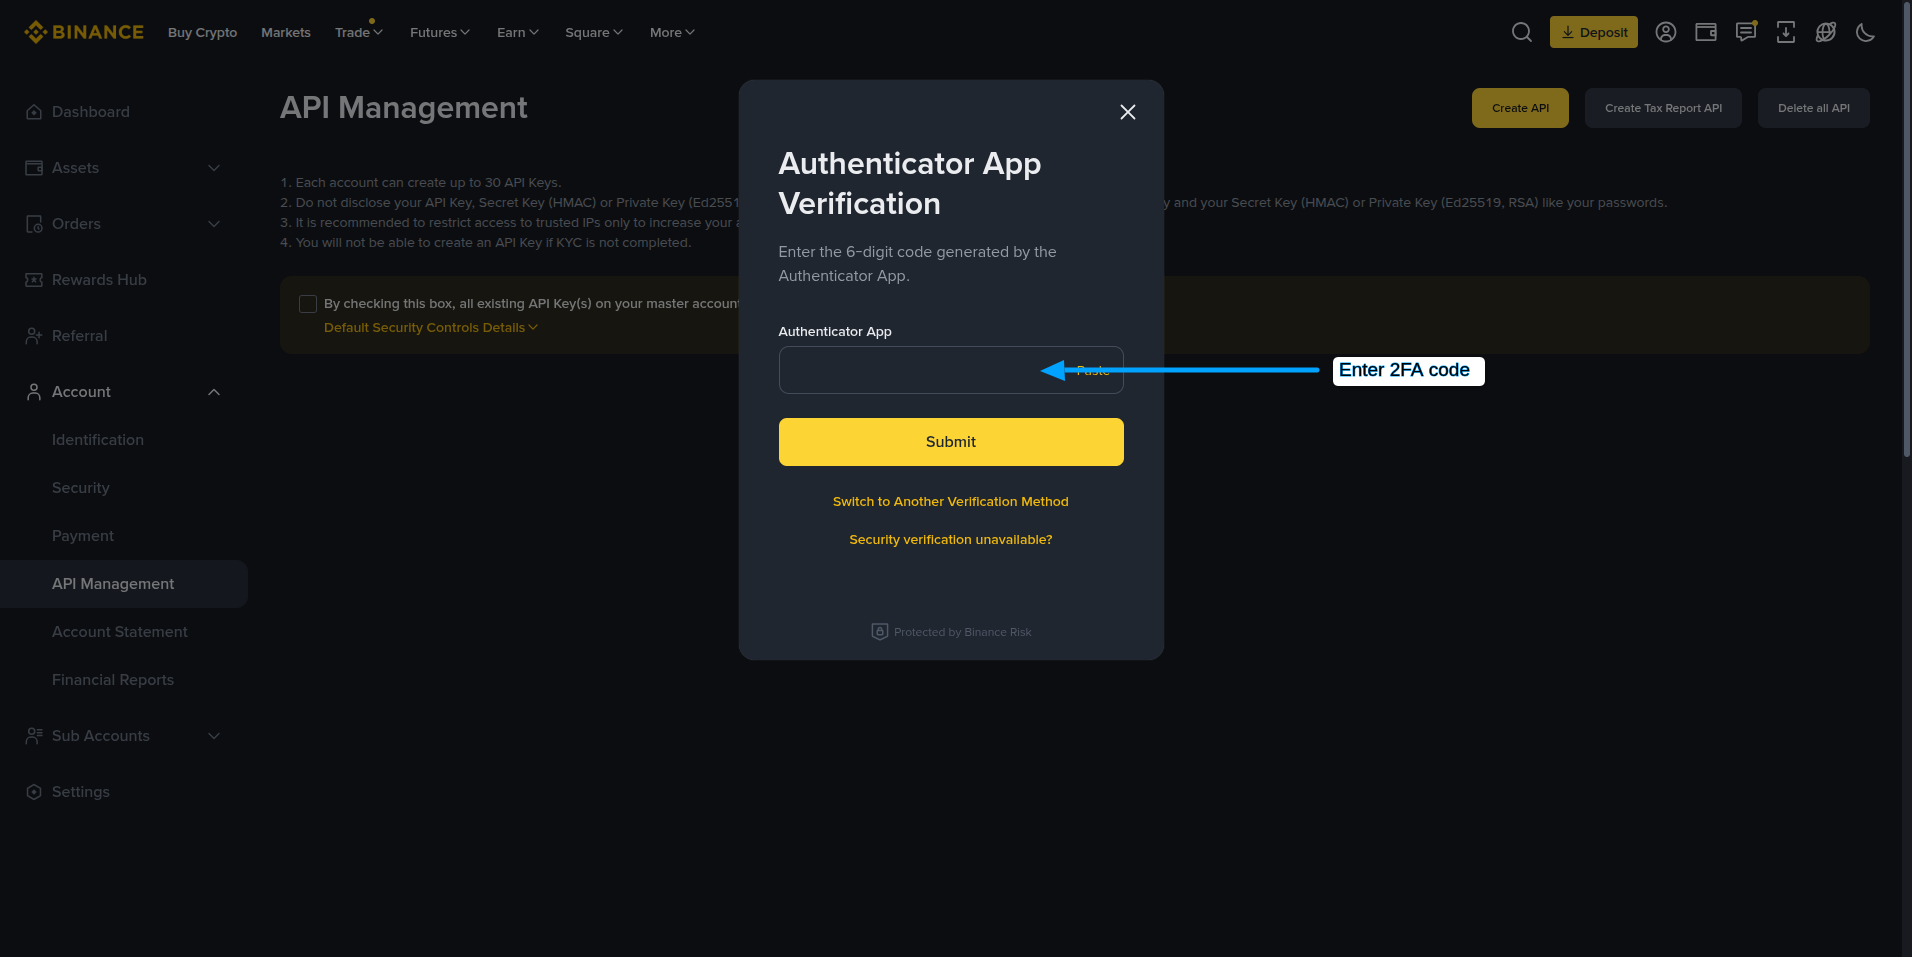
Create Your Binance API Key
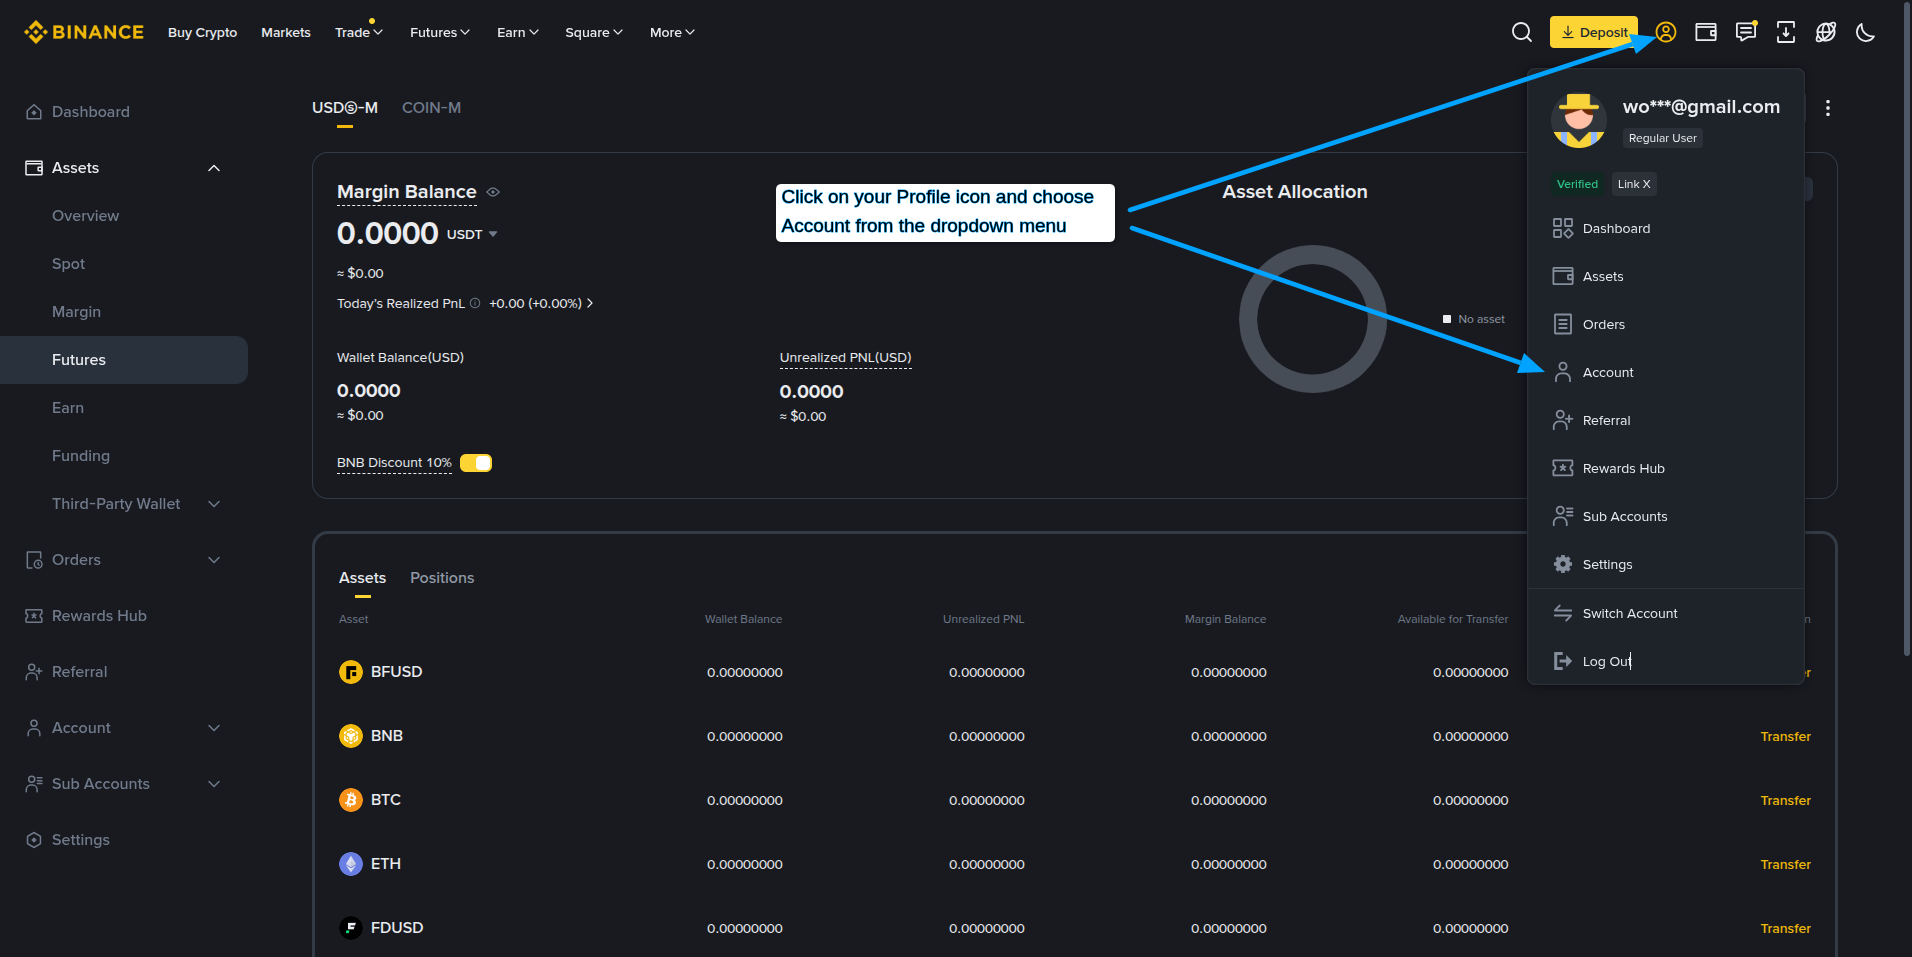
- Click your profile icon in Binance.
- Select Account.
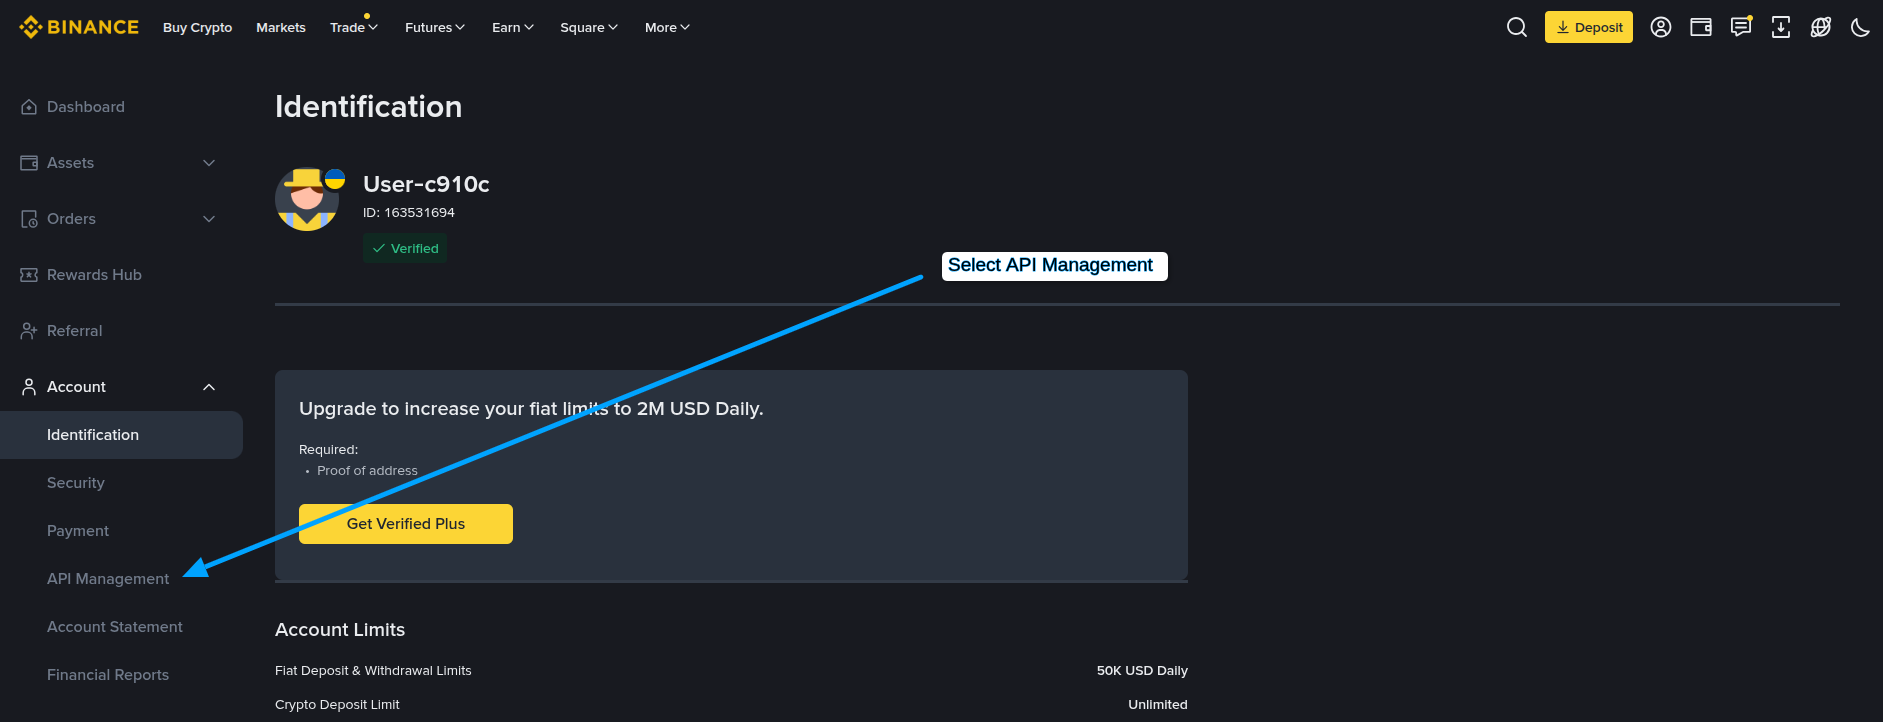
- Open API Management.
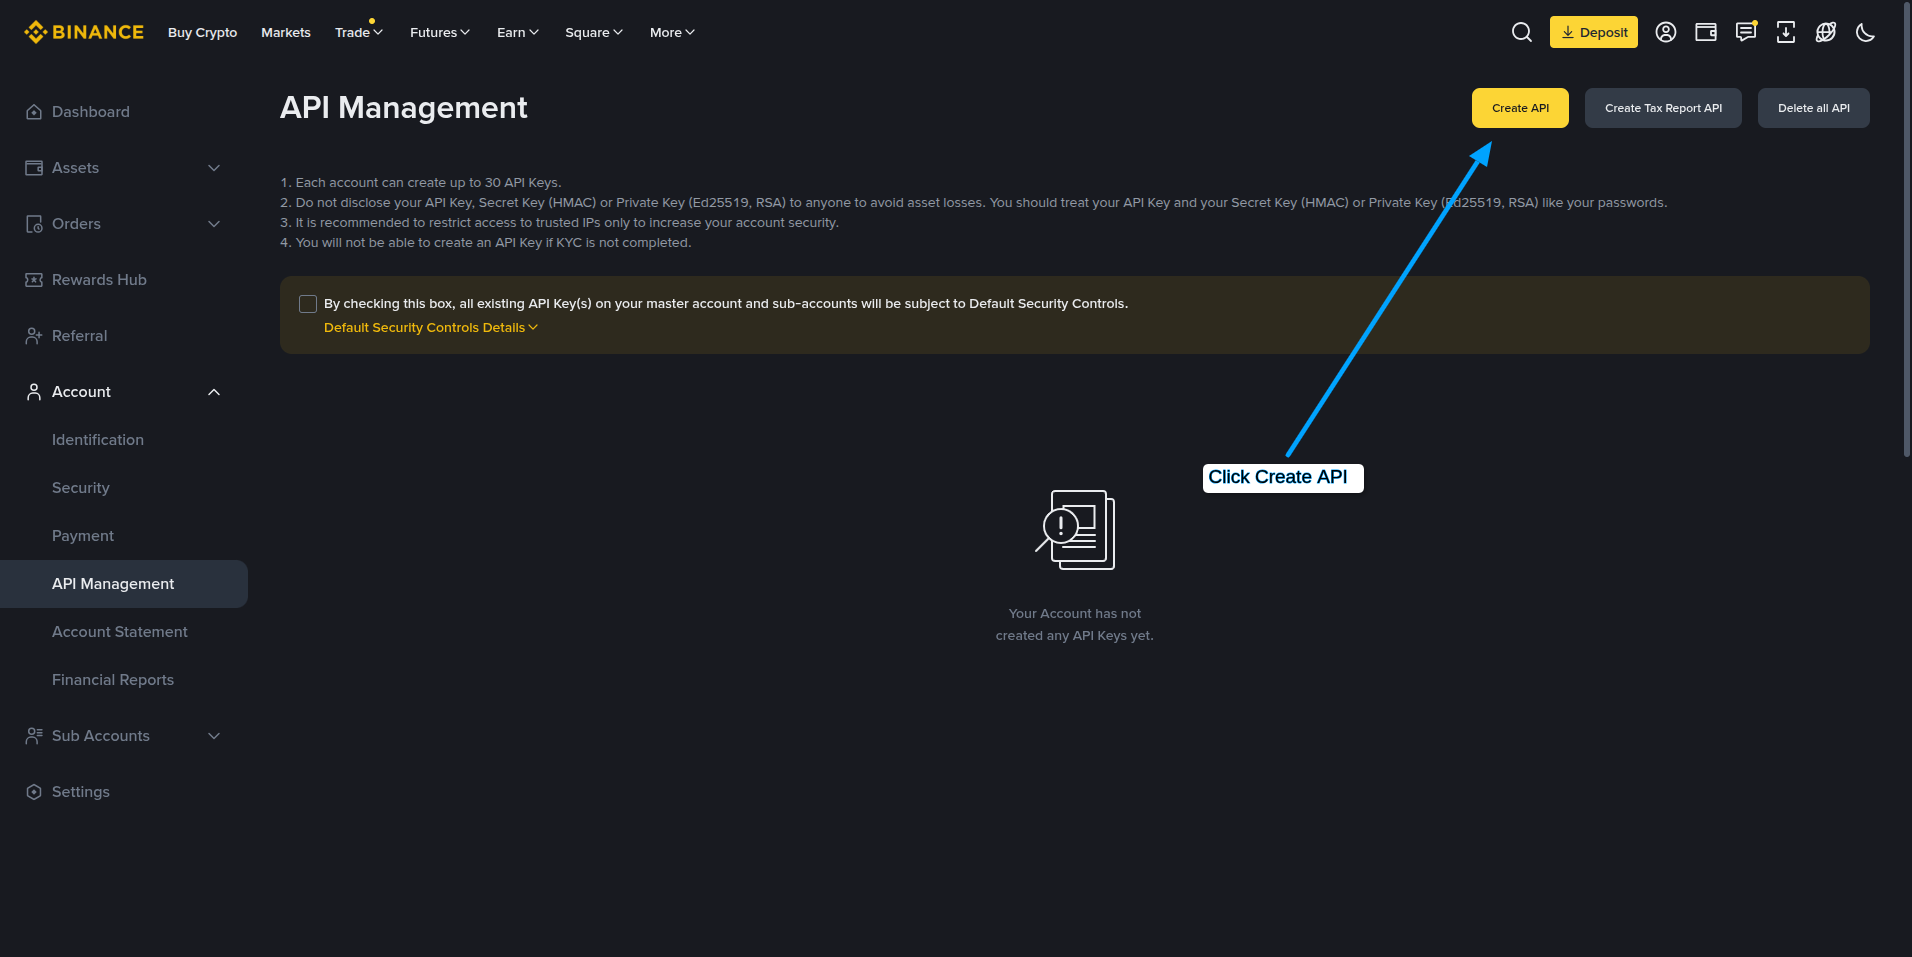
- Click Create API.
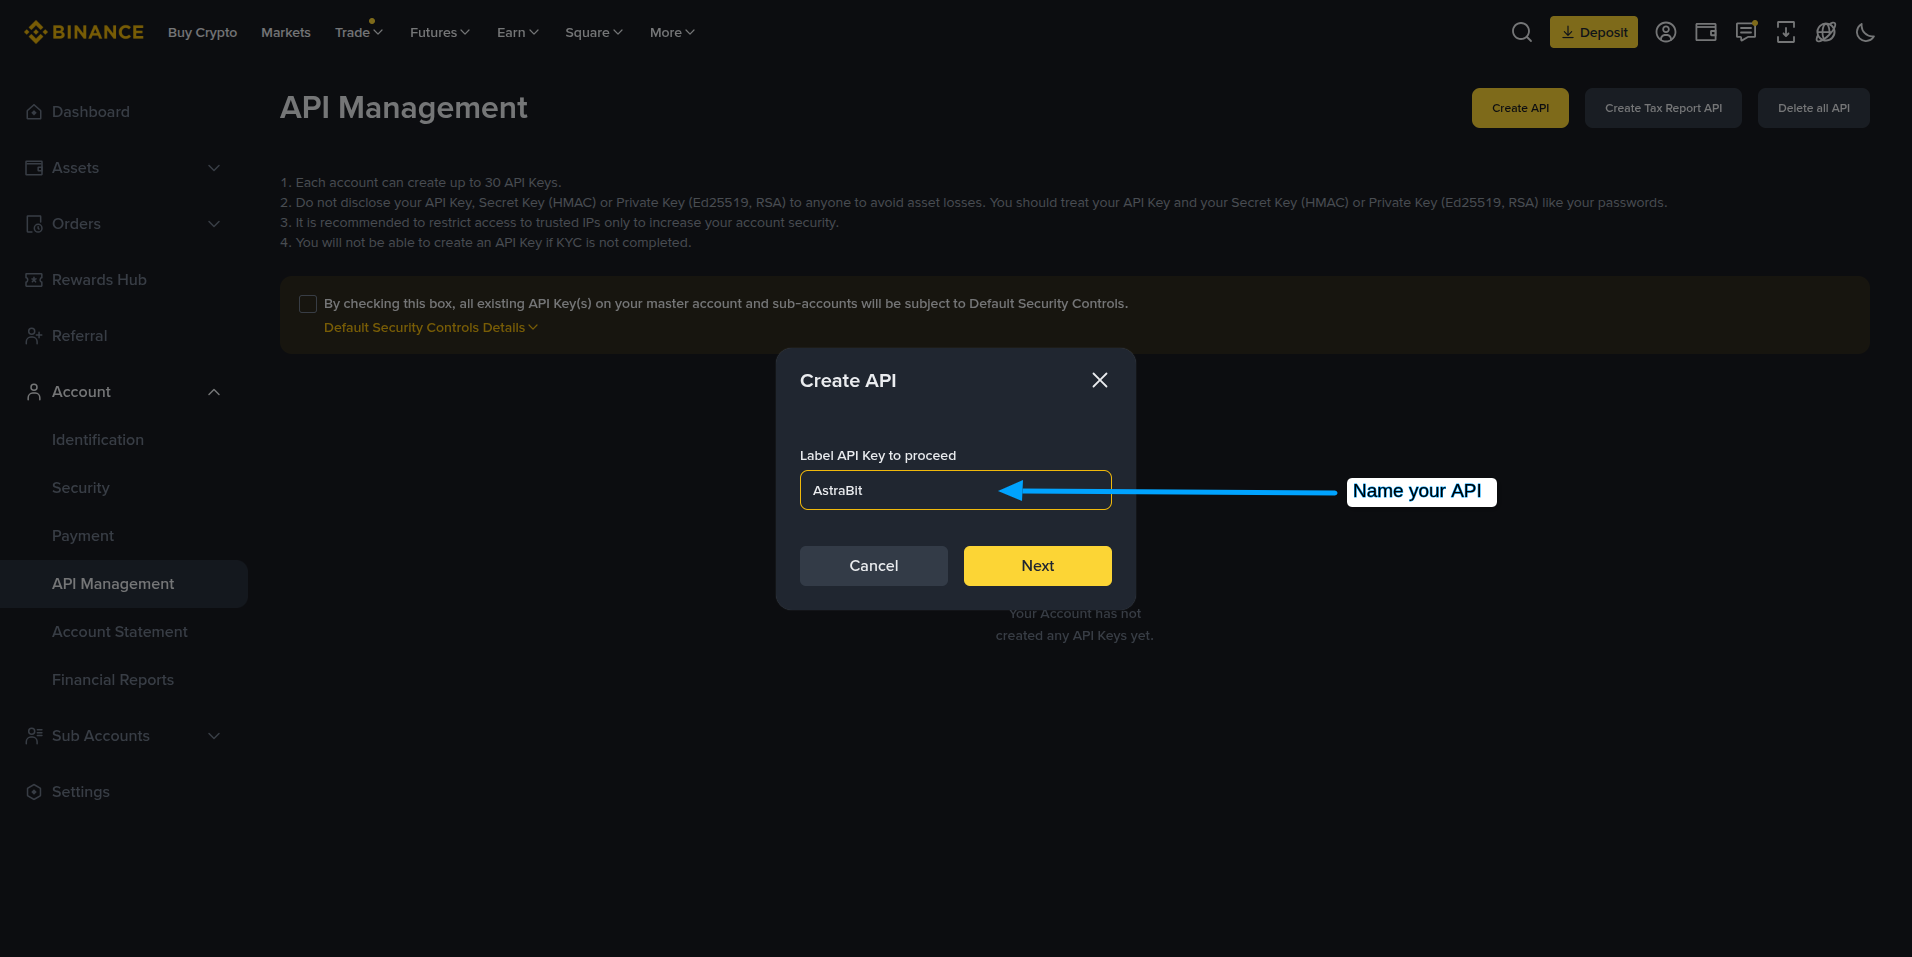
- Enter a label for your API key.
- Complete 2FA verification.
Important: keep your API Key and Secret Key private. You may only see the Secret Key once.
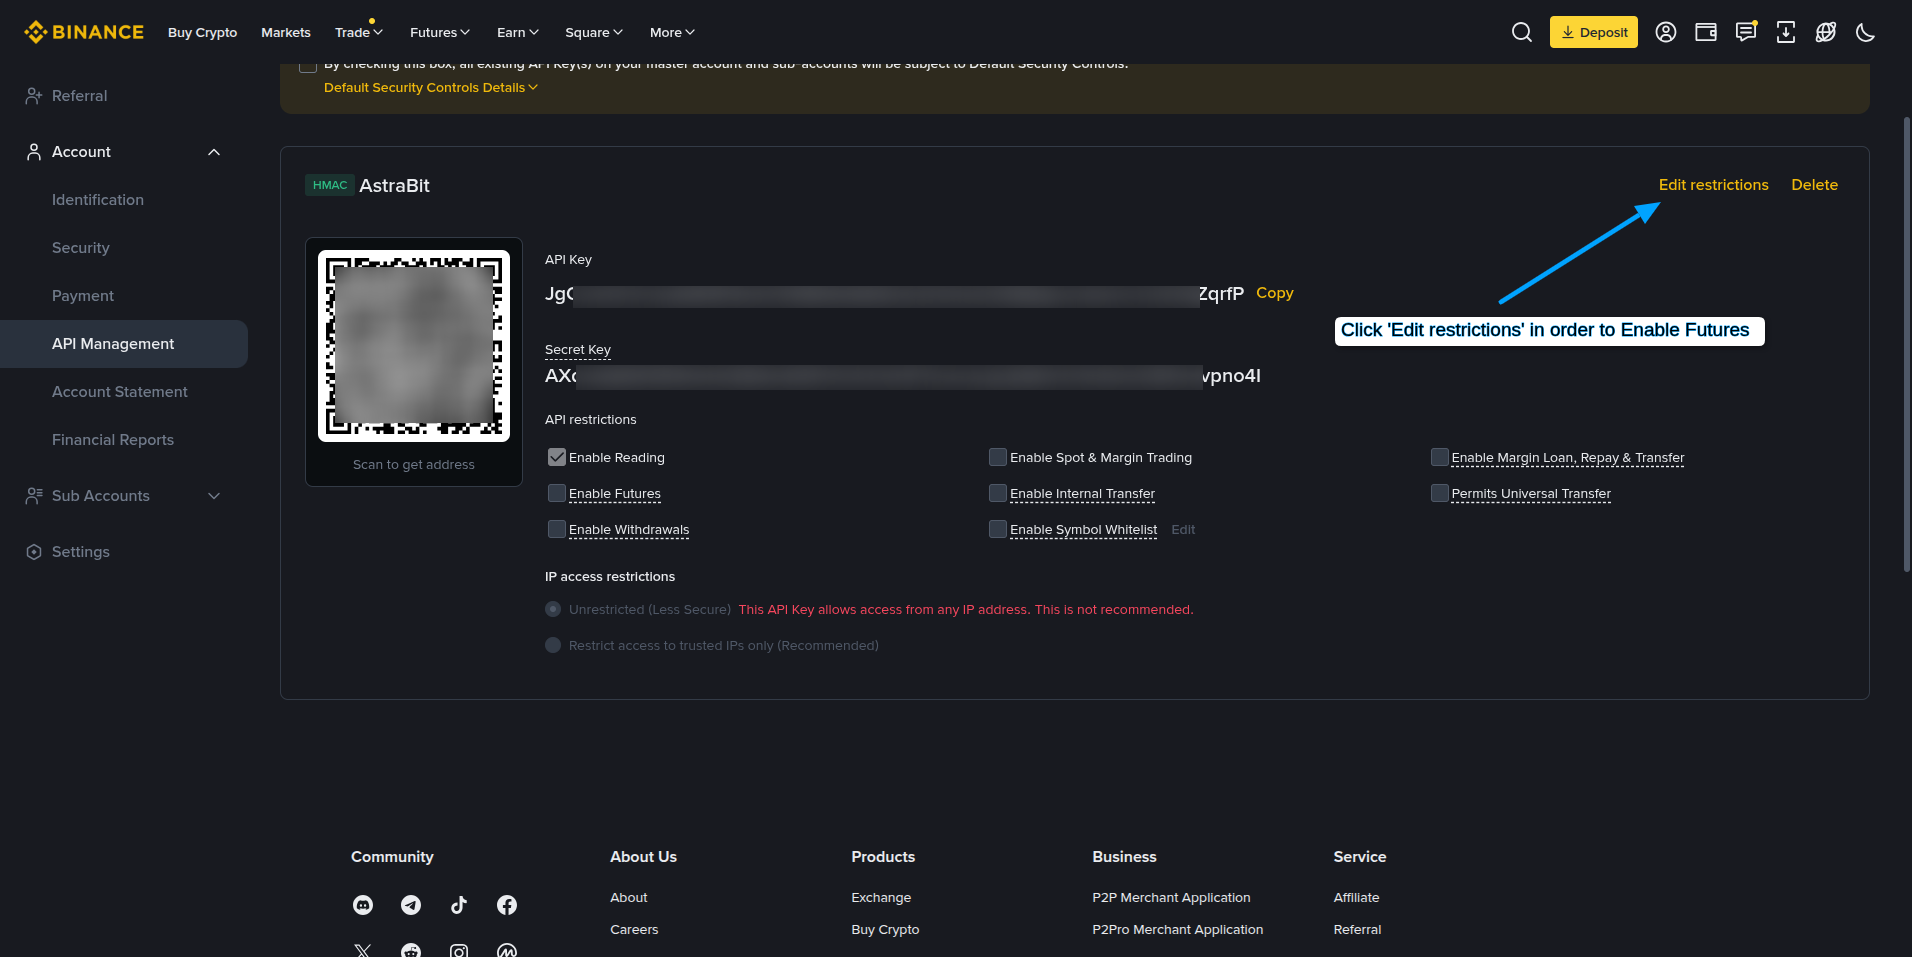
Configure API Permissions
- Click Edit restrictions on the newly created API.
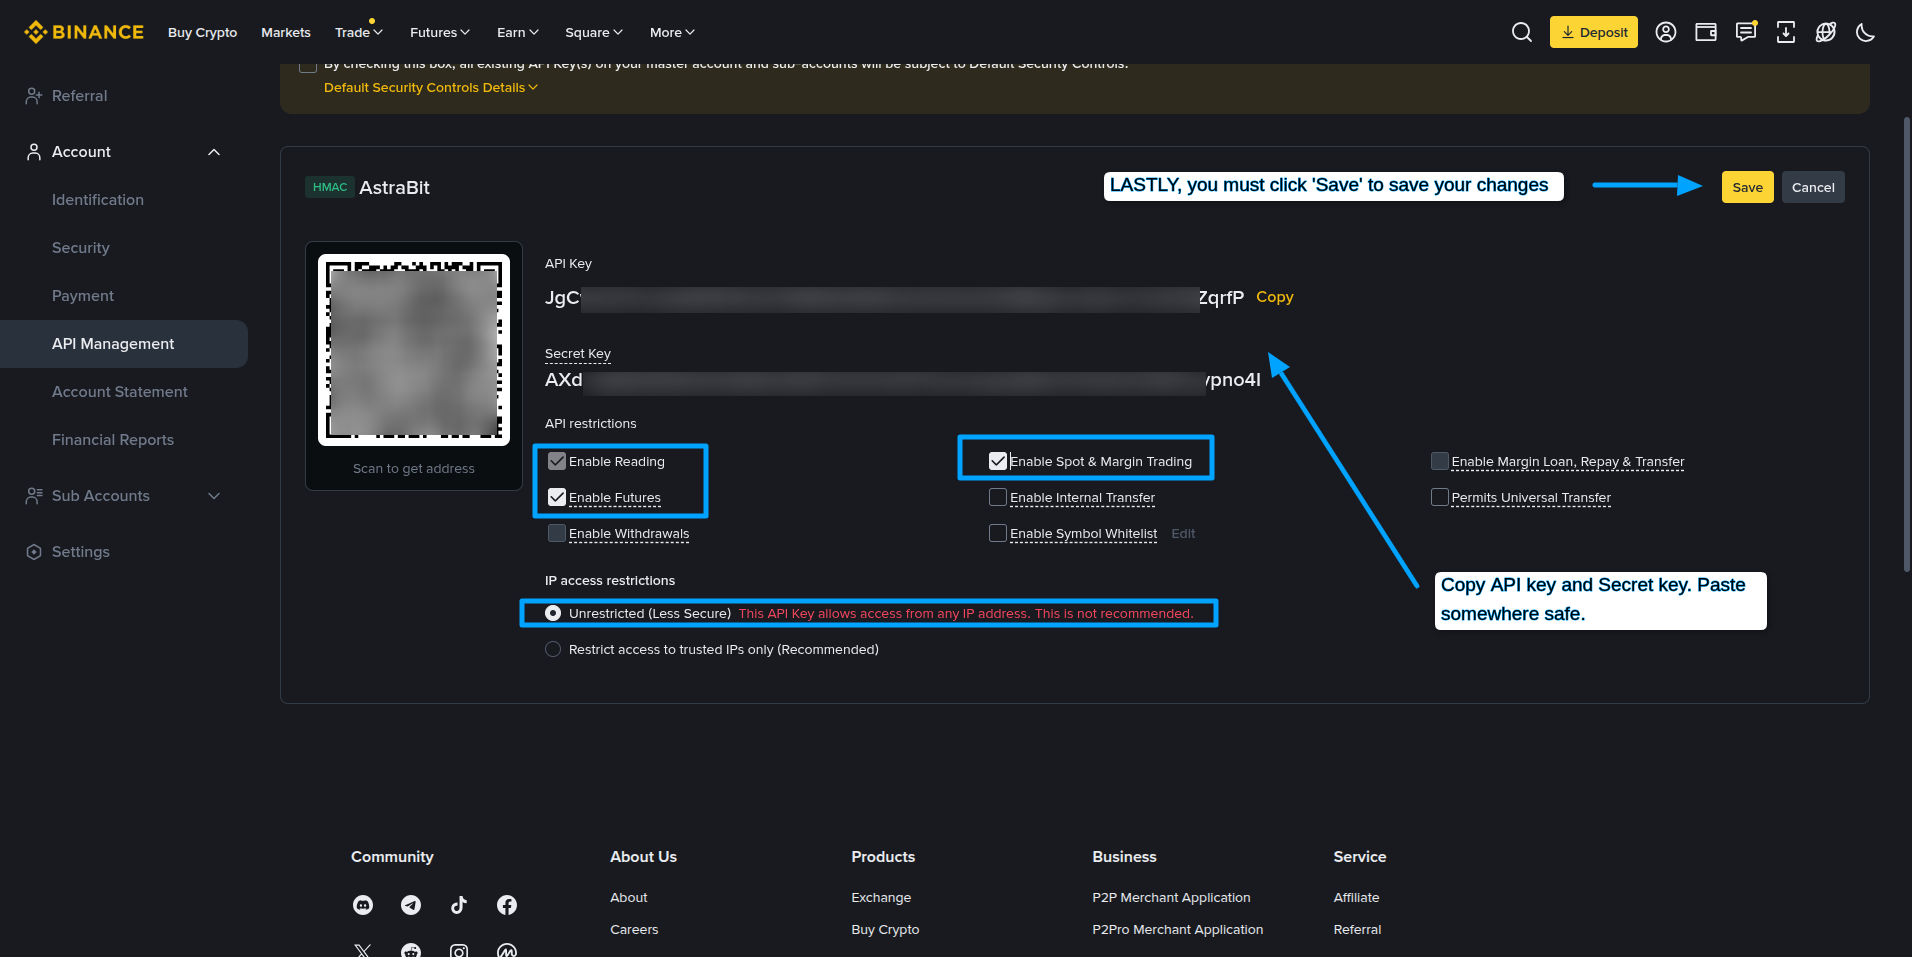
- Set permissions:
✓ Enable
- Reading
- Futures
- Spot & Margin Trading
✕ Leave Disabled
- Withdrawals
- Click Save.
- Copy and securely store your API Key and Secret Key.
Never enable withdrawal permissions for AstraBit API connections. IP whitelisting is recommended when available.
Part 3 · Connect Binance to AstraBit
Connect Binance in AstraBit
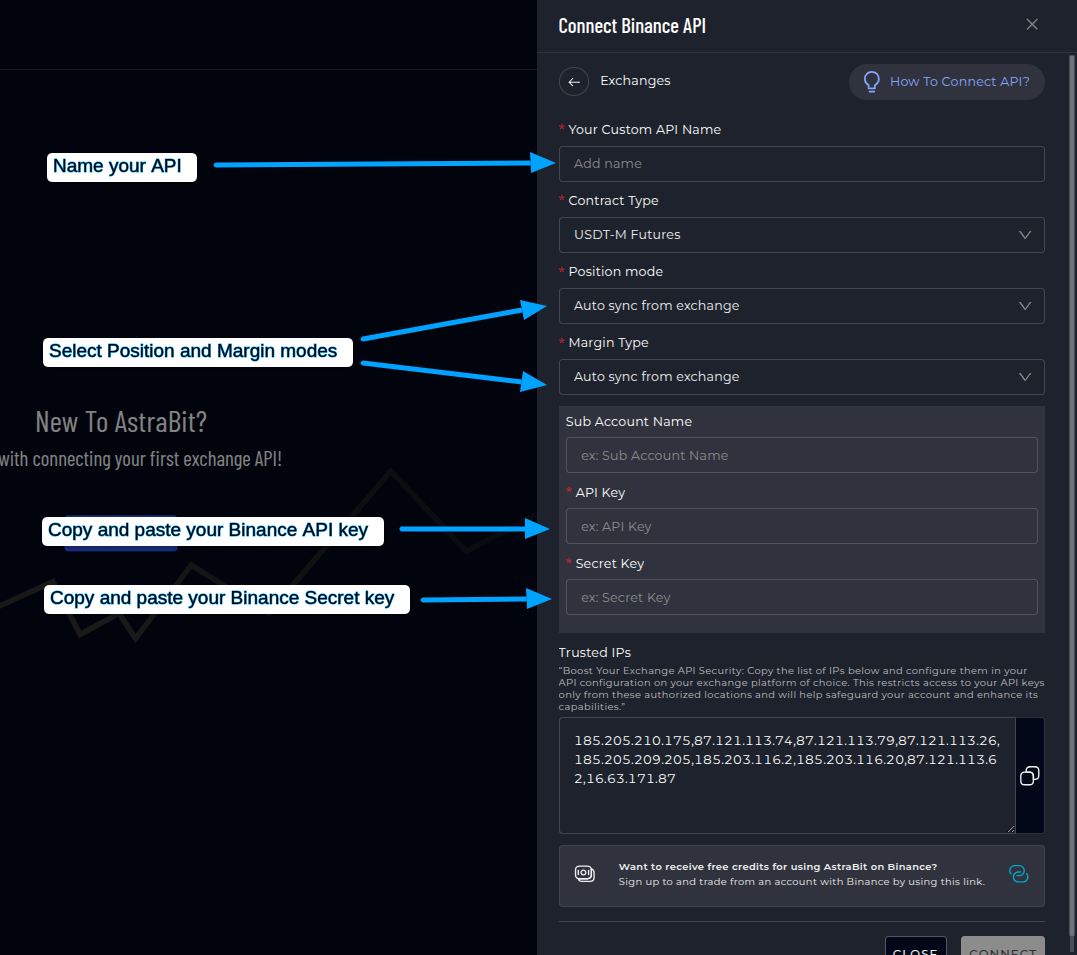
- Log in to your AstraBit account.
- Open the Binance connection screen.
- Enter a custom API name.
- Select USDT-M Futures as the contract type.
- Leave Position Mode and Margin Type on Auto sync from exchange.
- Paste your Binance API Key and Secret Key.
- Copy the AstraBit trusted IPs into Binance if needed.
- Click Connect.
Make sure the Binance permissions match the account type you want to trade. AstraBit does not require withdrawal permissions.
Final Check
API Configuration Checklist
Before you create a bot, make sure your Binance API has:
Need a Hand?
If you experience any problems, contact support by email or submit a ticket through Discord.
Security Reminder
Your Keys, Your Funds
API permissions strictly limit what AstraBit can do with your Binance account.
Cannot Withdraw
AstraBit cannot withdraw funds from your account. Ever.
Cannot Transfer
AstraBit cannot transfer funds between accounts or wallets.
Trades Only
AstraBit only executes trades via the API permissions you grant.
Connected? Put it to work.
Your Binance API is live in the Nexus dashboard. The next step is creating a trading bot and linking it to a strategy.
