Account Verification · Help Center
Complete Personal Identity Verification on AstraBit
Identity verification (KYC) confirms who you are so you can unlock your AstraBit account’s full feature set. The process is guided and powered by Sumsub — you’ll provide some personal details, upload a photo ID and proof of address, and complete a quick facial check. Eight steps, start to finish.
Have a valid government-issued ID and a recent proof of address ready before you begin — it keeps the process to a few uninterrupted minutes. Accepted documents and exact requirements can vary by region. This is a setup guide only, not legal or financial advice.
Before You Begin
What to Know First
A few things worth understanding about verification on AstraBit before you start the flow.
Why You Verify
AstraBit is regulated in the United States and is KYC and AML compliant. Verification is standard and unlocks your account’s capabilities. Completing it gives you access to higher verification tiers and the features tied to them.
What You’ll Need
A valid government-issued photo ID (driver’s license, passport, residence permit, or ID card), a recent proof of address, and a device with a camera for the liveness check.
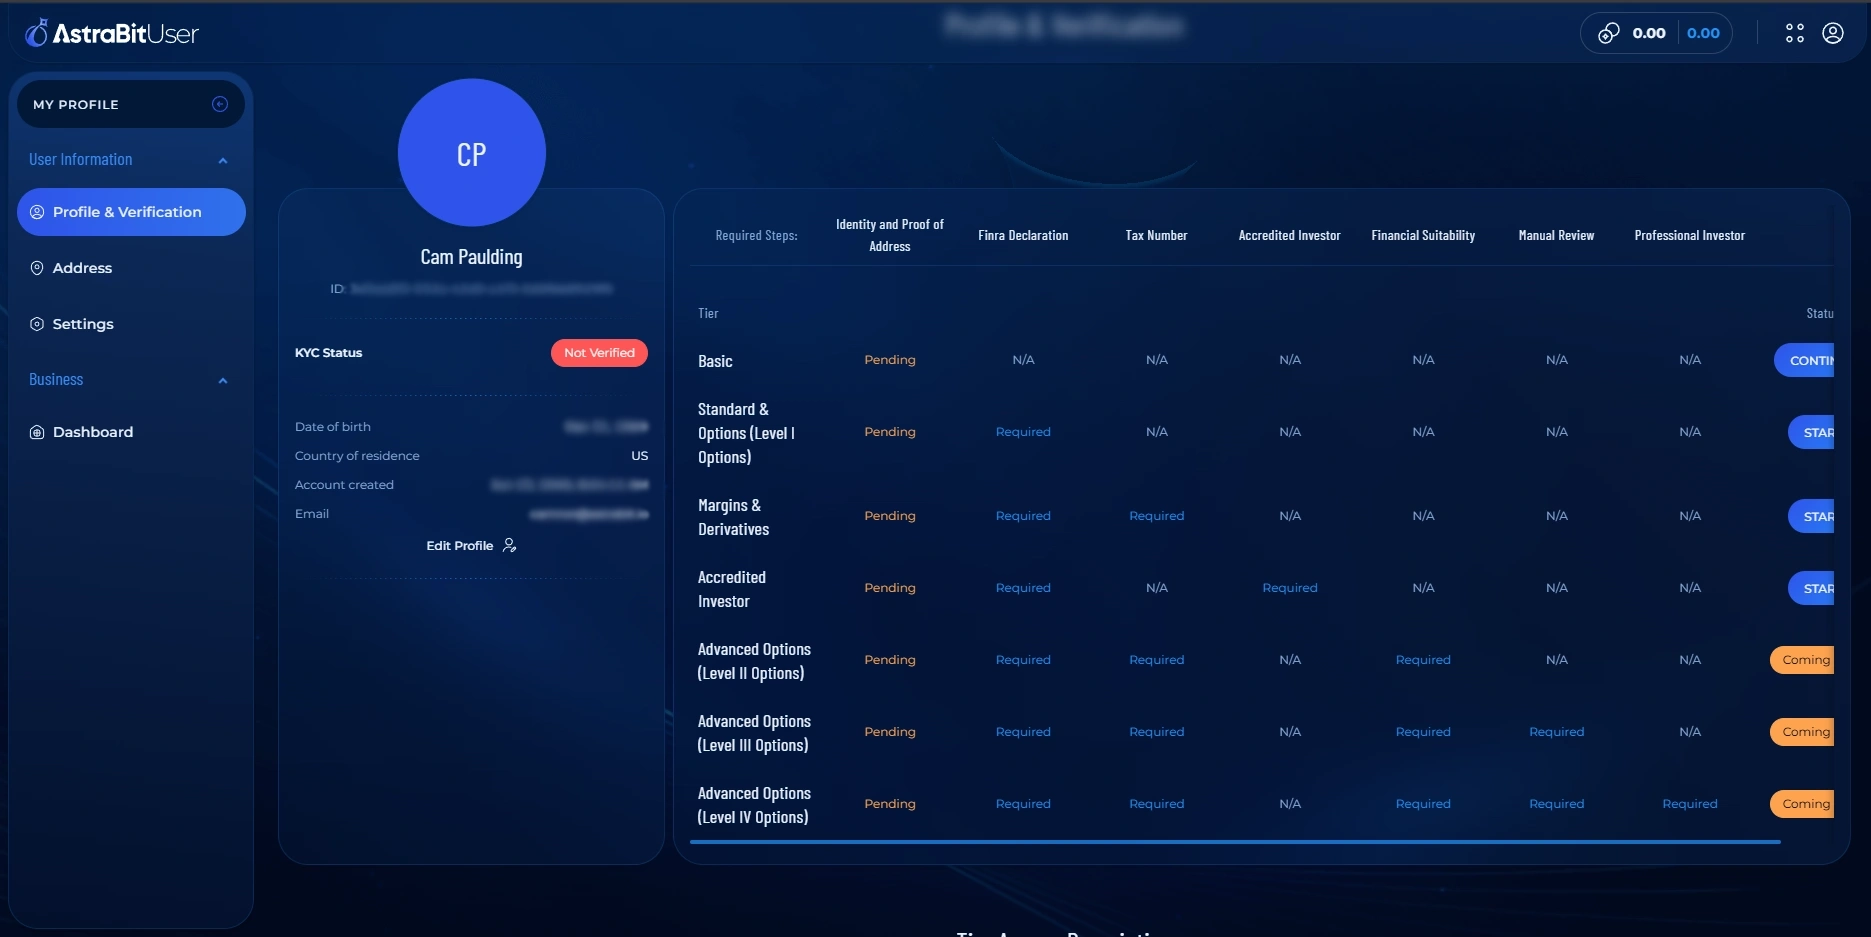
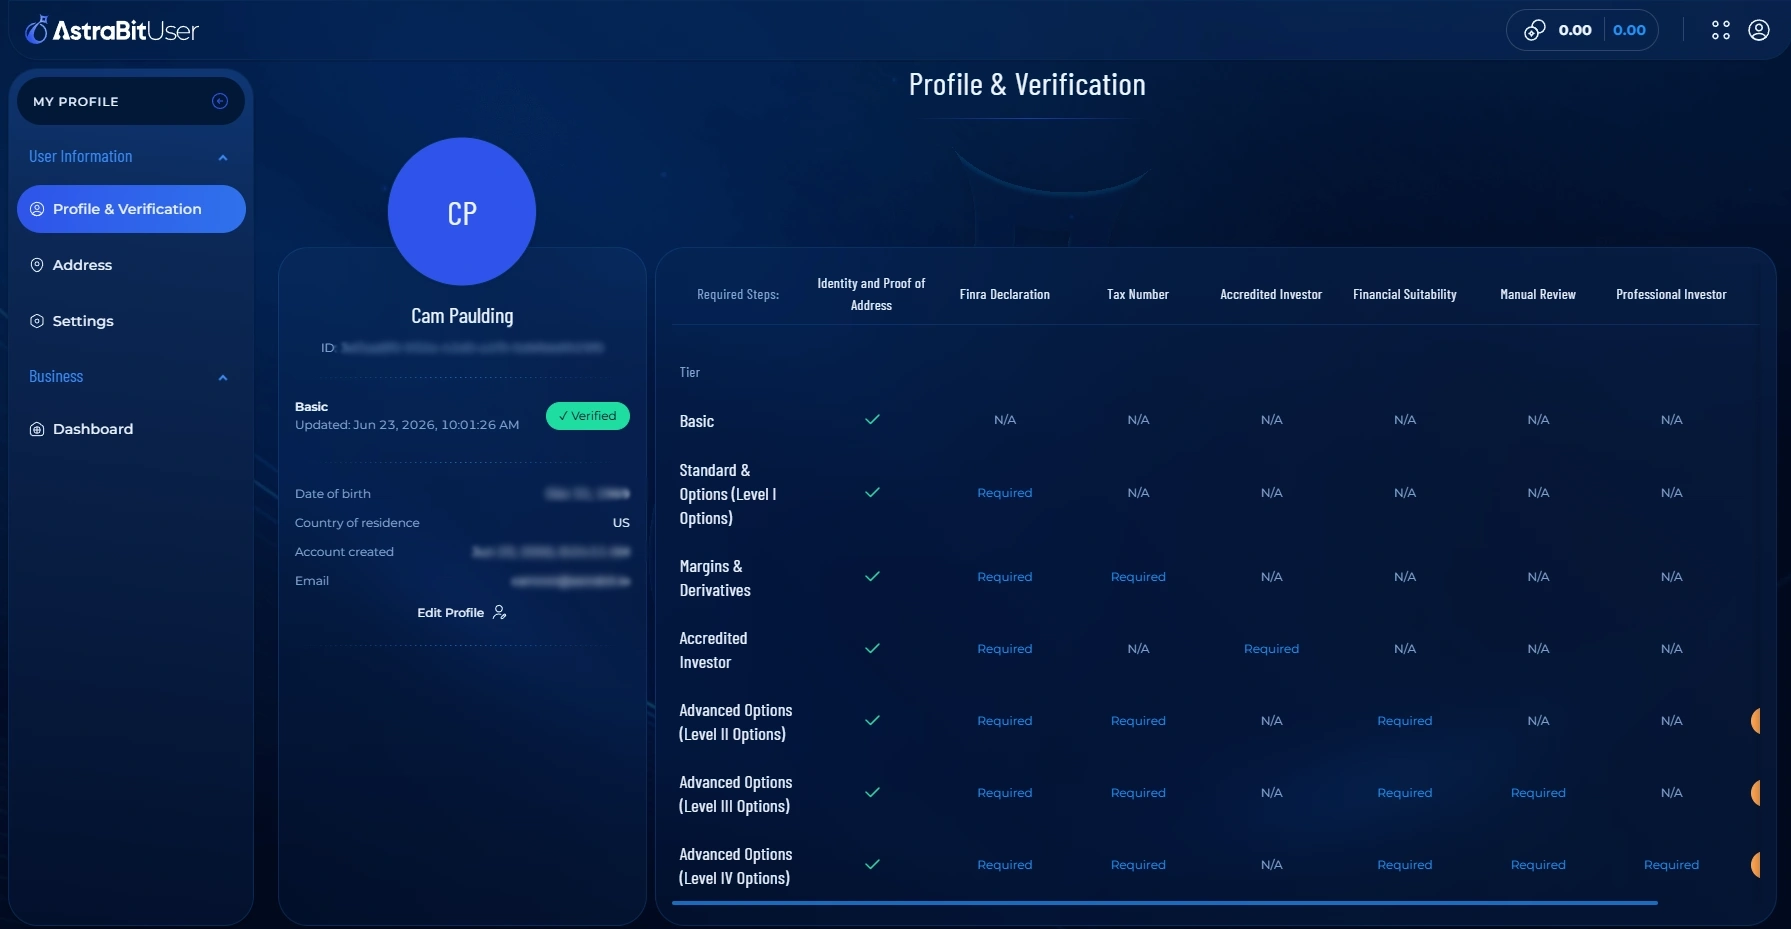
Verification Tiers
AstraBit offers multiple levels, including Basic, Options, Derivatives, and Accredited Investor. Each tier has its own requirements and unlocks a different level of account access.
Powered by Sumsub
Verification runs through Sumsub, a dedicated identity-verification provider. You’ll be guided through each step inside the Sumsub flow before being returned to AstraBit.
Step-by-Step
Eight Steps,
Start to Finish
Start from your AstraBit profile, complete the guided Sumsub flow, and return verified. Have your documents within reach so you can finish in one sitting.
Have These Ready
- A valid, unexpired photo ID
- A recent proof of address
- A device with a working camera
- Good lighting and a few uninterrupted minutes
Make sure the name and address on your documents match the details on your AstraBit profile.
Open Profile & Verification
- Log in to AstraBit and open your Profile & Verification page.
- Review the available verification tiers — Basic, Options, Derivatives, and Accredited Investor.
- Choose the tier you want and start the verification for it.
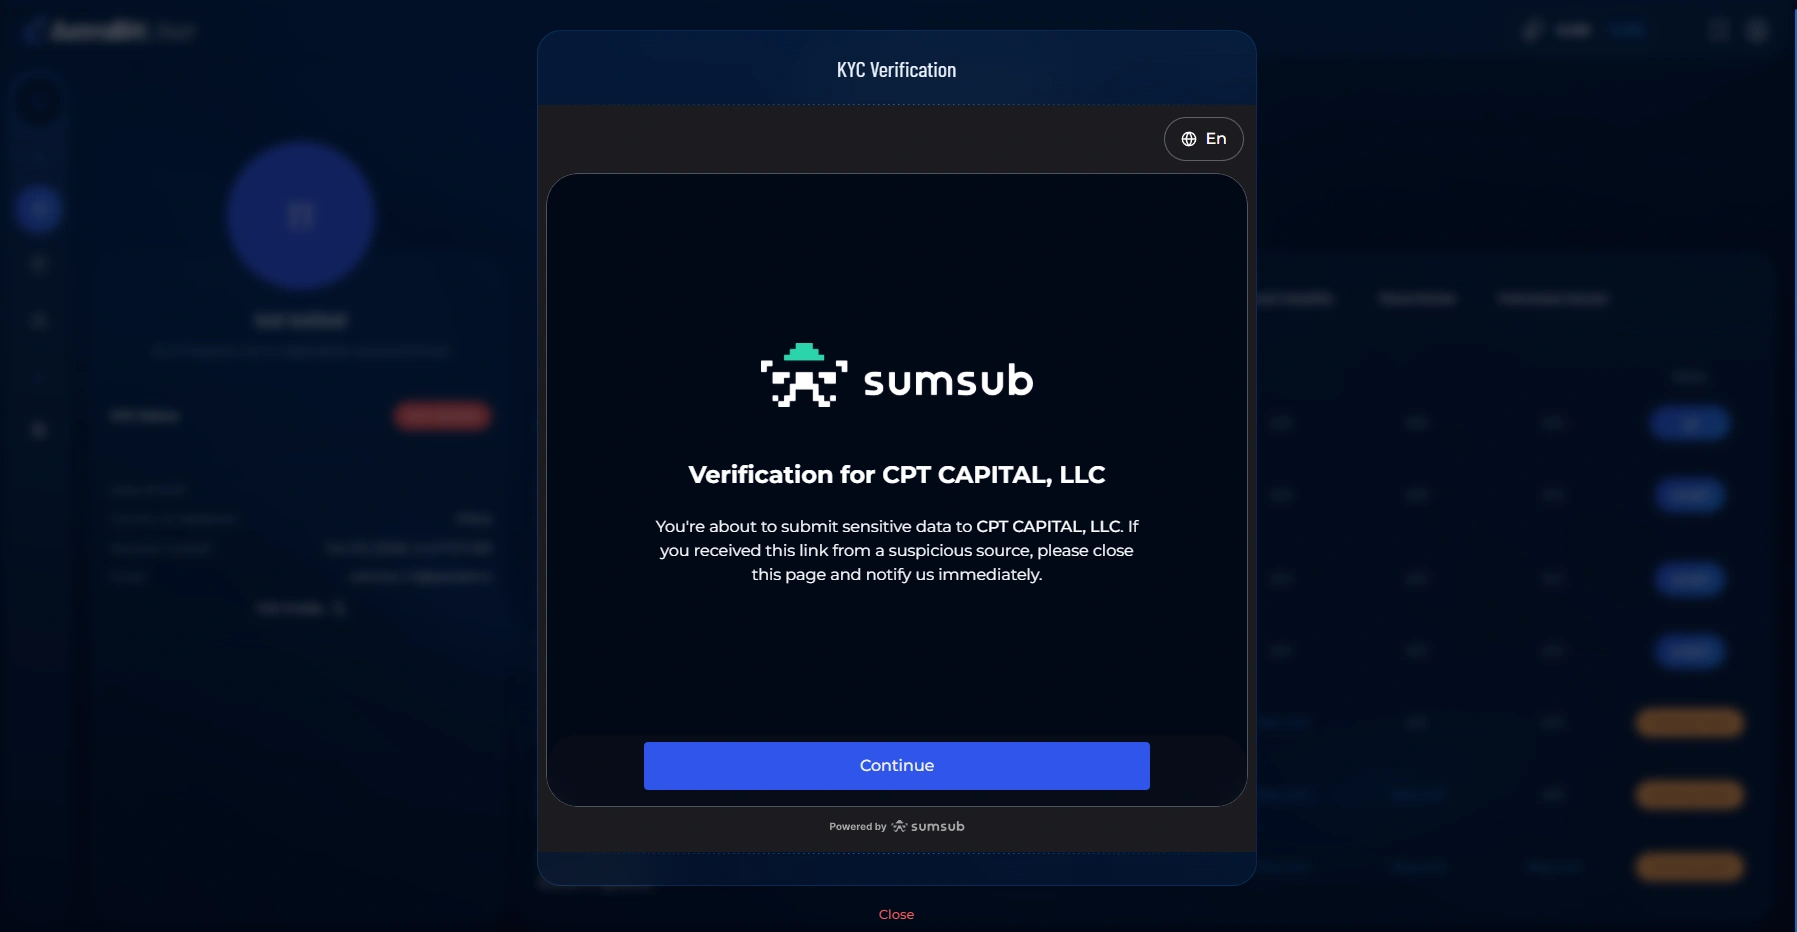
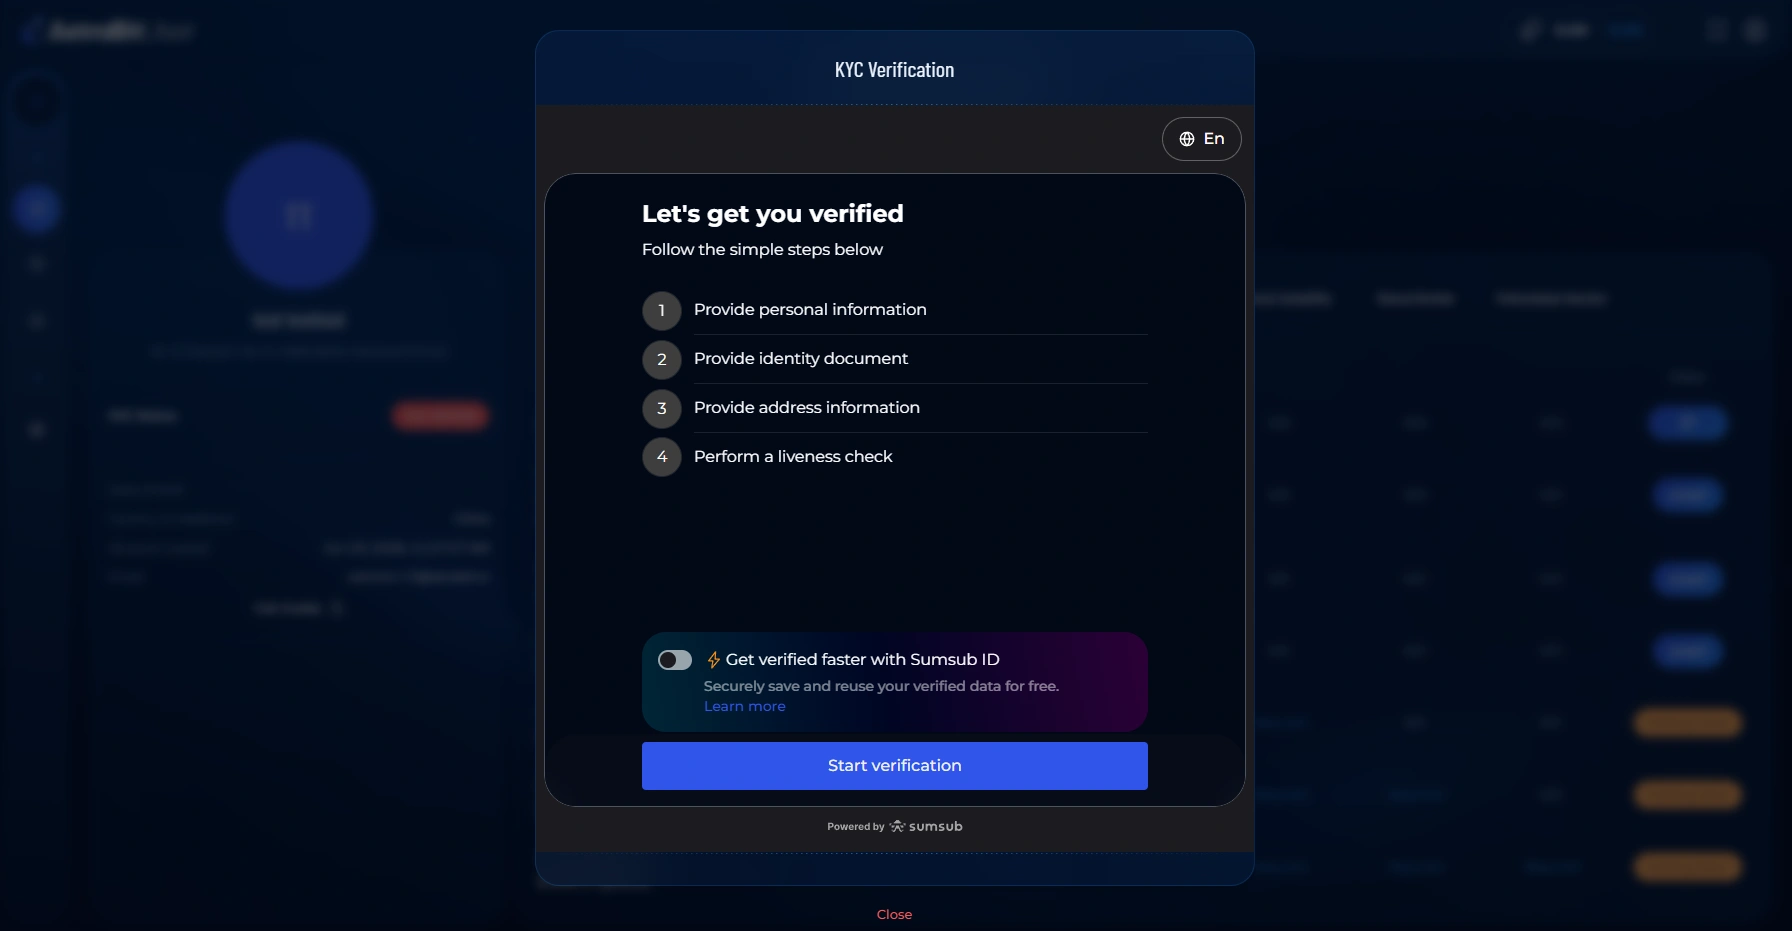
Start the Verification Flow
- The Sumsub verification flow opens with a welcome screen.
- Read the introduction and follow the on-screen instructions to begin.
- Review the checklist of what’s ahead — personal information, identity document, proof of address, and a liveness check.
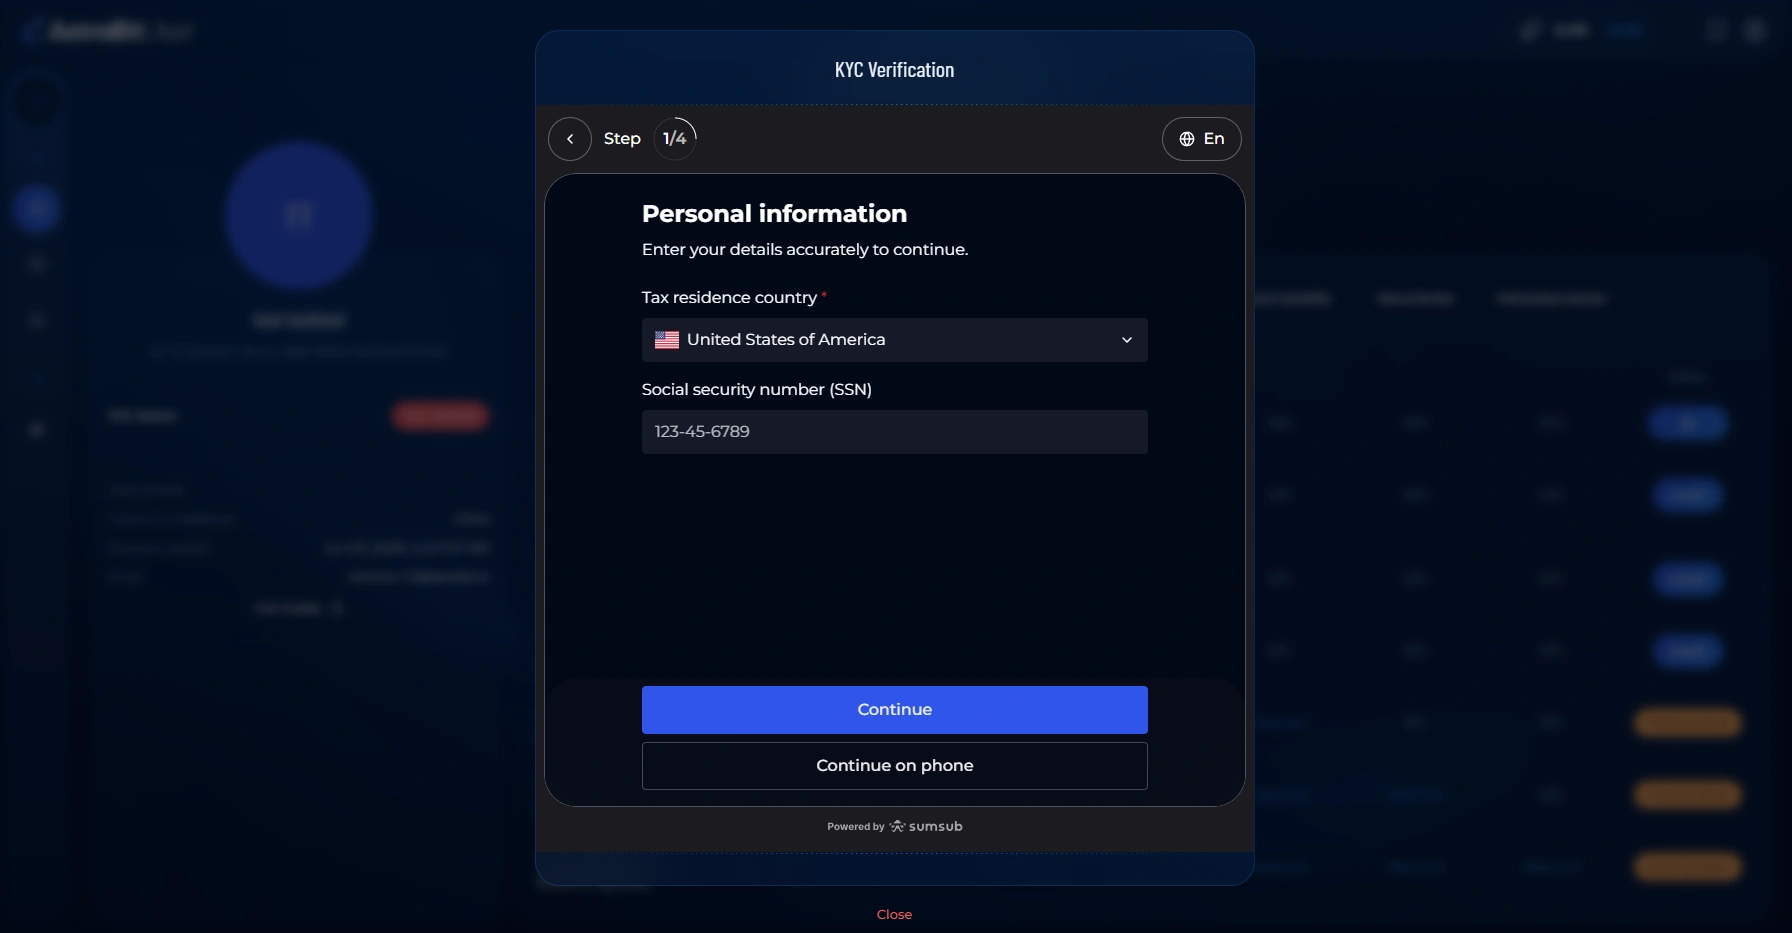
Enter Your Personal Information
- Provide your tax residency information.
- Enter your identification details, such as your social security or national ID number where required.
- Double-check everything for accuracy, then continue.
Enter details exactly as they appear on your official documents to avoid delays.
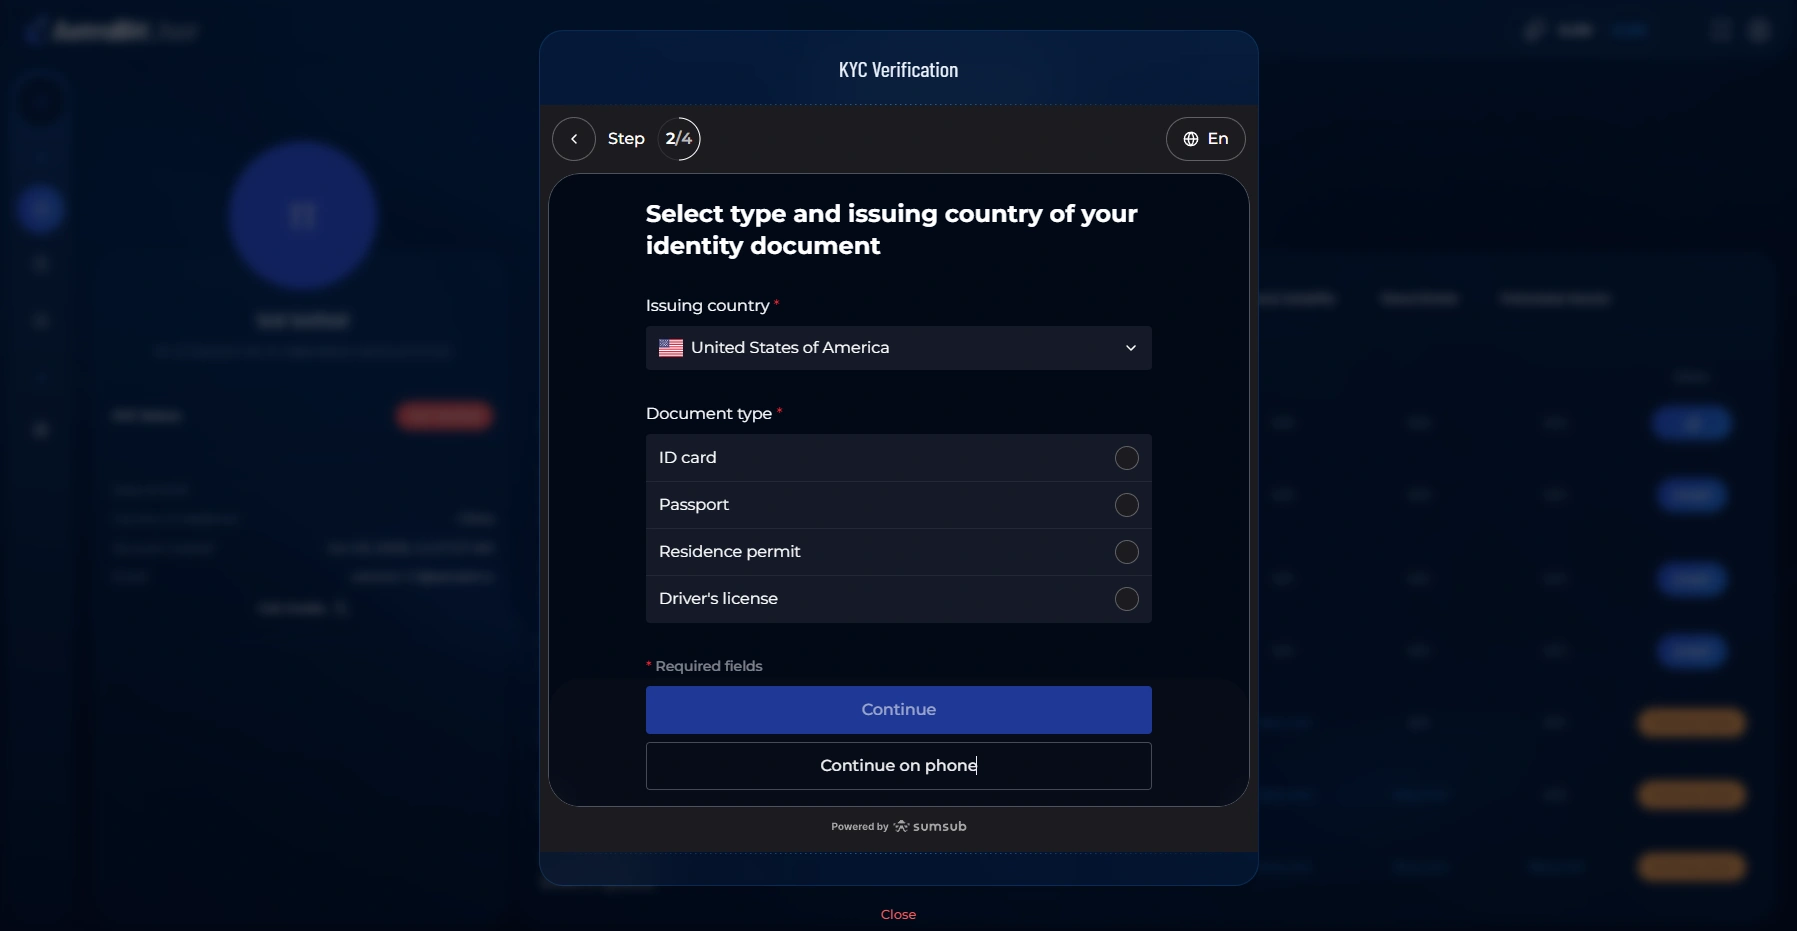
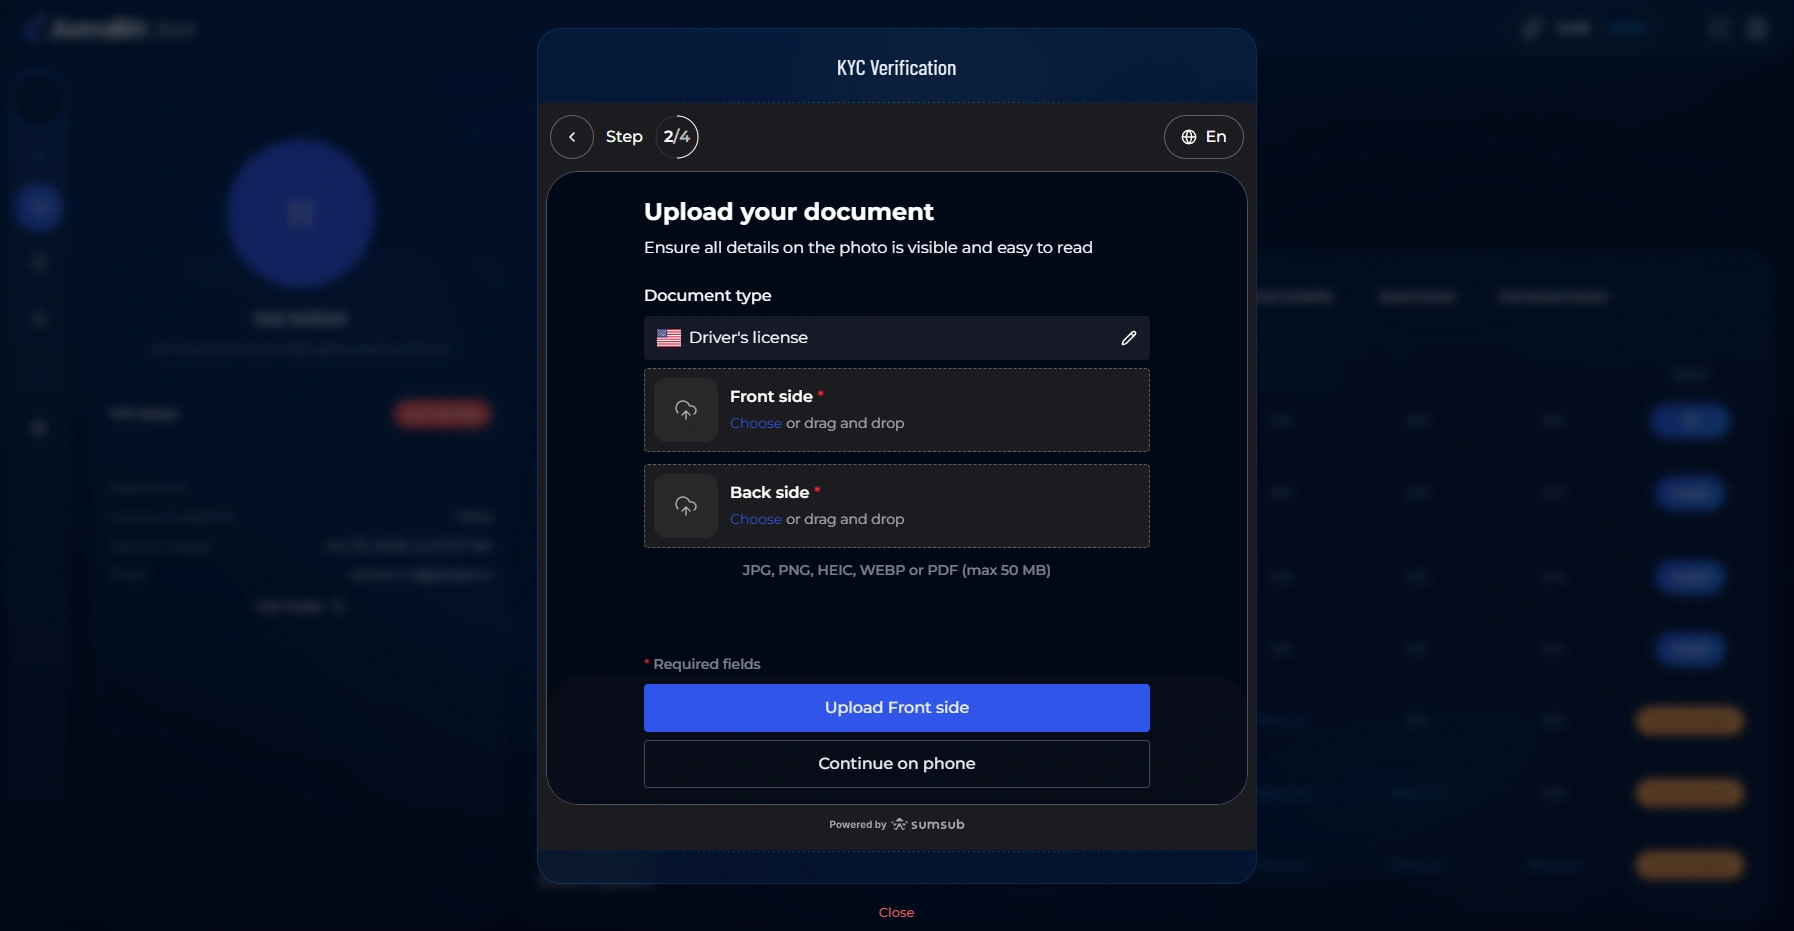
Select & Upload Your Identity Document
- Choose your document type — driver’s license, passport, residence permit, or ID card.
- Upload clear images of your document. For a driver’s license, you’ll provide both the front and back.
- Make sure all corners are visible and the text is legible, then continue.
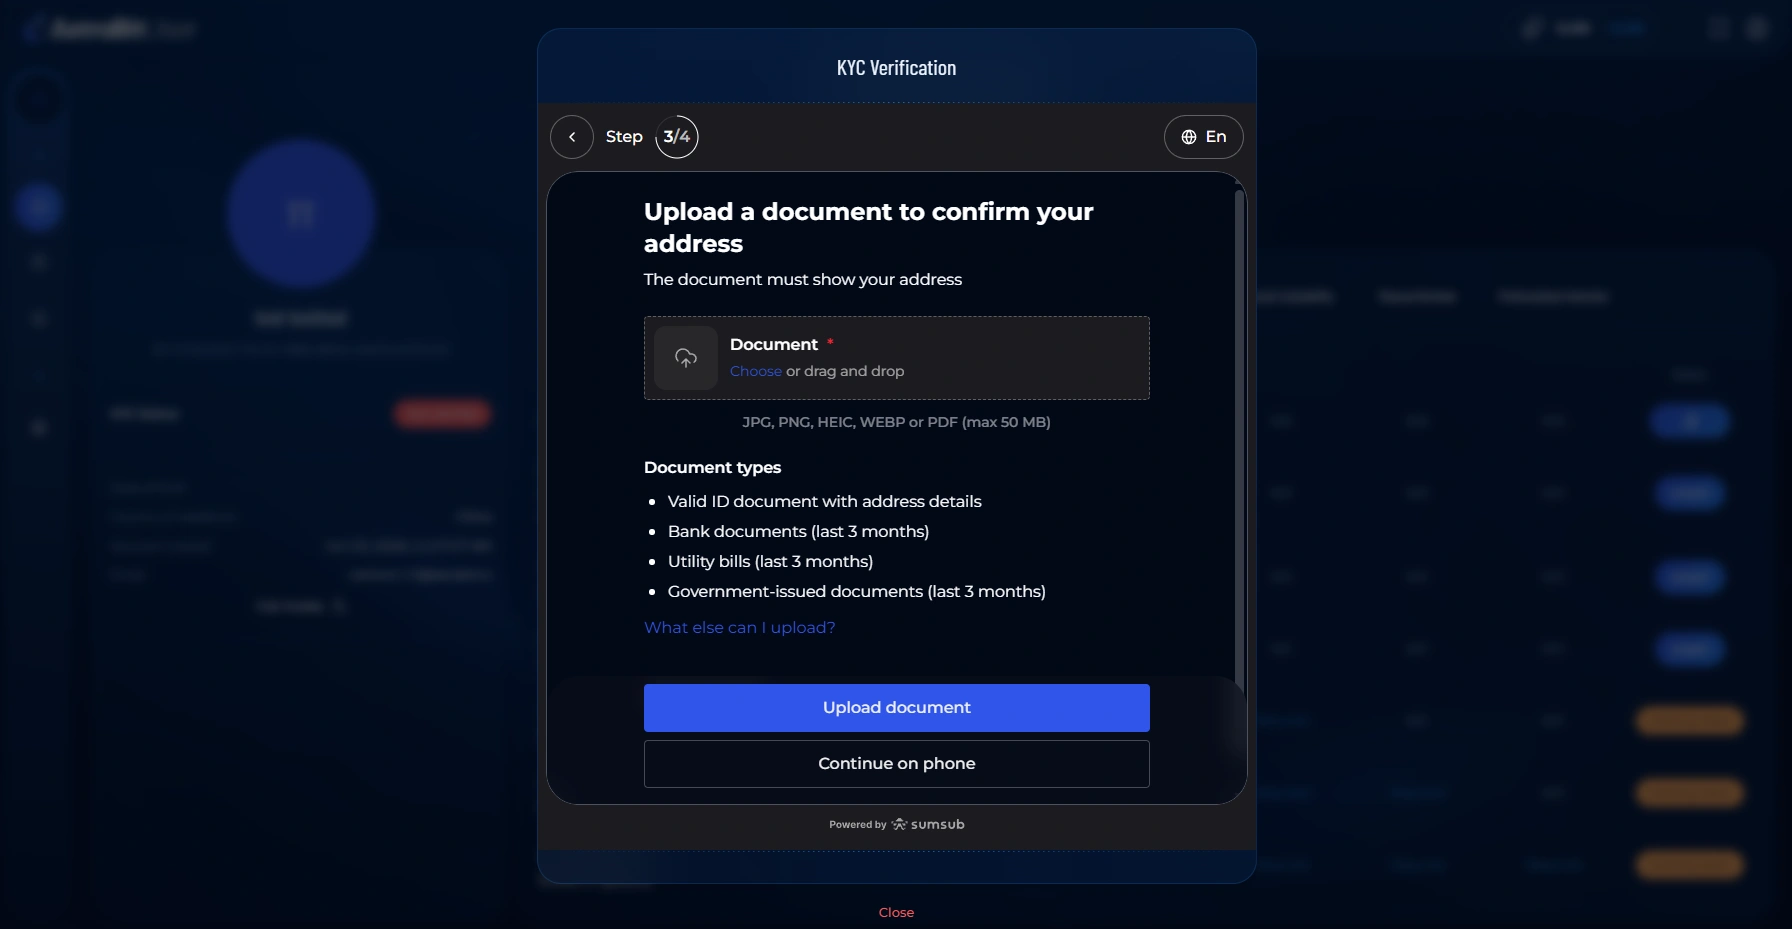
Upload Proof of Address
- Upload a document that confirms your residential address.
- Accepted documents typically include a utility bill, bank statement, or government-issued document.
- Confirm the address and date are clearly visible, then continue.
Use a recent document — older statements may be rejected. The name should match your AstraBit profile.
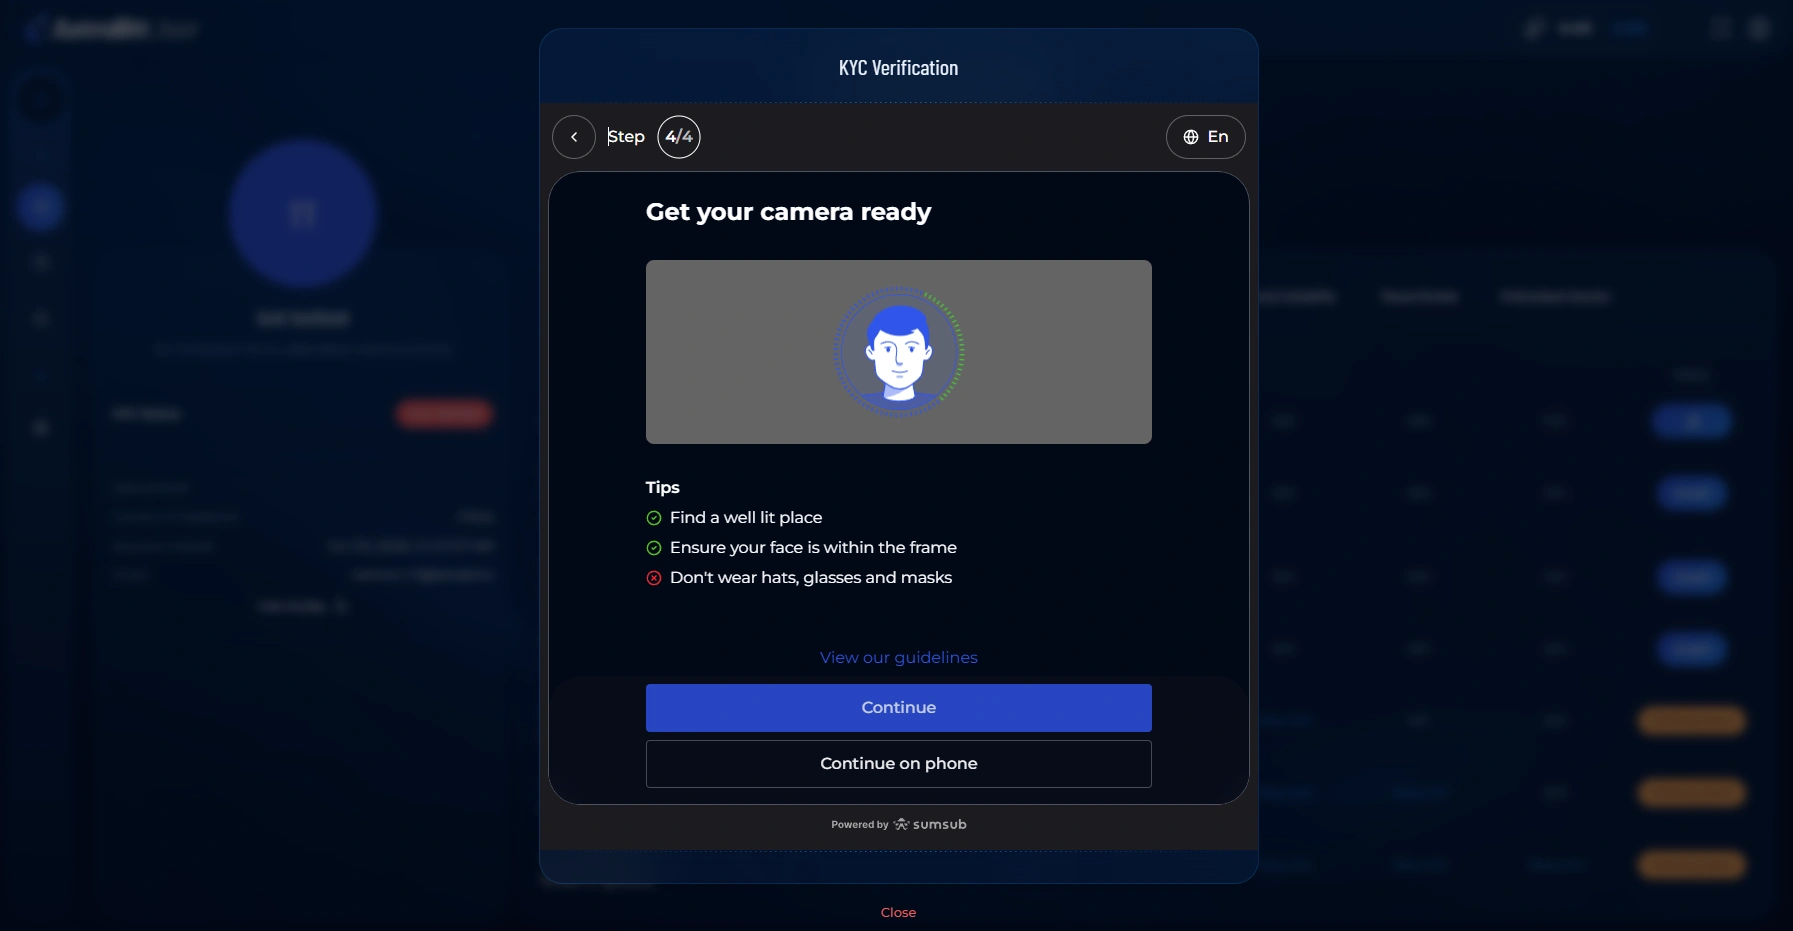
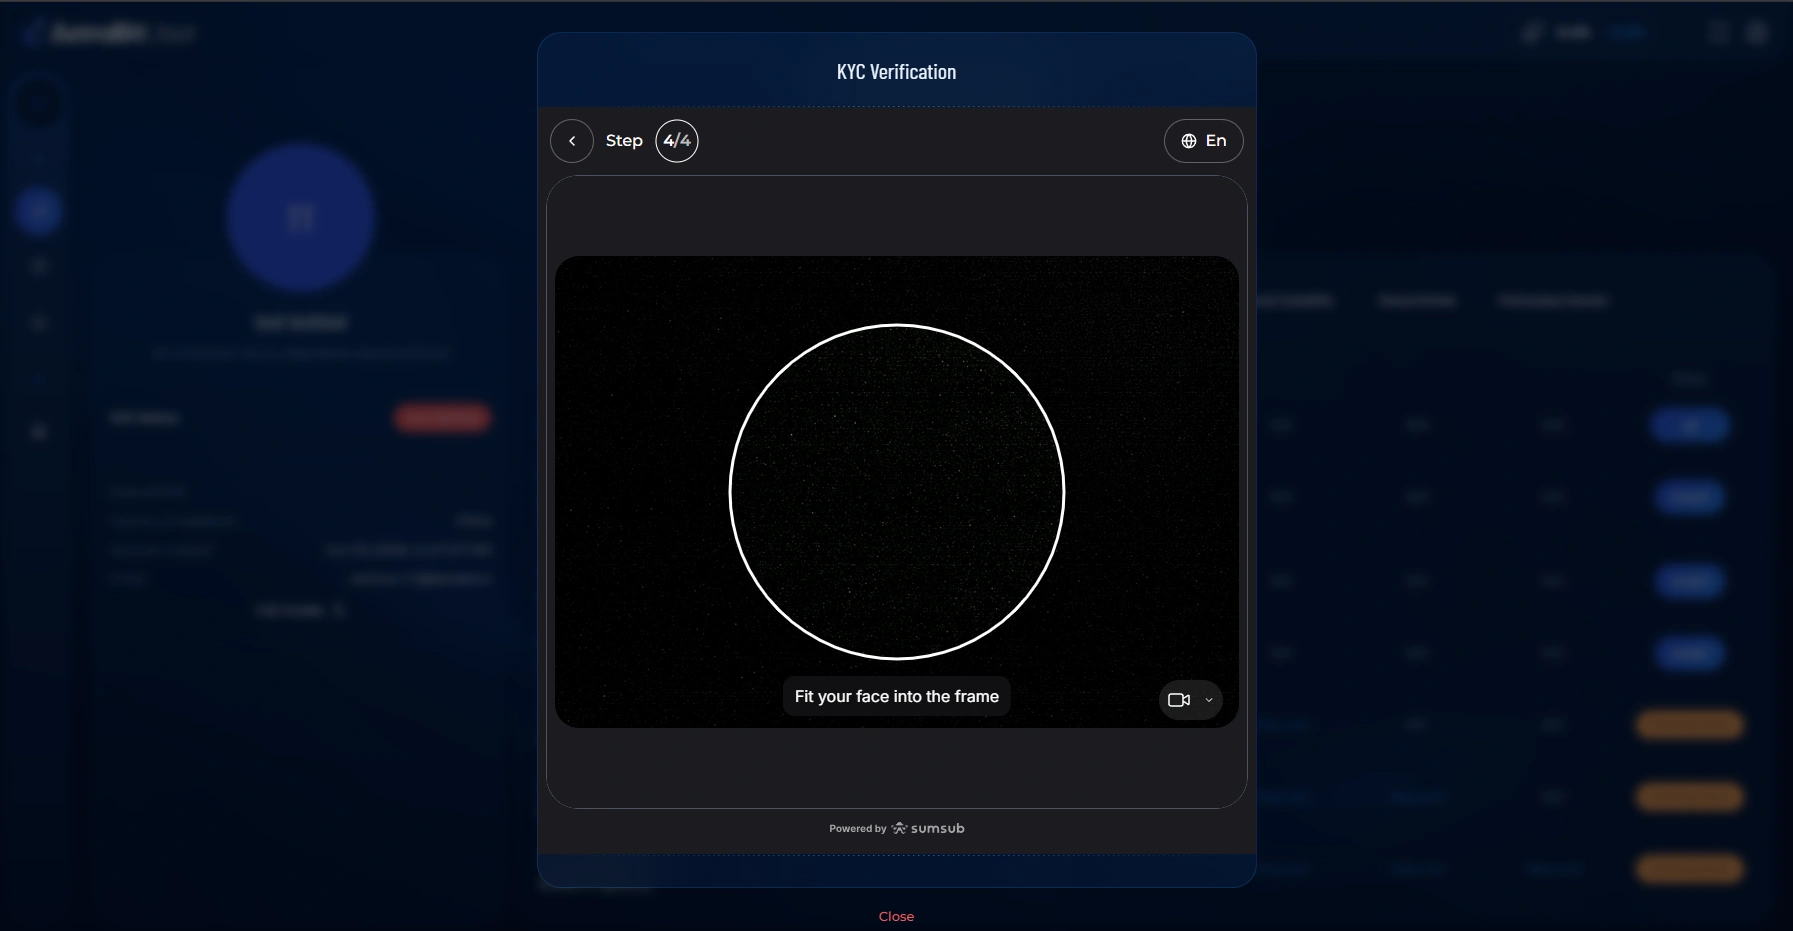
Complete the Liveness Check
- Review the on-screen tips for lighting and camera positioning.
- Allow camera access when prompted.
- Position your face within the frame and follow the prompts to complete the facial check.
For best results, use even lighting and remove hats or sunglasses.
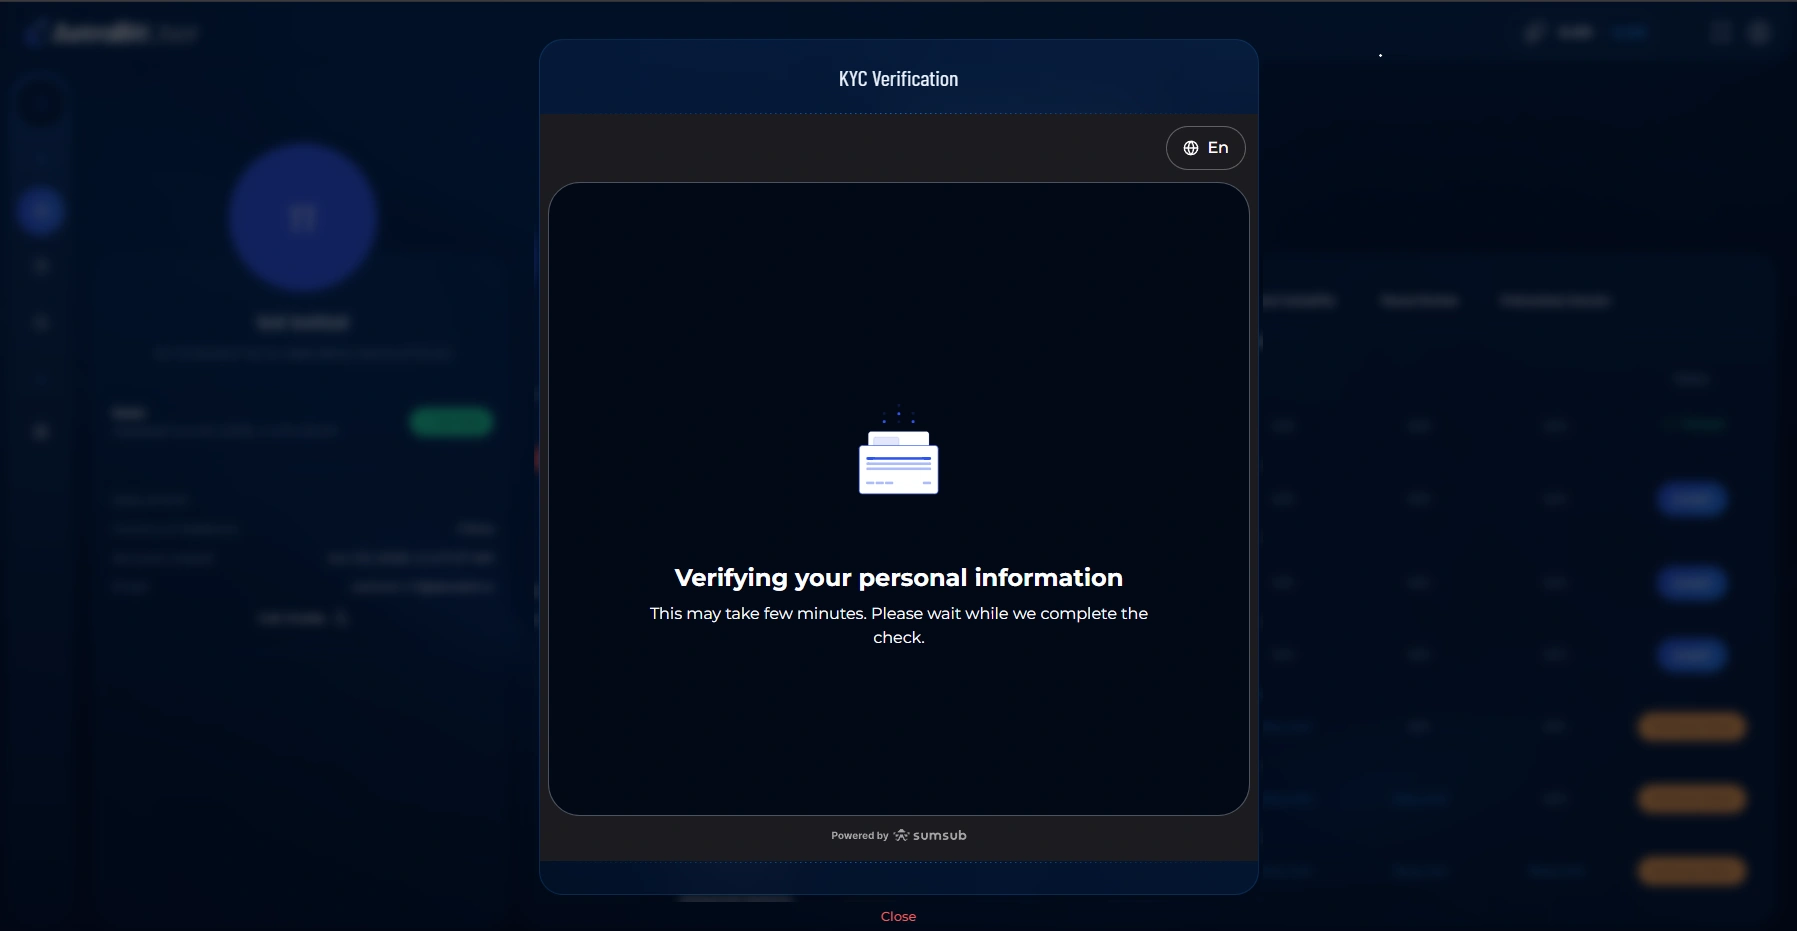
Submit & Wait for Review
- Once everything is submitted, your information enters review.
- A processing screen confirms your details are being checked.
- You’ll see a confirmation that your verification has been submitted successfully.
Review times can vary. You can close the window — you don’t need to keep it open while review is in progress.
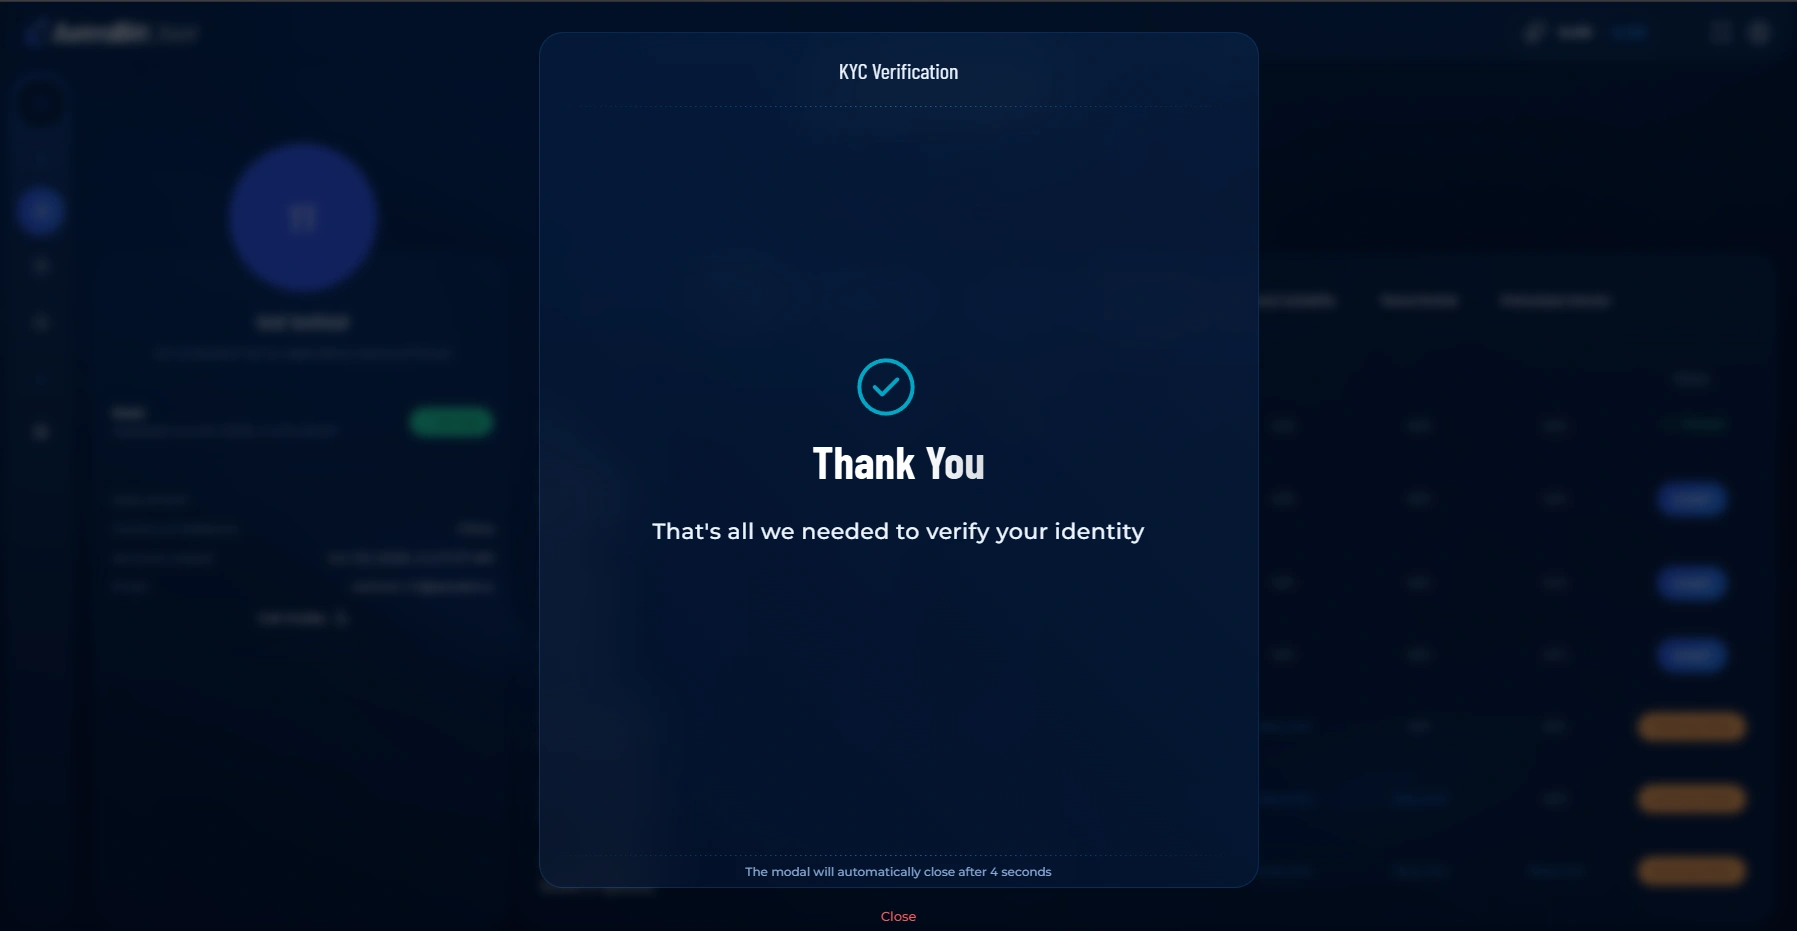
You’re Verified
- Once approved, your Profile & Verification page updates to show your verified status.
- The features tied to your verified tier are now unlocked.
Troubleshooting
Verification Stuck or Rejected?
If your verification doesn’t go through, run quickly through this checklist before resubmitting:
Still Stuck?
Contact AstraBit Support or open a ticket through Discord. Let them know which tier you’re verifying for and at which step the issue appeared.
Your Data, Handled Carefully
How Your Information Is Used
Verification details are collected only to confirm your identity and meet compliance requirements.
Encrypted Submission
Your documents and details are submitted over a secure, encrypted connection.
Handled by Sumsub
Verification is processed through Sumsub, a dedicated identity-verification provider.
Used for Verification
Your information is used to verify your identity and satisfy compliance requirements.
Verified? You’re ready to trade.
With your identity confirmed, the next step is connecting an exchange and setting up your first automated strategy.