Exchange Connections · Help Center
Connect Hyperliquid to AstraBit
Link your Hyperliquid account to AstraBit with an API key so the two platforms can communicate securely — wallet connection, account configuration, API creation, and where it all goes in AstraBit. Six steps, start to finish.
New to Hyperliquid? Sign up with referral code ASTRABIT to become Freemium-eligible — earn credits from trading volume that reduce or cover AstraBit costs. Technical setup guide only; not trading advice.
Know Before You Automate
What to Consider First
Automation doesn’t change the fundamentals. Here’s what to understand about Hyperliquid and AstraBit’s integration before you start.
Perpetuals Only — No Spot
AstraBit’s Hyperliquid integration supports perpetual futures. Spot trading on Hyperliquid is not supported, and funds left in your Spot balance won’t be visible to AstraBit.
Leverage Cuts Both Ways
Perpetual futures are leveraged instruments. Trading them — automated or not — involves a significant risk of loss and may not be suitable for all investors. A bot follows rules; it does not guarantee outcomes.
API Keys Expire
Hyperliquid API wallets are valid for up to 180 days. When yours expires, you’ll create a new key on Hyperliquid and update your AstraBit connection — a few minutes of maintenance.
Hyperliquid Is a DEX
Hyperliquid is a decentralized venue: you hold your own keys and interact through a wallet, which works differently from a centralized exchange. New to the distinction? Read our guide to centralized vs. decentralized exchanges.
Step-by-Step Setup
Six Steps,
Start to Finish
No wallet connection to AstraBit is needed. You connect your wallet to Hyperliquid, create an API key there, and add that key in AstraBit.
Required Hyperliquid Configuration
- Account type: Manual (Unified Account Mode disabled)
- Funds location: Perps, not Spot
- Margin: cross or isolated — learn the difference
Accounts configured differently may show a 0 balance in AstraBit or prevent trades from executing.
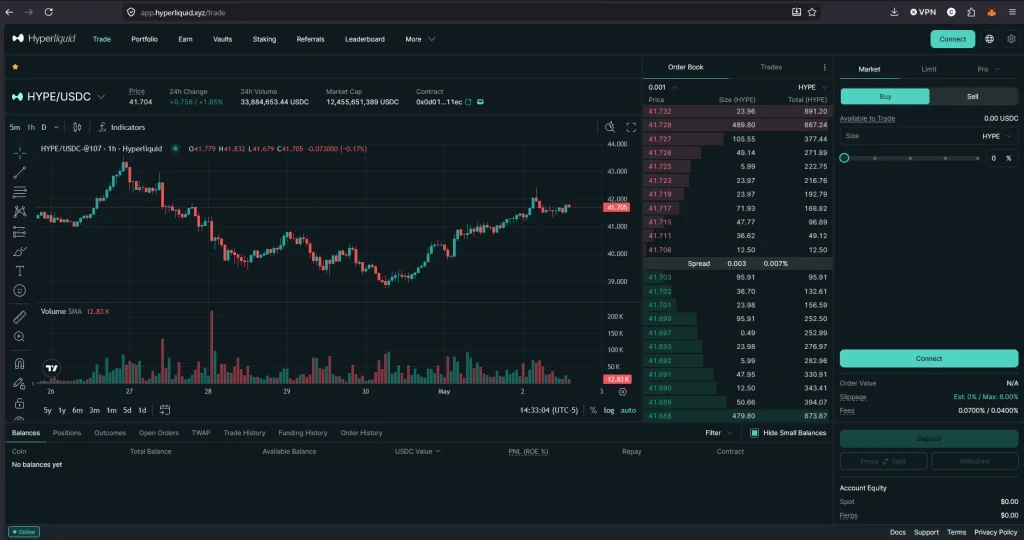
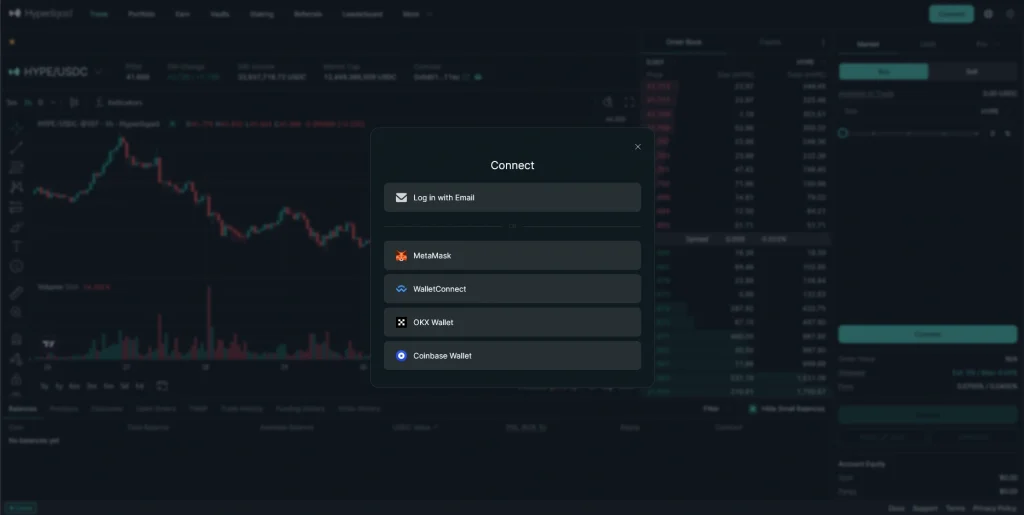
Connect Your Wallet to Hyperliquid
- On Hyperliquid, click Connect wallet (top-right).
- Your wallet (e.g., MetaMask) pops up for app.hyperliquid.xyz.
- Select the account you want to use and click Connect.
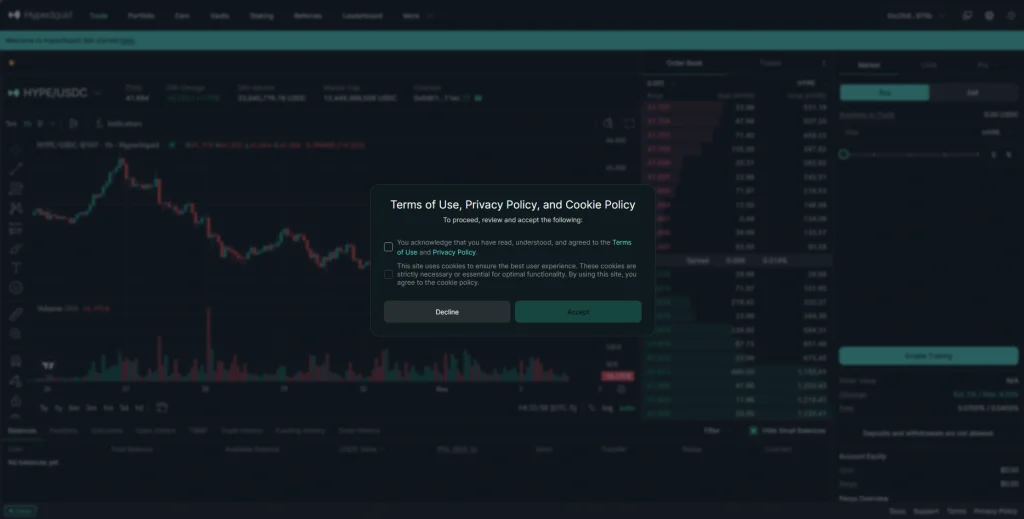
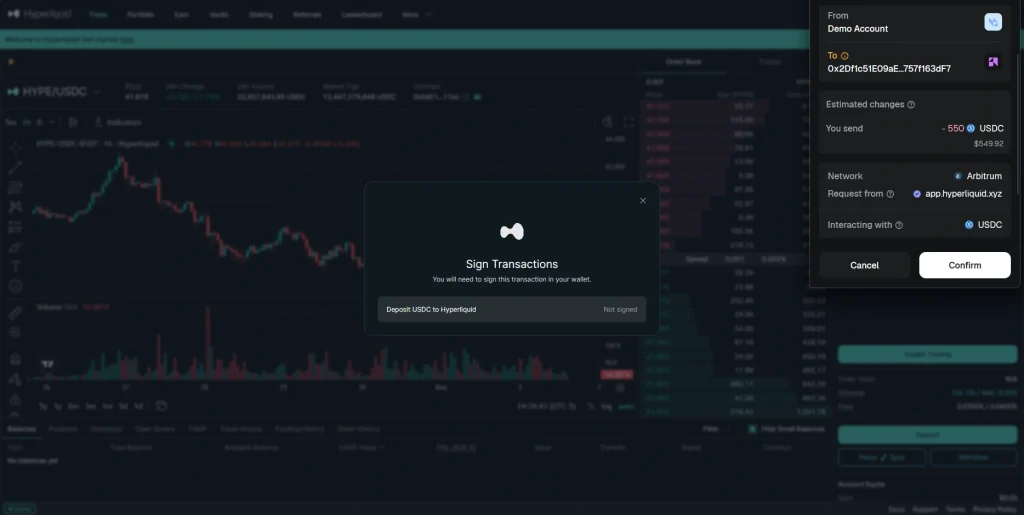
Fund Your Account with USDC
- Accept Hyperliquid’s Terms of Use, Privacy Policy, and Cookie Policy.
- (Optional) In the referral/code field, enter ASTRABIT.
- There may be a signature request — no gas fee required for it.
- Deposit USDC. This guide uses the Arbitrum network.
- A small gas fee (typically under $0.01, paid in ETH on Arbitrum) applies.
- Once confirmed, your deposit appears shortly — timing can vary with network congestion and platform activity.

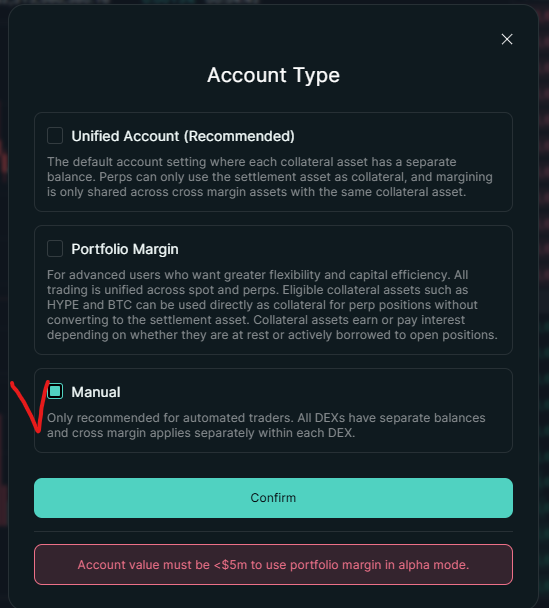
Set Account Type to Manual
- Navigate to your Hyperliquid Portfolio settings.
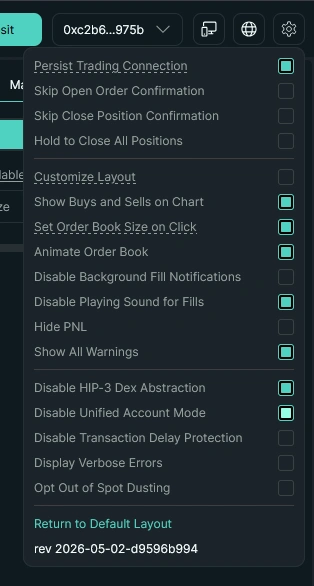
- Click the wheel icon to open additional settings.
- Locate the Account Type setting and select Manual.
- Toggle Disable Unified Account Mode — this allows you to transfer your USDC.
- Save any changes.
Accounts set to Unified Account or Portfolio Margin may not display balances correctly in AstraBit.
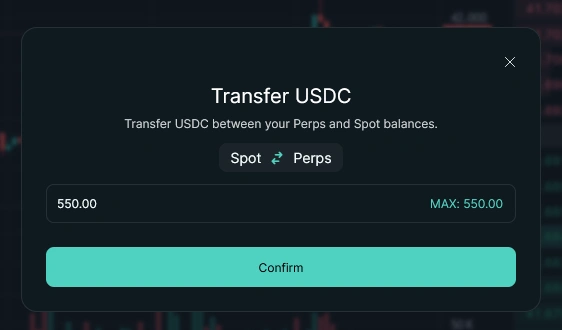
Move USDC from Spot to Perps
- Under the Deposit button on the right side, click the Spot / Perps button.
- Enter the amount of USDC you want to transfer.
- Click Confirm.
Funds must sit in Perps. Funds remaining in Spot may not be visible in AstraBit and may prevent trade execution.
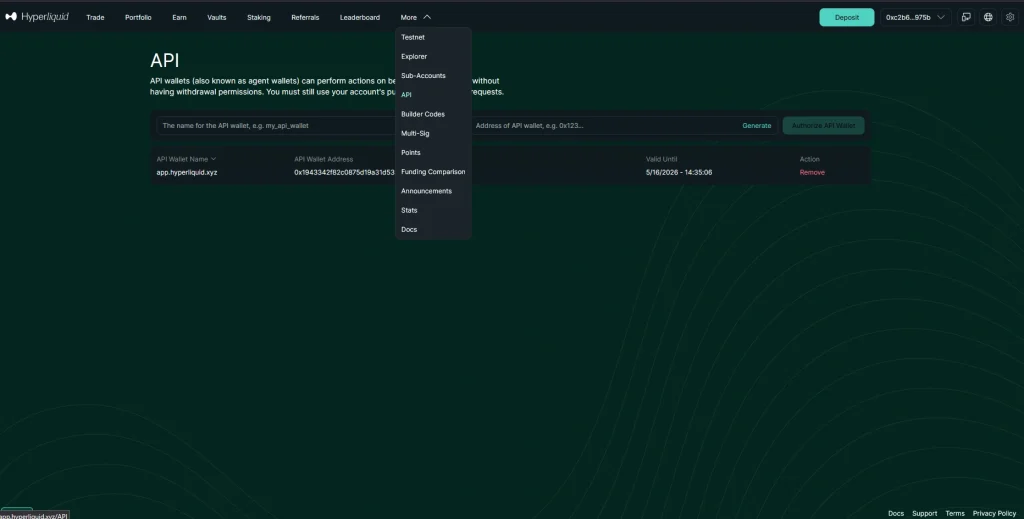
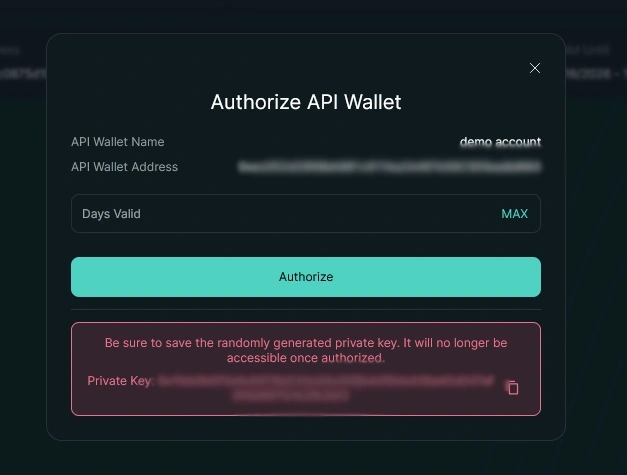
Create an API Key on Hyperliquid
- Under More at the top, select API.
- Click Generate on the right side to create an API wallet address, then click Authorize Wallet.
- You won’t need this address later, but it’s required to create the API.
- Name your API anything you like.
- Copy your Private Key to a safe location.
- Set Days Valid to MAX (180 days) or your preferred duration.
- Once the API expires, you’ll create a new one and update your trading bot.
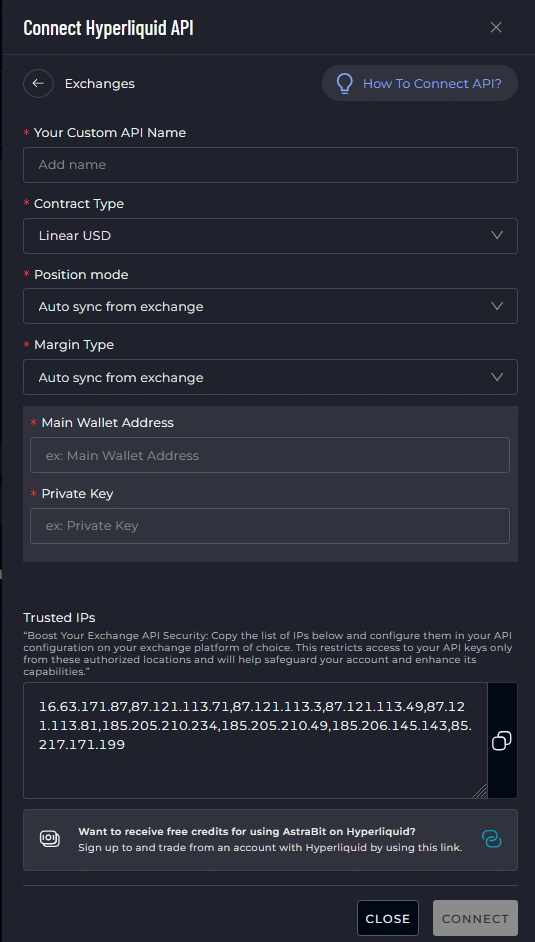
Add the API in AstraBit & Create Your Bot
- In the Nexus API Manager, click Connect New API and select Hyperliquid from the drop-down.
- Name: anything you like
- Contract Type: leave default
- Position Mode: leave default or select Force one way
- Margin Type: leave default, or select Force Cross or Force Isolated Margin
- Main Wallet Address: the wallet address you used to connect to Hyperliquid
- Private Key: paste the private key generated on Hyperliquid
- Trusted IPs: if Hyperliquid allows it, add these during API creation
- Click Connect.
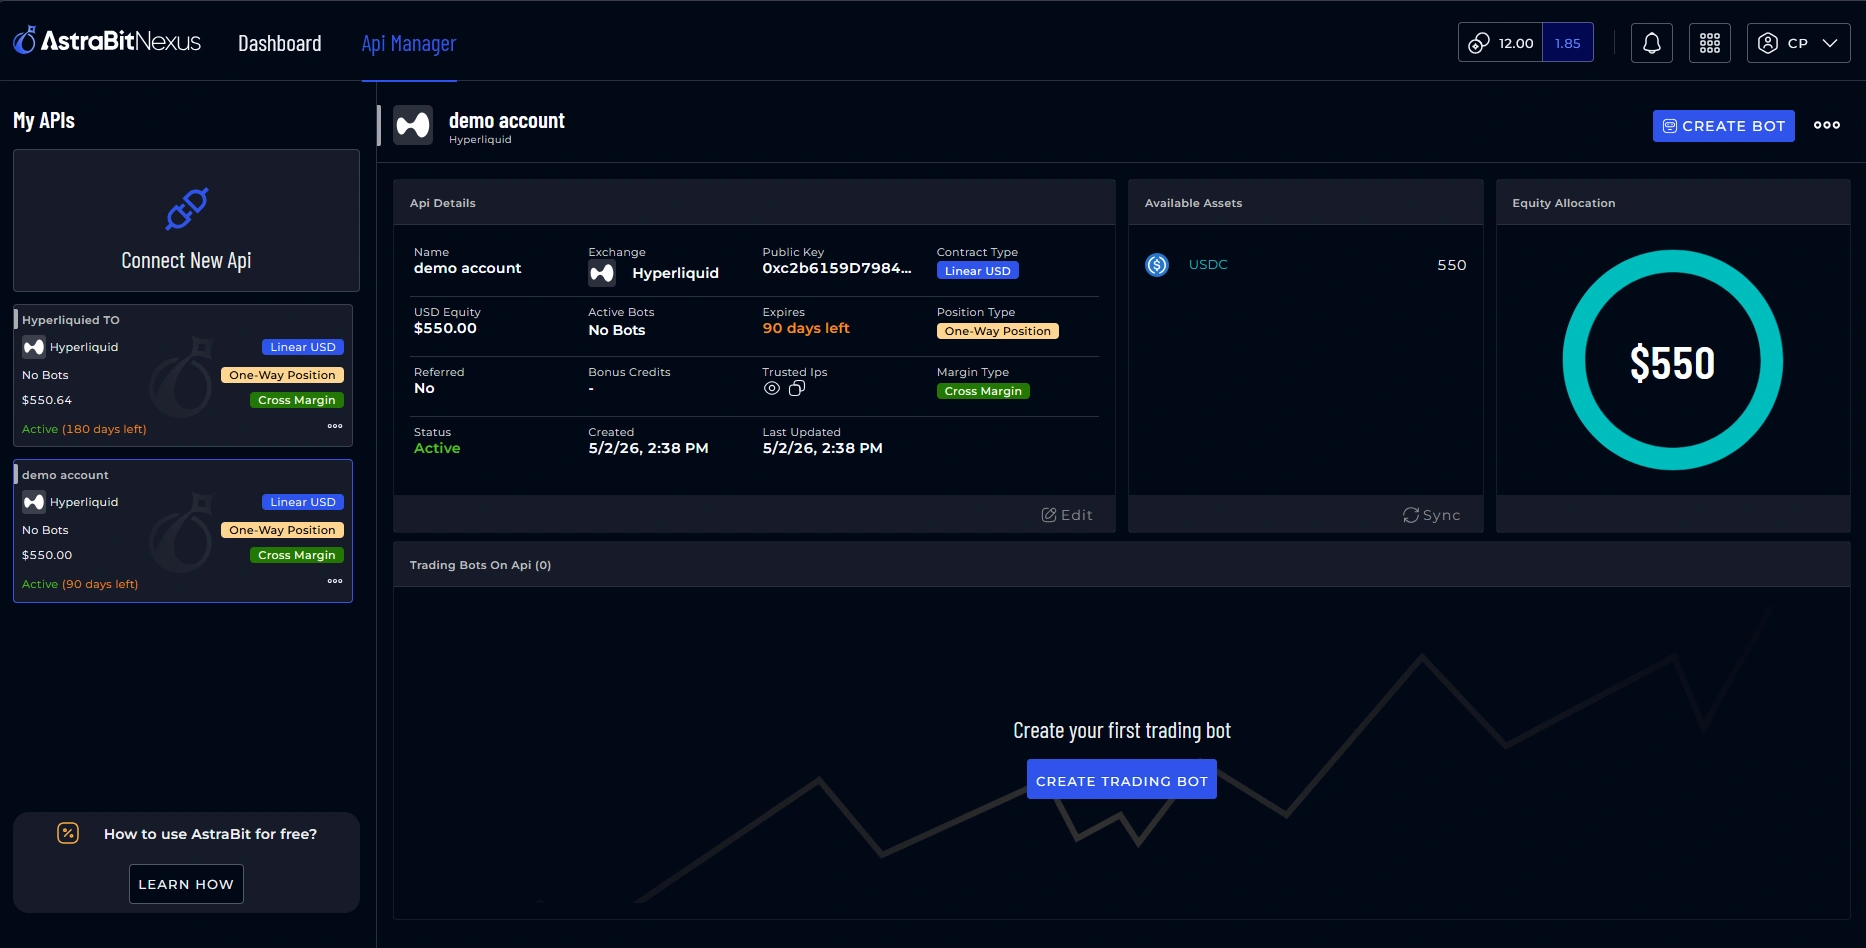
- You’ll see it added to the API Manager dashboard.
- It’s now ready to create a crypto trading bot and link to a strategy.
Troubleshooting
Balance Showing 0?
If AstraBit displays a 0 balance even though funds are visible in Hyperliquid, run through this checklist:
Still Stuck?
Contact AstraBit Support or submit a ticket through Discord, and include screenshots of your Portfolio page, Account Type settings, and balance location (Perps).
Security Reminder
Your Keys, Your Funds
API permissions strictly limit what AstraBit can do with your Hyperliquid account.
Cannot Withdraw
AstraBit can not withdraw funds from your account. Ever.
Cannot Transfer
AstraBit can not transfer funds between accounts or wallets.
Trades Only
AstraBit only executes trades via the API permissions you grant.
Connected? Put it to work.
Your Hyperliquid API is live in the Nexus API Manager. The next step is creating a trading bot and linking it to a strategy.